How to Set Color Mode in Windows 11

Open Settings, go to Personalization Colors, click the Choose your mode dropdown, and select Light, Dark, or Custom. The change applies to your taskbar, Start menu , Settings and compatible apps with no restart needed.
Pick Your Main Color Style
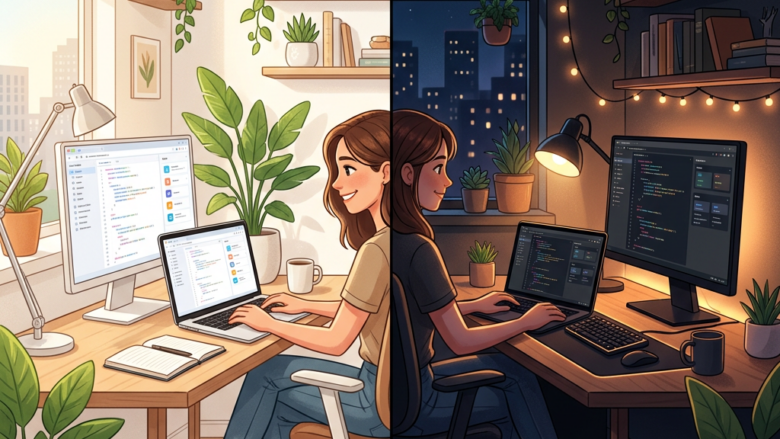
Color mode controls the overall look of Windows 11: the Start menu , taskbar, Settings, File Explorer and any app that follows the system theme. You can choose a light look, a dark look, or a custom mix of both. A dark theme cuts glare in a dim room. A light theme is easier to read in a bright office or in daylight.
Windows 11 has 3 core options: Light, Dark and Custom. All three are in the Personalization settings. The change applies as soon as you pick it, with no restart or sign-out, and it works the same on Windows 11 Home and Pro.
Light Mode: Bright and Clear
Choose your main color style first. Light and Dark are the two main choices, and Custom lets you combine them. The choice affects how your eyes feel, especially under bright lights or late at night. Try each one for a day before you decide. Switching back takes a few seconds.
Light is the default theme on a new Windows 11 install. It gives you a clean, white look that suits daytime use and makes text easy to read in bright rooms. If your PC is already on Dark or Custom, these steps put it back to Light.
Step 1: Open Settings
You can also click Start and select Settings. The Settings window opens with a list of categories down the left side.
Step 2: Go to Personalization
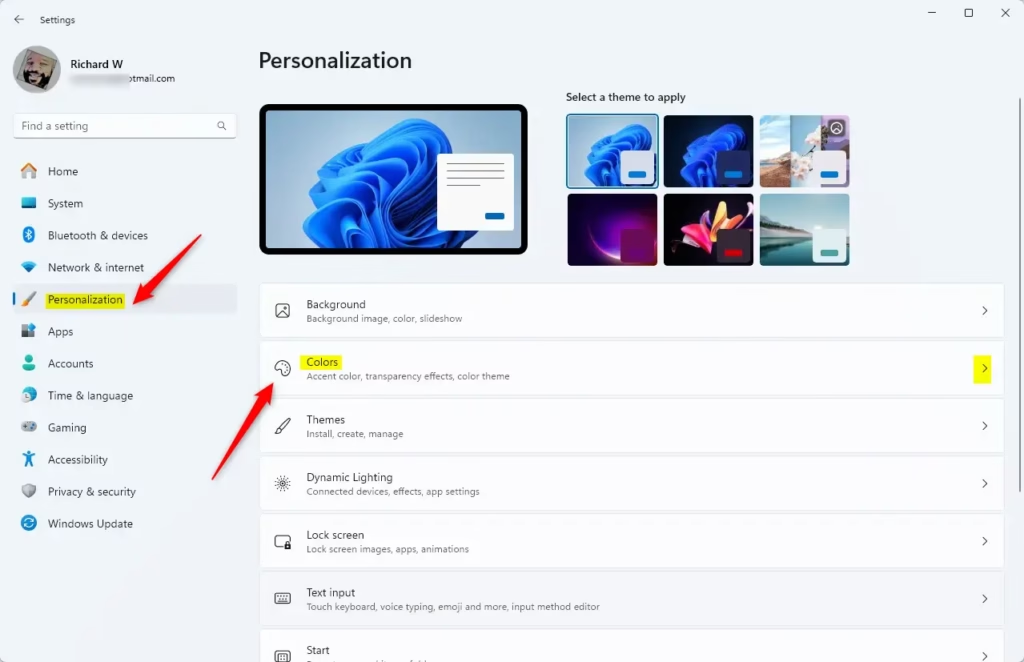
In the list on the left side of the Settings window, click Personalization. The right side now shows options such as Background, Colors and Themes.
Activate it first, because personalization is restricted until then.
Step 3: Choose Colors
On the Personalization screen, click Colors. The page that opens has the mode selector at the top. Further down are the accent color and transparency settings.
Step 4: Pick Your Mode
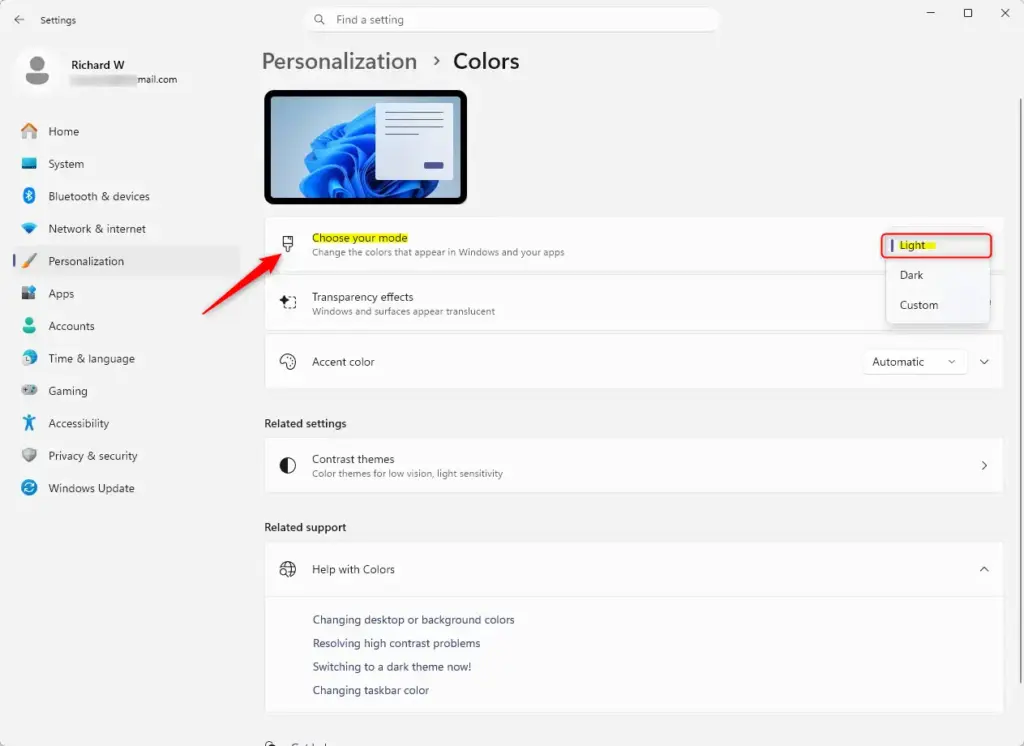
- Find the Choose your mode dropdown and click it.
- Select Light.
The change shows right away. The taskbar , Start menu and Settings window turn light. Some older or third-party apps may keep their own theme until you reopen them, and a few never follow the system setting.
Dark Mode: Easy on Your Eyes
Dark mode switches the interface to dark backgrounds with light text. It reduces eye strain in low-light rooms. It can also save some battery on laptops, mostly on OLED screens, where dark pixels use less power. On a standard LCD the saving is small.
Step 1: Go to Color Settings
Follow Steps 1-3 from the ‘Light Mode’ section to get to the Colors settings page. The short path is Settings Personalization Colors
Step 2: Choose Dark Mode
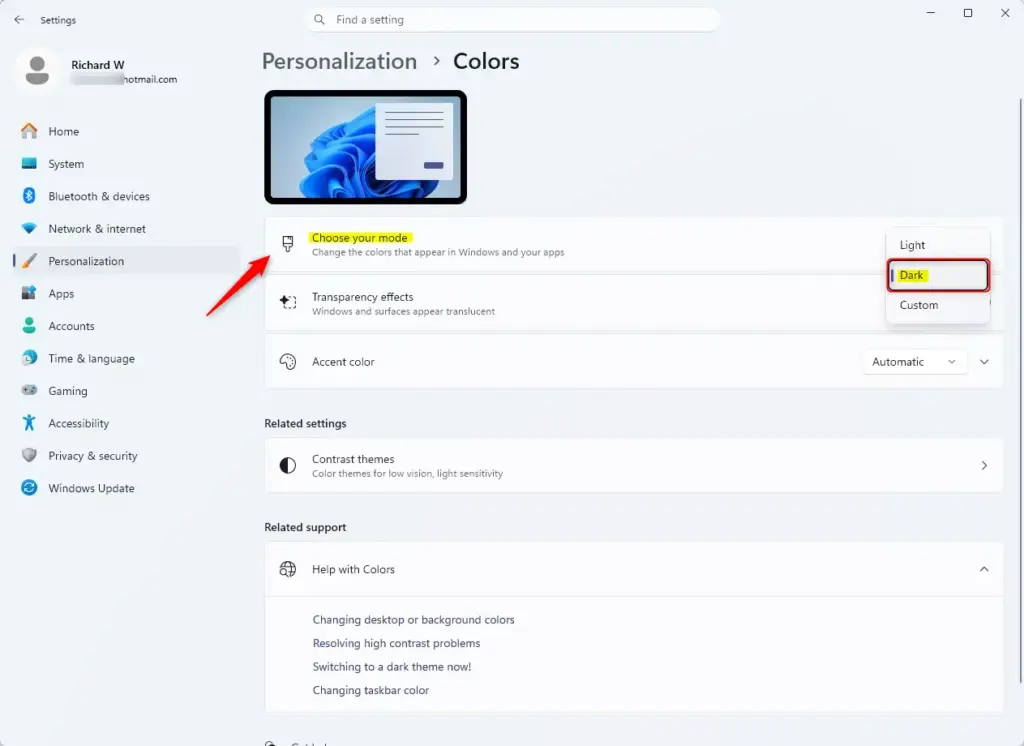
- Click the Choose your mode dropdown.
- Select Dark.
Your windows, Start menu and taskbar change to a dark theme straight away. No restart is needed. To undo it, return to the same dropdown and pick Light.
Custom Mode: The Best of Both
Custom mode lets you set the Windows interface and your apps separately. For example, you can have a dark taskbar and Start menu while your apps stay light. This gives you more control over how the display looks.
Step 1: Go to Color Settings
Go back to Settings Personalization Colors
Step 2: Choose Custom Mode
- Click the Choose your mode dropdown.
- Select Custom.
Two extra settings now appear below the dropdown: Choose your default Windows mode and Choose your default app mode. Each one has its own Light and Dark choice. The first controls the taskbar and Start menu. The second controls apps that follow the system theme.
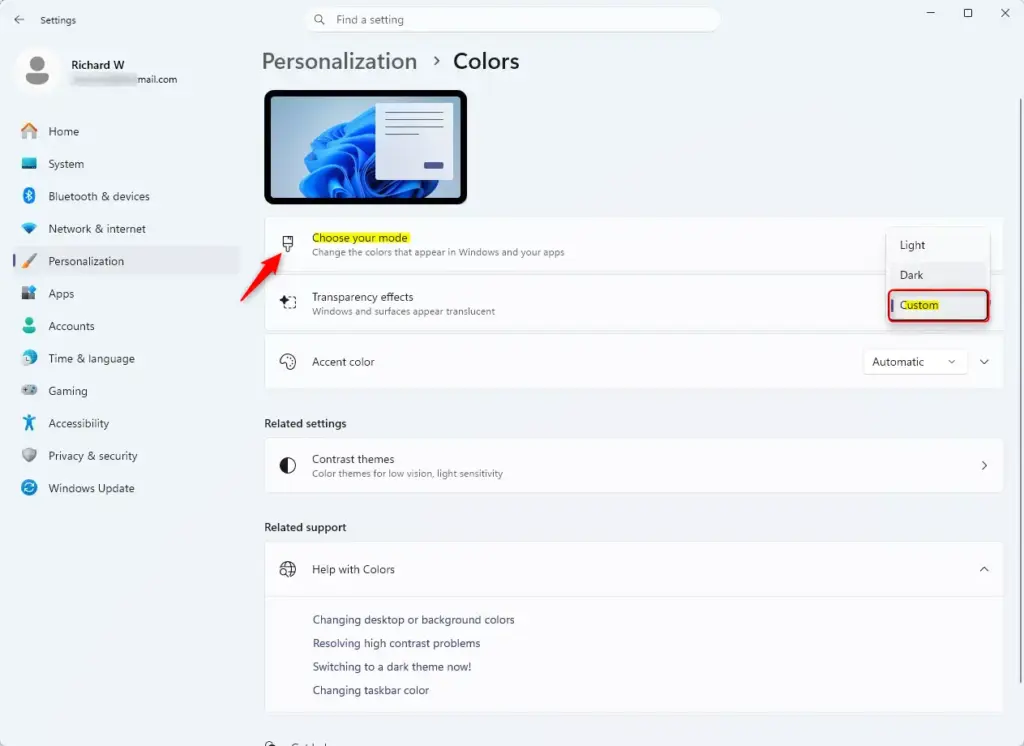
Try different combinations. You could have a dark Windows appearance with light apps, or a light Windows look with dark apps. Each change applies immediately, so you can compare them side by side. To drop the mix, set Choose your mode back to Light or Dark.
Reference:
Summary
Windows 11 offers three main color modes: Light mode for bright environments, Dark mode for comfort in low light, and Custom mode to mix the two for Windows and your apps. You change all of them in Settings Personalization Colors with the Choose your mode dropdown. The change applies immediately and you can reverse it at any time.
Have a question about this guide?
Answered by AI from this guide. Good questions may be added to this page — please don't include personal details.
Did this guide fix your problem?

About the Author
Richard
Tech Writer, IT Professional
Richard is a writer at Geek Rewind who turns complex IT tasks into clear, step-by-step guides. He draws on years of hands-on experience in system administration and enterprise IT operations, focusing on Windows, Linux and WordPress: the problems people actually run into, and the fixes that work. His server and WordPress guides come from systems he runs himself. Richard builds and maintains the platform behind Geek Rewind, from its Ubuntu servers and Nginx configuration to its custom WordPress plugins. Many new tutorials start with readers' questions, and he's always glad to answer them in the comments.
No comments yet — be the first to share your thoughts!