How to Install CAB Files in Windows 11

You install CAB files on your Windows 11 PC using the built-in Command Prompt.
A CAB (Cabinet) file is a compressed archive file, like a ZIP file, that Windows uses to deliver software updates and system files. These files contain one or more compressed files, making them quicker to install.
For instance, you might need to install a specific driver update from a CAB file. This often happens when you download it manually from a manufacturer’s website because automatic updates didn’t work. Typically, you’ll need to go to where the file is saved and run a command.
The `expand` command in Command Prompt extracts and installs CAB file contents directly into system directories. This method efficiently manages these specific update packages, allowing users to install software components from a compressed file format without needing specialized tools beyond the command line.
You install CAB files in Windows 11 using Command Prompt or PowerShell with administrator privileges. Open your chosen tool, then type `dism /Online /Add-Package /PackagePath:”FULL_PATH_TO_CAB_FILE”` for Command Prompt, or `Add-WindowsPackage -Online -PackagePath “FULL_PATH_TO_CAB_FILE”` for PowerShell.
What Is a CAB File?
A CAB file, short for Cabinet file, is like a special zipped folder that holds one or more files, often used by Windows and device makers to package updates or drivers for your computer.
There are a few ways to install CAB files. Here are the best methods:
How to Install a CAB File in 🪟 Windows 11
1Using Command Prompt
You can install a CAB file in Windows 11 using the Command Prompt. First, open Command Prompt as an administrator to give it the special permissions needed to install the file correctly. Then, you can use a simple command to add the CAB file to your system.
Type the command below, but replace FULL_PATH_TO_CAB_FILE with the full location of your CAB file. For example, if your CAB file is in Downloads, it might look like this: C:\Users\UserName\Downloads\file.cab.
dism /Online /Add-Package /PackagePath:"FULL_PATH_TO_CAB_FILE"
Example:
dism /Online /Add-Package /PackagePath:"C:\Users\UserName\Downloads\Windows10.0-KB5018851-x64.cab"
After running the command, you should see a message that says the installation was successful.
2Using Windows PowerShell
Installing CAB files in Windows 11 with Windows PowerShell is another straightforward option. Like Command Prompt, PowerShell is a command-line tool that requires administrator privileges to install files. Open PowerShell as an administrator and then enter the command to install your CAB file.
Type this command, again replacing FULL_PATH_TO_CAB_FILE with your file’s path:
Add-WindowsPackage -Online -PackagePath "FULL_PATH_TO_CAB_FILE"
Example:
Add-WindowsPackage -Online -PackagePath "C:\Users\UserName\Downloads\Windows10.0-KB5018851-x64.cab"
Once done, you’ll get a success message.
3Extract and Install CAB Files Using File Explorer
If your CAB file contains Windows drivers, you can use File Explorer to extract only the specific driver files you need, instead of installing everything. This is useful if you only want certain parts of the CAB package. Open File Explorer, find your CAB file, and double-click it to see what’s inside.
- Open Open File Explorer (the folder icon on your taskbar).
- Find your CAB file and double-click it to open.
- Select all the files inside, right-click, and choose Extract All.
- Pick a folder where you want to save the extracted files, then click Extract.
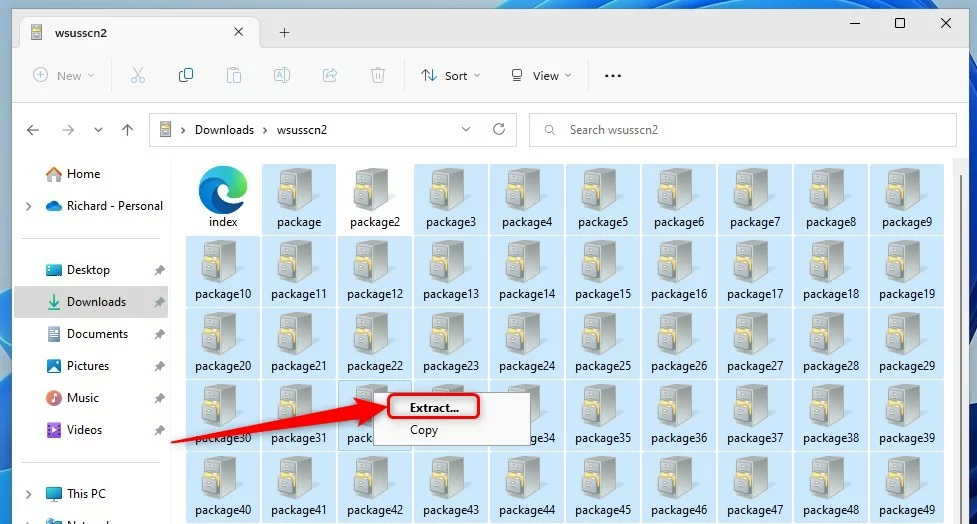
Extracting CAB files in Windows 11 using File Explorer
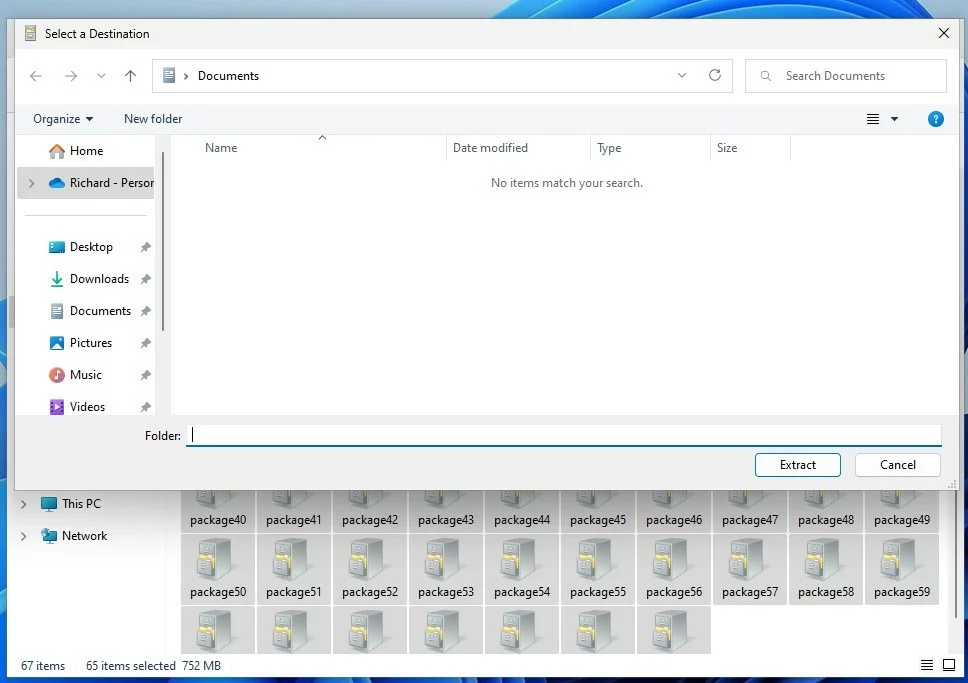
Choosing a folder to extract the CAB file
After extracting, you can install drivers using Device Manager. For a simple guide on installing drivers, check out this post: How to install device drivers in Windows 11.
Summary
CAB files are compressed packages that hold updates or drivers for Windows. In Windows 11, you can install them easily using Command Prompt or PowerShell with simple commands. If you only need specific drivers, File Explorer lets you extract them directly from the CAB file without installing the whole package.- CAB files are compressed packages with updates or drivers for Windows.
- You can install them using Command Prompt or PowerShell by typing simple commands.
- If you only want certain drivers, you can extract CAB files using File Explorer and install just what you need.
- Helpful links and pictures make the process easier to follow.
Helpful Links & Resources
- Microsoft official info about CAB files
- How to open apps as administrator in Windows 11
- How to open Command Prompt in Windows 11
- How to open PowerShell in Windows 11
If you have questions or want to share your experience, feel free to leave a comment below!
What software is used to install CAB files?
You can also use the DISM (Deployment Image Servicing and Management) tool. DISM is a built-in Windows command-line tool for installing updates and features, like language packs or optional Windows features, that come as CAB files.
Was this guide helpful?

About the Author
Richard
Tech Writer, IT Professional
Richard, a writer for Geek Rewind, is a tech enthusiast who loves breaking down complex IT topics into simple, easy-to-understand ideas. With years of hands-on experience in system administration and enterprise IT operations, he’s developed a knack for offering practical tips and solutions. Richard aims to make technology more accessible and actionable. He's deeply committed to the Geek Rewind community, always ready to answer questions and engage in discussions.


No comments yet — be the first to share your thoughts!