How to Check Your Windows 11 Version: Easy Step-by-Step Guide

The Windows 11 version tells you which feature update your PC runs (for example 23H2 or 24H2) and the exact build number. It takes under 10 seconds to find. You need it when you are chasing a bug, checking whether a fix applies to you, or installing software that requires a certain system level.
The quickest way: press the Win and R at the same time, type winver into the box, and press Enter. A small pop-up window shows your version details.
Open Settings , navigate to System, then About, and look for “Windows specifications” to find your version. Alternatively, press Win+R, type “winver,” and press Enter to see your version and build number.
Why Check Your Windows Version?
Checking your operating system version is a good habit before you install new programs or troubleshoot system errors. Some software only works on certain Windows builds. Support articles and update notes also refer to versions and build numbers, so you need yours to know whether they apply to you.
Below are three ways to check, from fastest to most technical. All three only read information, so none of them changes your system.
Method 1Use the “About Windows” Screen
The built-in winver command opens a small window with your operating system version and build number. You do not have to dig through any system menus, which makes it the fastest method. It works the same way on Windows 11 Home and Pro.
- Press the Win and the R key on your keyboard at the same time. The “Run” box opens in the bottom-left corner of the screen.
- In the box, type
winverand press Enter. The About Windows window opens.
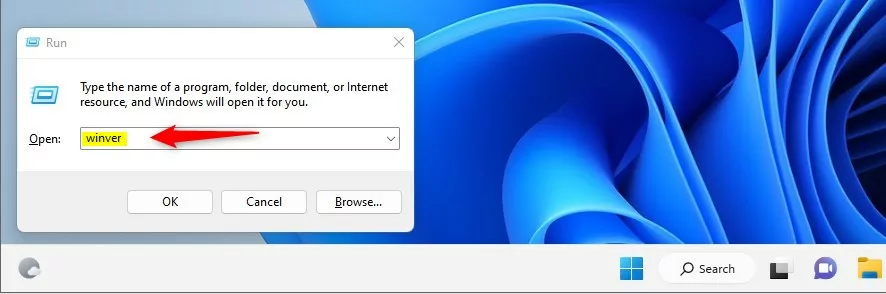
The Run box with the command winver typed in.
The About Windows window shows the Windows 11 version (such as 23H2) and the OS build number. The window also names the edition and the user the license is registered to. Click OK to close it. You do not need to restart anything.
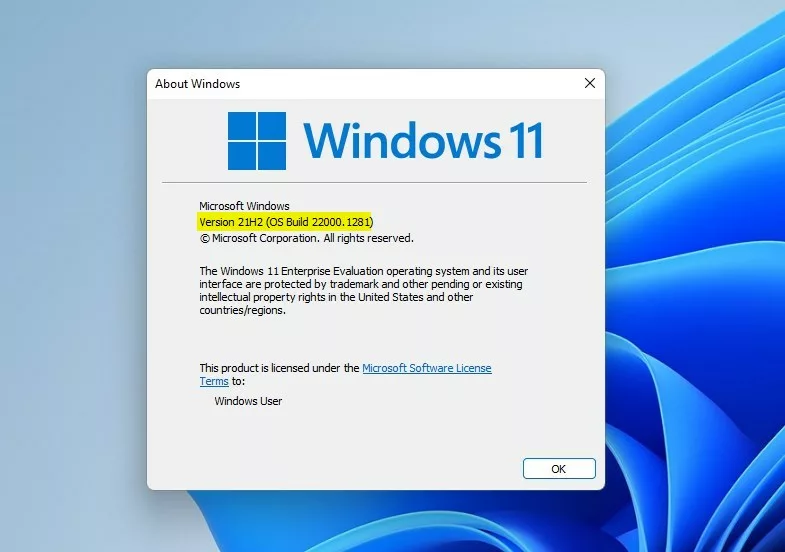
About Windows window showing version and build number.
Method 2Find Windows Version Using Settings
If you prefer a visual menu over keyboard commands, use the Settings app. It shows the version and build next to your edition (Home or Pro) and your device specifications, so you can check several things in one place.
- Click the Start button (Windows icon) on the taskbar. By default it is in the center of the taskbar. If you moved the taskbar to the left, it is at the bottom-left corner.
- Click the Settings icon (it looks like a gear). Or press Windows key + I to open Settings directly. The Settings window opens with a category list on the left.
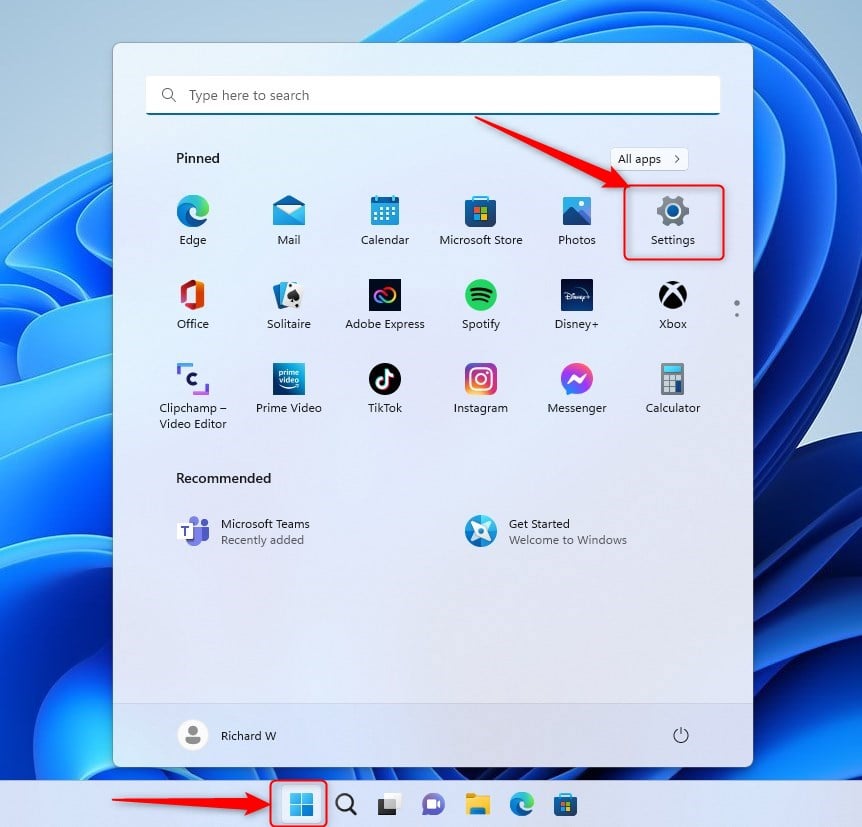
Windows 11 Start menu with Settings gear icon.
Now move through the menus:
- Click System in the left-side menu. The System page opens on the right.
- Scroll to the bottom of the right pane and click About. The page shows your device name and hardware details.
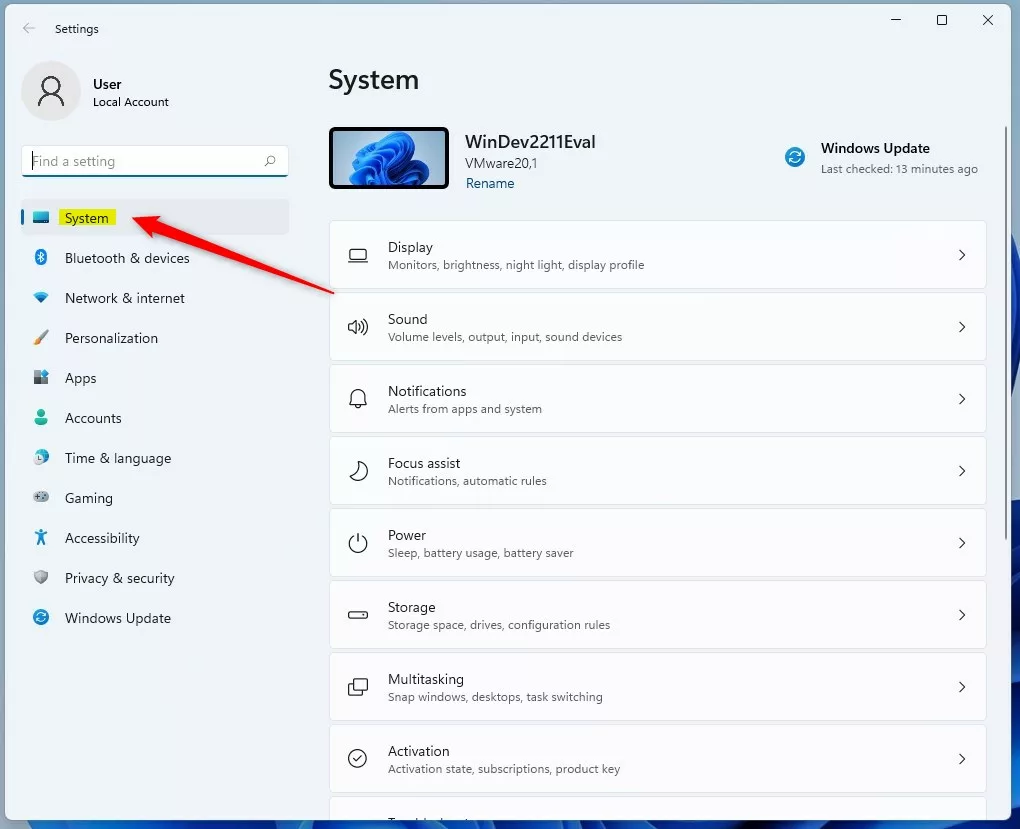
System option in the Settings app.
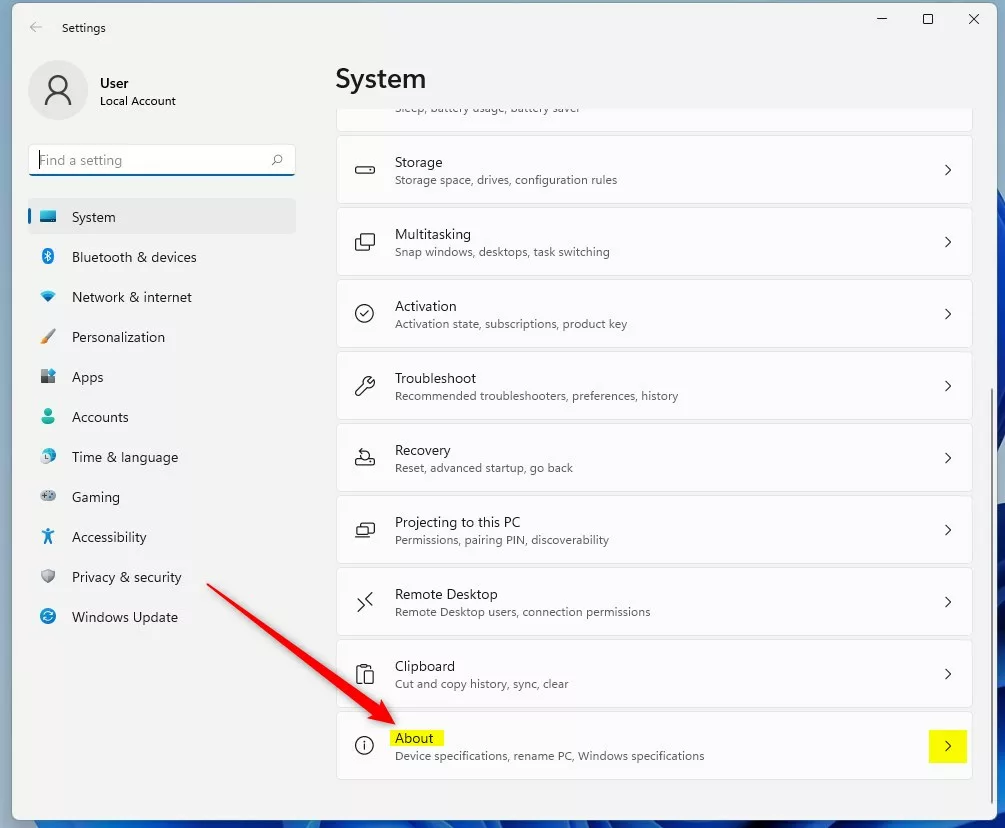
About option inside System settings.
Scroll down to the Windows specifications section. You will see Edition, Version, Installed on and OS build. Use the Version line for the feature update and OS build for the exact build. Click Copy next to the section if you need to paste these details into a support ticket or an email.
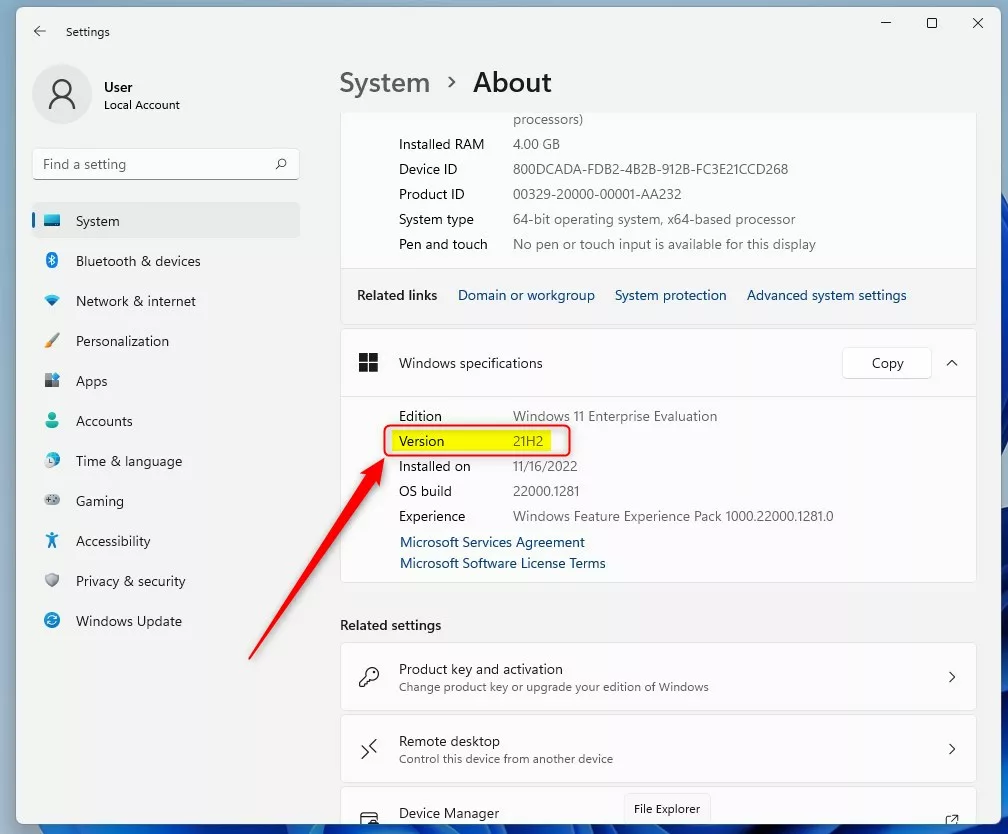
Windows version number shown in About settings window.
Method 3Check Windows Version Using Registry Editor (Advanced)
Registry Editor is a database for low-level system settings. It is useful when the normal menus will not open or a script needs the value. IT staff also use it to confirm exact build data during deeper troubleshooting. Only look at the value here. Do not change or delete anything in the Registry.
- Press Windows key + R, type
regedit, and press Enter. If Windows asks Do you want to allow this app to make changes to your device?, click Yes. Registry Editor opens. (If you want a guide on opening Registry Editor, see this tutorial.) - In Registry Editor, go to this path. You can expand the folders in the left pane, or paste the path into the address bar at the top of the window:
HKEY_LOCAL_MACHINE\SOFTWARE\Microsoft\Windows NT\CurrentVersion - Look at the right pane for DisplayVersion. Its Data column shows your Windows 11 version.
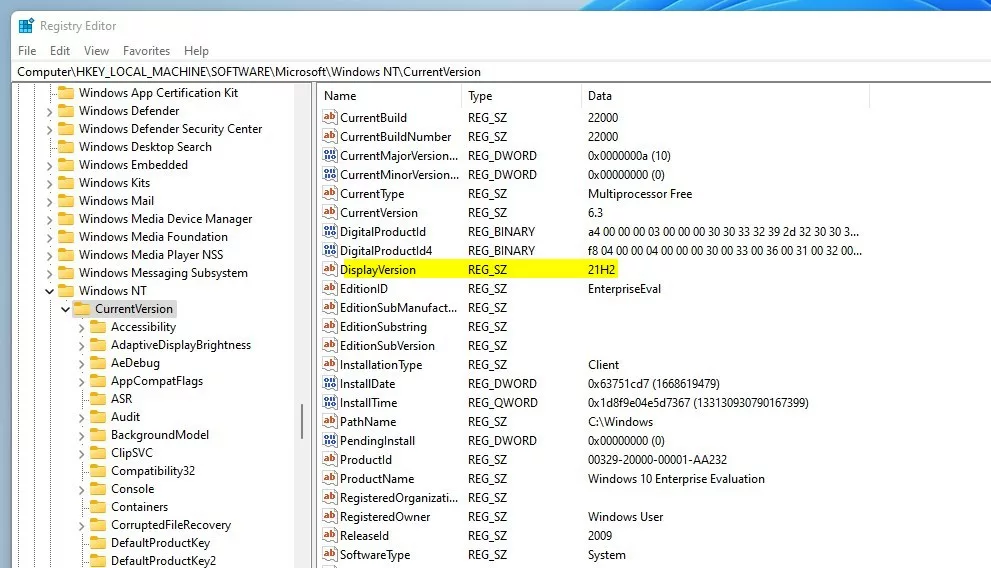
Windows version number shown in Registry Editor.
Summary
- You can check your Windows 11 version with the winver command, the Settings app, or Registry Editor.
- Knowing your version helps you install the right software and keep your PC updated.
- The winver method is the fastest and easiest for most users. Settings gives the most detail, including the edition. Registry Editor is the one to use when the other two are not available.
- For more info about Windows 11 updates, visit Microsoft's official Windows 11 release info page.
Each of the three methods gives you the same version information, so choose the one that suits the situation: the quick winver command, the graphical Settings app, or Registry Editor. With your version and build number in hand, you can confirm your PC has the right updates and that new software will be compatible.
Was this guide helpful?

About the Author
Richard
Tech Writer, IT Professional
Richard is a writer at Geek Rewind who turns complex IT tasks into clear, step-by-step guides. He draws on years of hands-on experience in system administration and enterprise IT operations, focusing on Windows, Linux and WordPress: the problems people actually run into, and the fixes that work. His server and WordPress guides come from systems he runs himself. Richard builds and maintains the platform behind Geek Rewind, from its Ubuntu servers and Nginx configuration to its custom WordPress plugins. Many new tutorials start with readers' questions, and he's always glad to answer them in the comments.


No comments yet — be the first to share your thoughts!