How to Change Your Wi-Fi Settings in Windows 11
Changing your Wi-Fi settings in Windows 11 means you can update saved network details like passwords directly.
This feature lets you modify information for existing Wi-Fi connections without needing to forget and re-add them.
For instance, if your home Wi-Fi password changed recently, you can easily update it on your PC.
You’ll find these Wi-Fi settings conveniently located within the Windows 11 Settings app, typically under the “Network & internet” section.
Go to Settings > Network & internet > Wi-Fi > Manage known networks. Select the network you want to change, then click Edit to update the password, security type, or connection preferences.
Why Change Wi-Fi Settings?
You might need to change your Windows 11 Wi-Fi settings if you’ve updated your home Wi-Fi password, need to connect to a different network, or want to stop Windows 11 from automatically joining certain Wi-Fi spots. These changes help keep your connection secure and working smoothly.
- You changed the Wi-Fi password on your router.
- You want to use a newer security type (like WPA3 instead of WPA2).
- You want to control if your PC connects automatically or not.
The good news? You can do this without deleting the network and starting over.
How to Change Wi-Fi Network Settings
- Open Settings. Press
Win + Ion your keyboard. - Click Network & internet on the left menu. Then click Wi-Fi on the right.
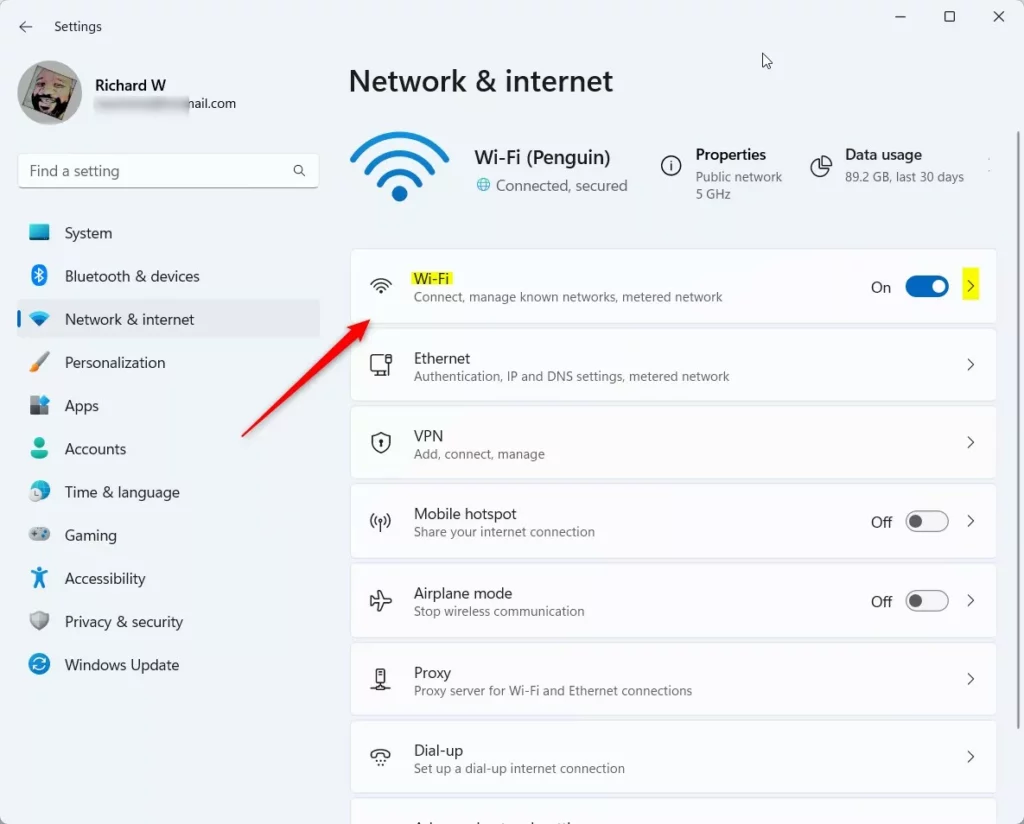
Windows 11 Settings app showing Wi-Fi network tile option - Click on Manage known networks.
Changing your Windows 11 Wi-Fi settings is done through the Settings app. To start, press the Windows key and ‘I’ on your keyboard at the same time. Then, click on ‘Network & internet’ in the left menu, select ‘Wi-Fi’ on the right, and choose ‘Manage known networks’ to see your saved Wi-Fi connections.
- Find the Wi-Fi network you want to change (for example, “Penguin”) and click it.
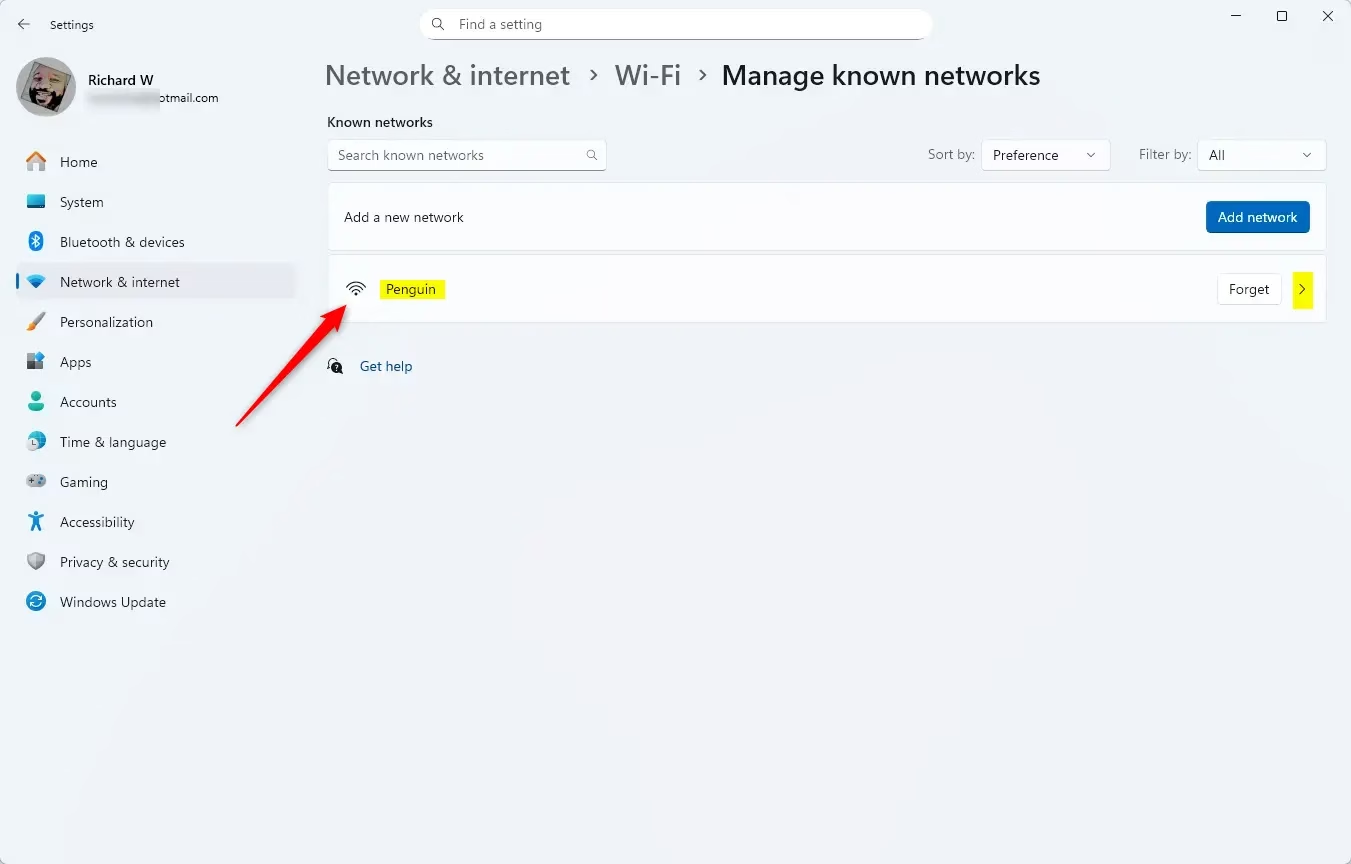
WiFi profile in Windows 11 - Click the Edit button under Advanced Wi-Fi network properties.
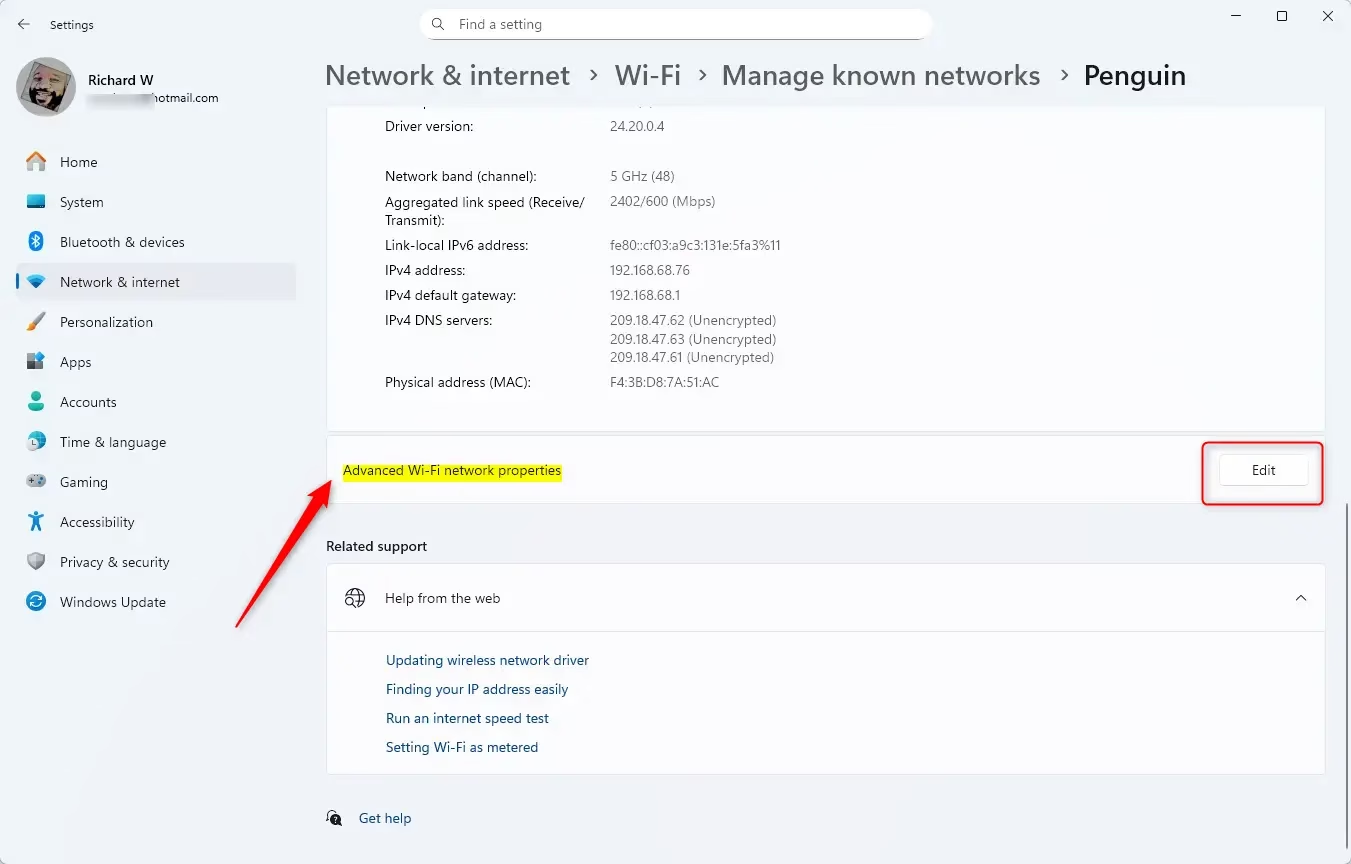
WiFi profile in Windows 11 edit - Change Connection Settings:
- Choose whether your PC should connect automatically when the network is nearby.
- Decide if your PC should look for other Wi-Fi networks while connected.
- Allow connection even if the network name (SSID) is hidden.
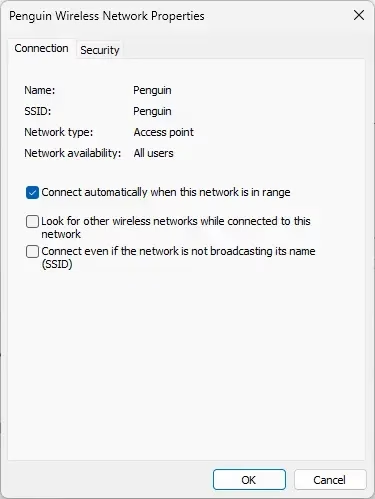
WiFi profile in Windows 11 connection tab
- Change Security Settings:
- Select the Security type from the dropdown (like WPA2 or WPA3).
- Pick the Encryption type if available.
- Type in the new Network security key ( Wi-Fi password).
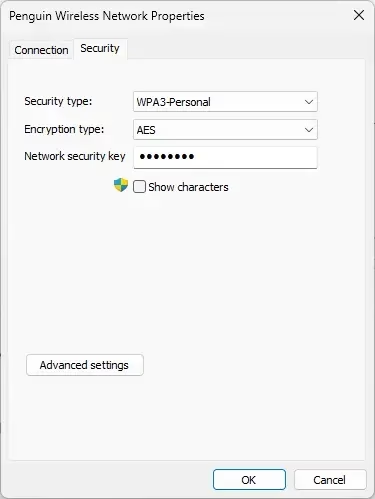
WiFi profile in Windows 11 security tab
- Click OK when done.
- Close the Settings window if you want.
Summary
- Changing Wi-Fi settings in Windows 11 is easy and doesn’t require deleting the saved network.
- You can update your password, security type, and connection preferences.
- These changes help keep your Wi-Fi connection safe and working well.
- Now your Windows 11 PC will connect using the updated Wi-Fi settings!
Where are the Wi-Fi settings on 🪟 Windows 11?
In the Settings app on your Windows device, select > Network & Internet > Wi-Fi .
Was this guide helpful?

About the Author
Richard
Tech Writer, IT Professional
Richard, a writer for Geek Rewind, is a tech enthusiast who loves breaking down complex IT topics into simple, easy-to-understand ideas. With years of hands-on experience in system administration and enterprise IT operations, he’s developed a knack for offering practical tips and solutions. Richard aims to make technology more accessible and actionable. He's deeply committed to the Geek Rewind community, always ready to answer questions and engage in discussions.


No comments yet — be the first to share your thoughts!