How to Enable or Disable Wi-Fi Settings in Windows 11

Windows 11 lets you turn Wi-Fi settings on or off easily from two main places: the Settings app and the Action Center. Wi-Fi connects your computer to wireless internet networks, and knowing how to switch it is a key skill.
For example, you might turn Wi-Fi off to save your laptop’s battery or to fix connection problems by giving your wireless adapter a quick reset. This process is straightforward for anyone using Windows 11.
Click the Wi-Fi icon on the taskbar and then click the Wi-Fi button to toggle it on or off. Administrators can disable this option entirely by modifying a registry setting.
Why You Might Want to Disable Wi-Fi
- Save battery: Turning off Wi-Fi when you don’t need it helps your laptop last longer.
- Control access: If you share your computer, you might want to stop others from turning Wi-Fi on or off.
How Administrators Can Stop Users from Changing Wi-Fi Settings
If you manage a shared or work computer, you might want to prevent others from turning Wi-Fi on or off. This is achieved by modifying a specific setting within the Windows Registry, a central database for system configurations. Please note: This process is intended for advanced users or system administrators. Exercise caution when navigating the Registry Editor.
Steps to Restrict Wi-Fi Switching
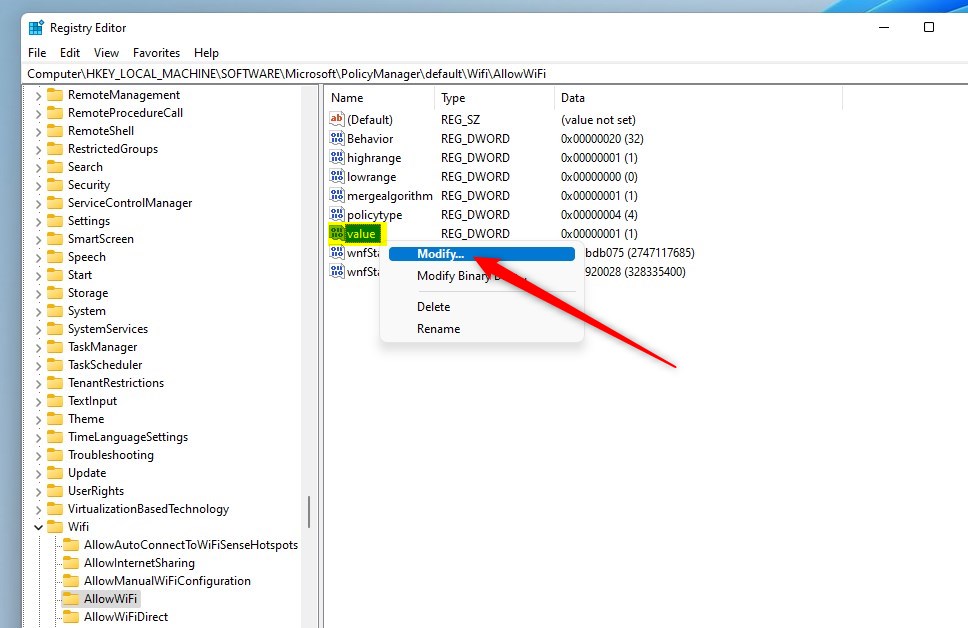
- [Admin Required] Click the Start Menu, type Registry Editor, and open the app.
- In the Registry Editor window, find this folder path on the left side (you can copy and paste it into the address bar at the top):Registry
HKEY_LOCAL_MACHINE\SOFTWARE\Microsoft\Windows NT\CurrentVersion\NetworkList\Settings\{12345678-90AB-CDEF-1234-567890ABCDEF} - Right-click on the folder name and choose Permissions.
- Select the user account you want to restrict and uncheck the box for ‘Allow’ under ‘Full Control’.
- Click Apply and then OK.
If you need to stop others from changing Wi-Fi settings on a Windows 11 computer, you can use the Registry Editor to restrict these options. This guide shows you how to make changes using the Registry Editor. You’ll need administrator rights to do this.
Summary
In Windows 11, managing your Wi-Fi settings is possible from the taskbar, and administrators have options to restrict these changes using the Registry Editor.Where are the Wi-Fi settings on 🪟 Windows 11?
Within the Settings app on your Windows device, navigate to Network & Internet, then select Wi-Fi.
Was this guide helpful?

About the Author
Richard
Tech Writer, IT Professional
Richard, a writer for Geek Rewind, is a tech enthusiast who loves breaking down complex IT topics into simple, easy-to-understand ideas. With years of hands-on experience in system administration and enterprise IT operations, he’s developed a knack for offering practical tips and solutions. Richard aims to make technology more accessible and actionable. He's deeply committed to the Geek Rewind community, always ready to answer questions and engage in discussions.


No comments yet — be the first to share your thoughts!