How to Connect to Wi-Fi on Windows 11
Windows 11 users can join or connect to Wi-Fi networks by following simple steps outlined in this guide. Connecting to Wi-Fi allows devices access to the internet for browsing and communication.
Click the icons on the right side of your Taskbar to open Quick Settings, then select your Wi-Fi network and enter its password. Alternatively, press Windows key + I, go to Network & Internet, click Wi-Fi, select your network, and enter the password to connect.
Why Connect to Wi-Fi?
Wi-Fi connects your Windows 11 computer to the internet without cables. This wireless connection allows for fast and convenient internet access.
What Changed in 🪟 Windows 11?
In Windows 11, the old Wi-Fi icon has moved from the Taskbar. Now, you’ll find it within a new feature called Quick Settings, which groups Wi-Fi, sound, and battery controls all together on the right side of your Taskbar.
Method 1Connect Using Quick Settings
Quick Settings offers a shortcut menu for Wi-Fi, sound, and battery controls. Users can access this menu by clicking an icon in the bottom right corner of the Windows 11 Taskbar. This menu provides quick adjustments for common device functions.
Step 1Open Quick Settings
The Wi-Fi icon on the right side of the Windows 11 Taskbar opens the Quick Settings window. This window lets you quickly turn Wi-Fi on or off.
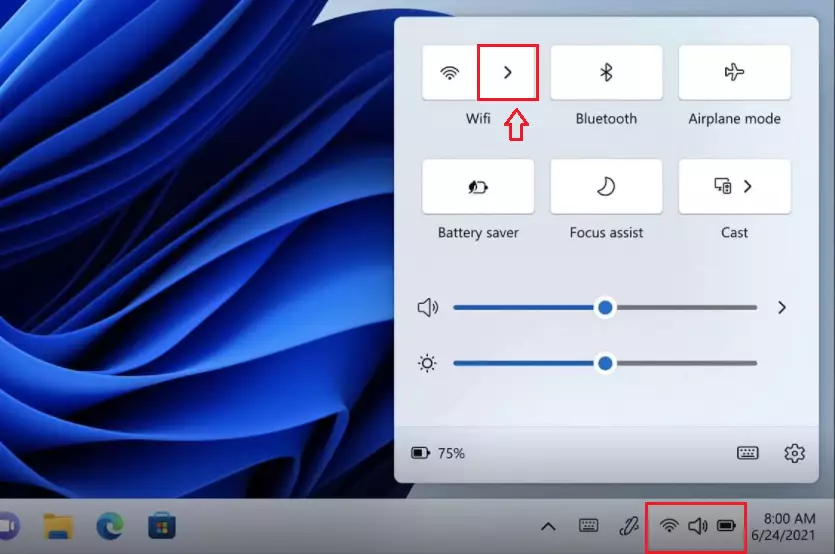
Step 2Find the Wi-Fi Option
Look for the Wi-Fi symbol in the upper part of the Quick Settings box. Click the arrow next to it that points to the right.
Step 3Turn On Wi-Fi (If Needed)
Make sure the Wi-Fi switch is set to ‘On’. Windows will then list all the Wi-Fi networks it can find nearby.
Step 4Select Your Network
Find your Wi-Fi network name in the list. Click on it to select it.
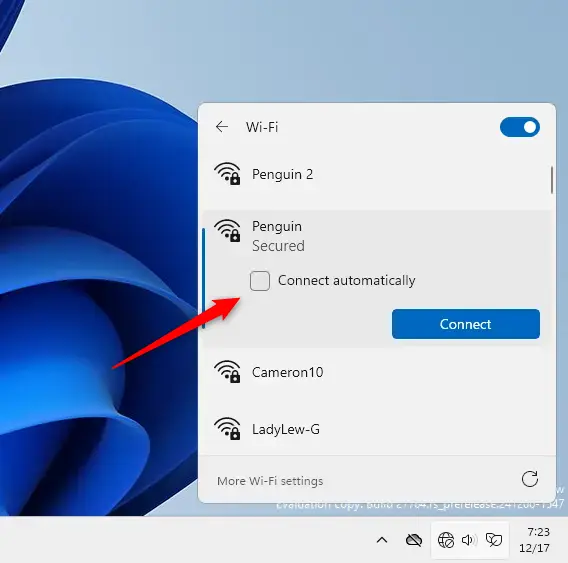
Step 5Enter Your Password
Step 6Connect
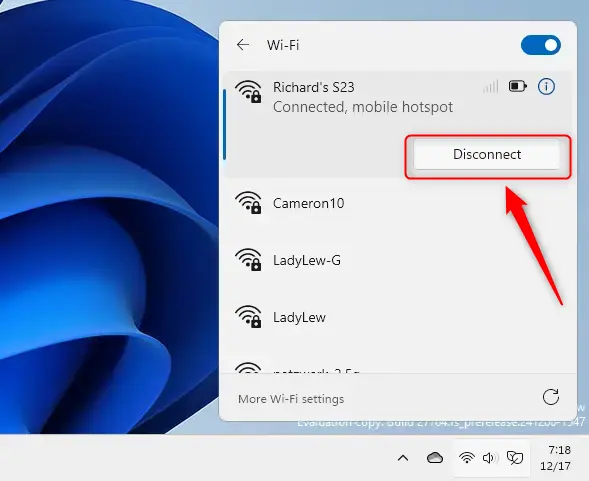
Success! You are now connected to Wi-Fi.
Method 2Connect Using Windows Settings
Why use Windows Settings? Settings gives you more control and options. It’s a centralized place for all your computer adjustments.
Step 1Open Windows Settings
Opening Windows Settings is your first step to connect Wi-Fi on Windows 11, and you can do it a few easy ways.

Alternatively, click the search box on your Taskbar. Type Settings and open it.
Step 2Go to Network Settings
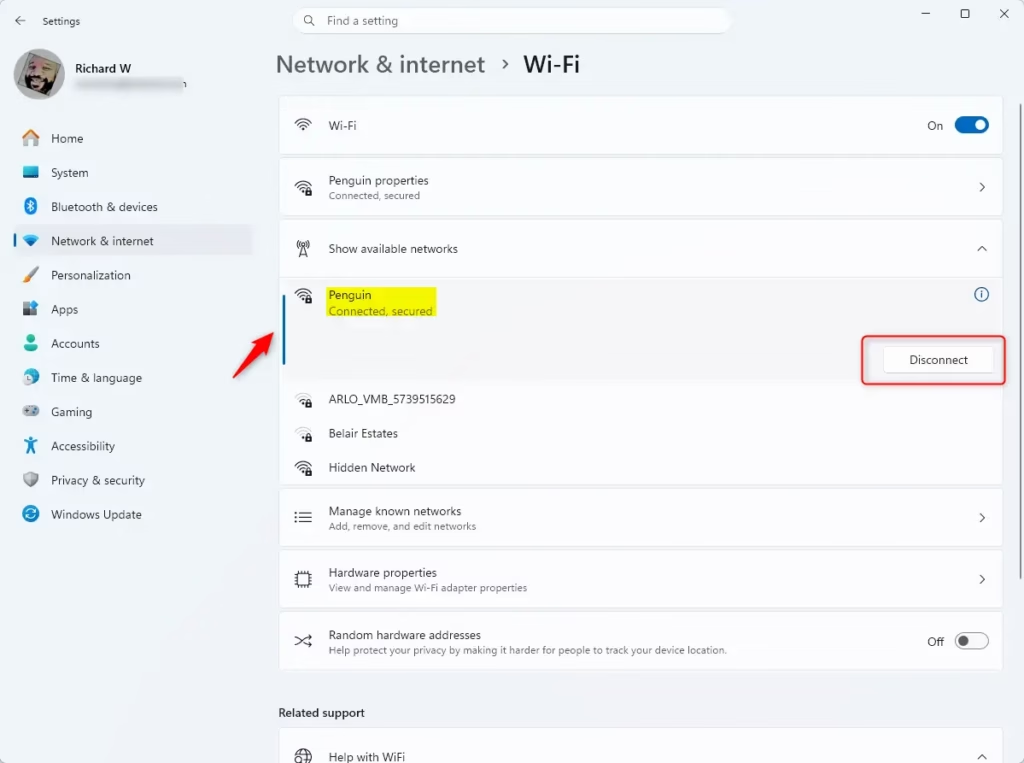
Click Network & Internet on the left side. Then click Wi-Fi on the right side of your screen.
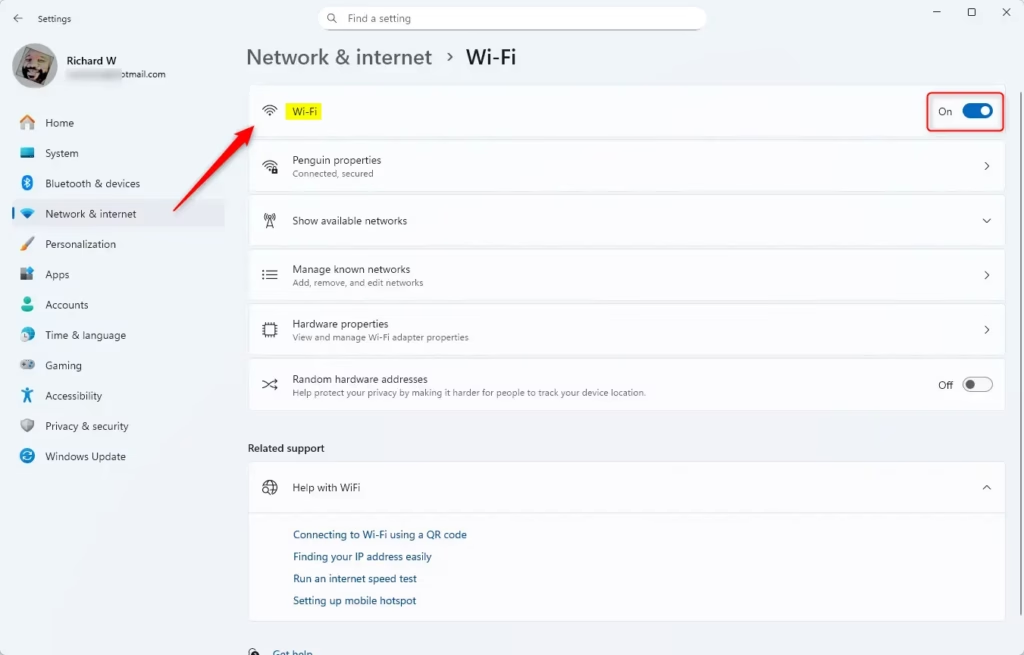
Step 3Turn On Wi-Fi
Ensure the Wi-Fi switch is set to ‘On’. Then, click ‘Show available networks.’
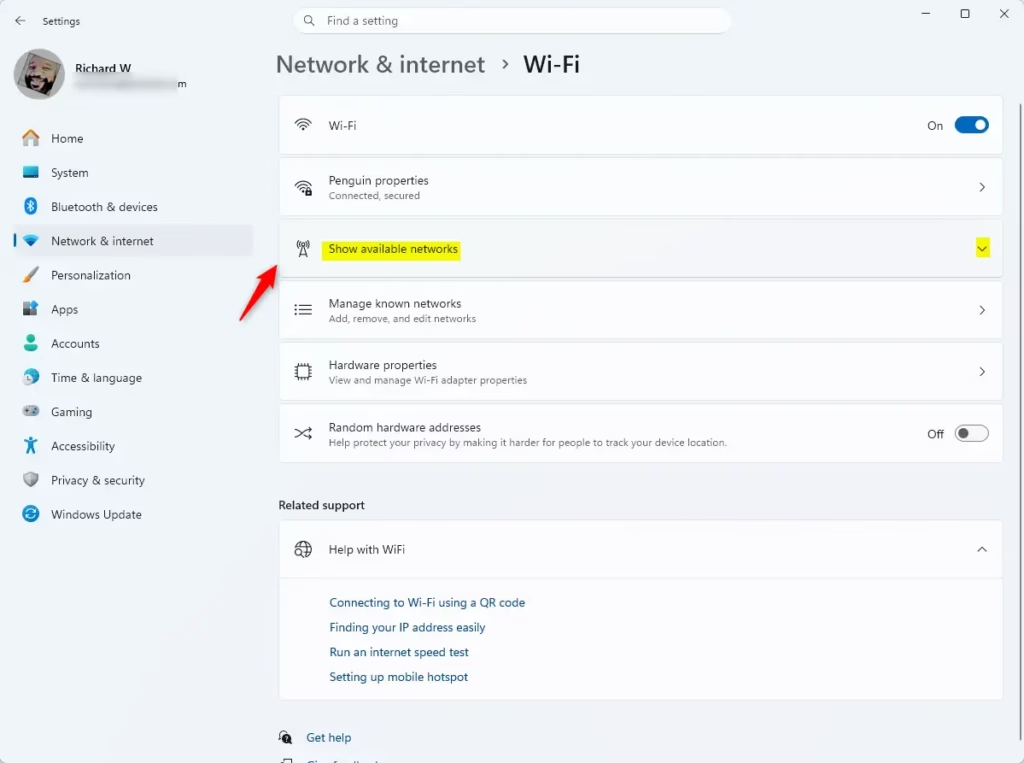
Step 4Select Your Network
Windows displays all nearby wireless networks. Find your network name and click on it.
Step 5Enter Your Password
Type your Wi-Fi password in the password field. Be careful with uppercase and lowercase letters.
Step 6Connect
Click Next or Connect. Your computer will connect to the network.
You’re now connected to Wi-Fi!
Summary
You can connect to Wi-Fi on Windows 11 easily through two quick methods. You can use the Quick Settings menu by clicking the icons on your Taskbar, or you can go through the full Windows Settings app. Both ways let you find your network, enter your password, and get online fast.
- Quick Settings: Click the icons on the bottom right of your Taskbar. Find Wi-Fi. Select your network. Enter your password. Done.
- Windows Settings: Press
Windows key + I. Go to Network & Internet. Click Wi-Fi. Select your network. Enter your password. Done.
Either way you choose, it only takes a few clicks. Once you enter your password, Windows will connect automatically, giving you wireless internet access.
Was this guide helpful?

About the Author
Richard
Tech Writer, IT Professional
Richard, a writer for Geek Rewind, is a tech enthusiast who loves breaking down complex IT topics into simple, easy-to-understand ideas. With years of hands-on experience in system administration and enterprise IT operations, he’s developed a knack for offering practical tips and solutions. Richard aims to make technology more accessible and actionable. He's deeply committed to the Geek Rewind community, always ready to answer questions and engage in discussions.


No comments yet — be the first to share your thoughts!