How to Change Time Format in Windows 11

The time format in Windows 11 controls how hours and minutes appear on your taskbar clock and lock screen. You can switch between a 12-hour display with AM/PM and a 24-hour layout in the main Settings app. It takes less than a minute and you don’t need any extra tools or programs.
The change applies to your user account only. If other people sign in to the same PC, their clocks stay as they are.
Open Settings , navigate to Time & language, then Language & region. Expand Regional format and click Change formats. Select your preferred time format from the dropdown menus for Short time and Long time.
Why Change Your Time Format?
Pick the layout that suits how you read the time. A 12-hour display shows the time as 3:45 PM. A 24-hour layout shows the same moment as 15:45, with no AM/PM marker. The 24-hour layout is common in IT, healthcare and the military, and many people find it less ambiguous.
What Happens When You Change It?
Once you change the format, Windows updates how the time appears everywhere on your computer. The taskbar clock reflects the new format straight away. You don’t need to restart. If an open app still shows the old format, close it and open it again.
Where Windows Stores This Information
Windows 11 stores your time format settings in the Registry Editor, a central database for system and app settings. You can view and edit these values by browsing to the path 🗝️HKEY_CURRENT_USER\
HKEY_CURRENT_USER\Control Panel\International
The specific settings are stored in these values:
sShortTimesTimeFormat
Because this path sits under HKEY_CURRENT_USER, it only affects your own account. Editing the registry by hand is riskier than using Settings, since a wrong value can leave the clock showing odd text. Note the original value before you change it so you can put it back. If a change doesn't show up straight away, sign out and back in. For most people the Settings app below is the better route.
Option 1Change Time Format in Settings
- Open Settings by pressing
Win+Ion your keyboard. The Settings window opens. - Click Time & language on the left side.
- Click Language & region on the right side. You will see your display language, preferred languages and regional settings.
- Find Regional format and click it to expand the options.
- Click Date & time format. On older Windows 11 versions the button is called Change formats instead.
- In the dropdown menus, select the time format you want for Short time and Long time. Choose a format with AM/PM for 12-hour time, or one without it for 24-hour time. Short time is the version shown on the taskbar clock.
- Close Settings when you're done. Check the taskbar clock in the bottom-right corner. It should already show the new format.
To undo the change, repeat these steps and pick your original formats again.
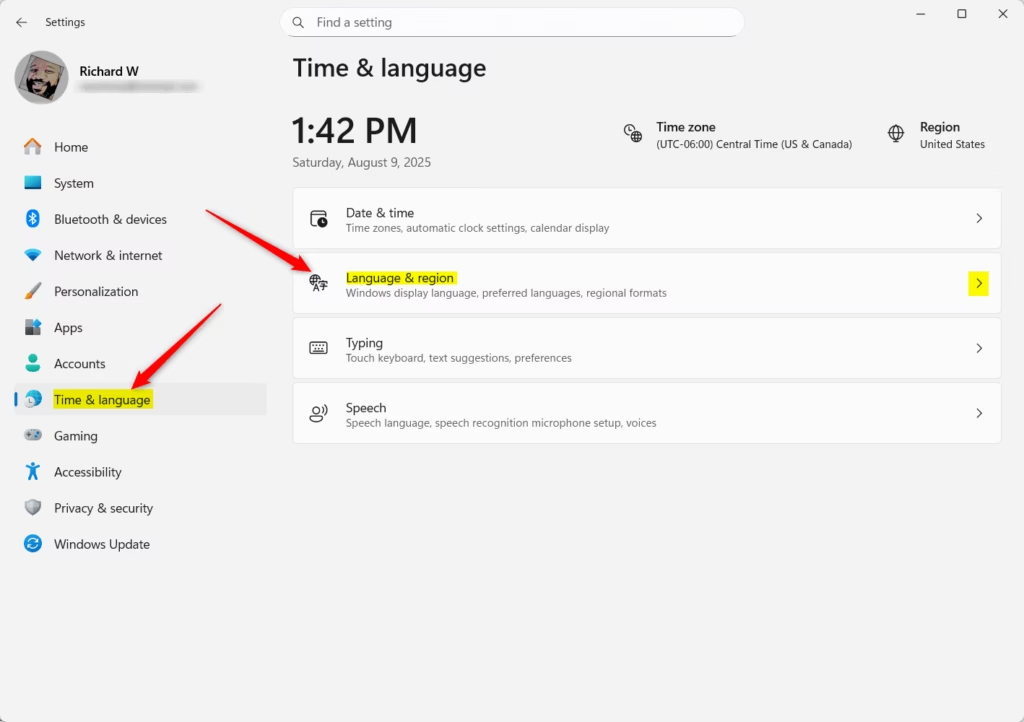
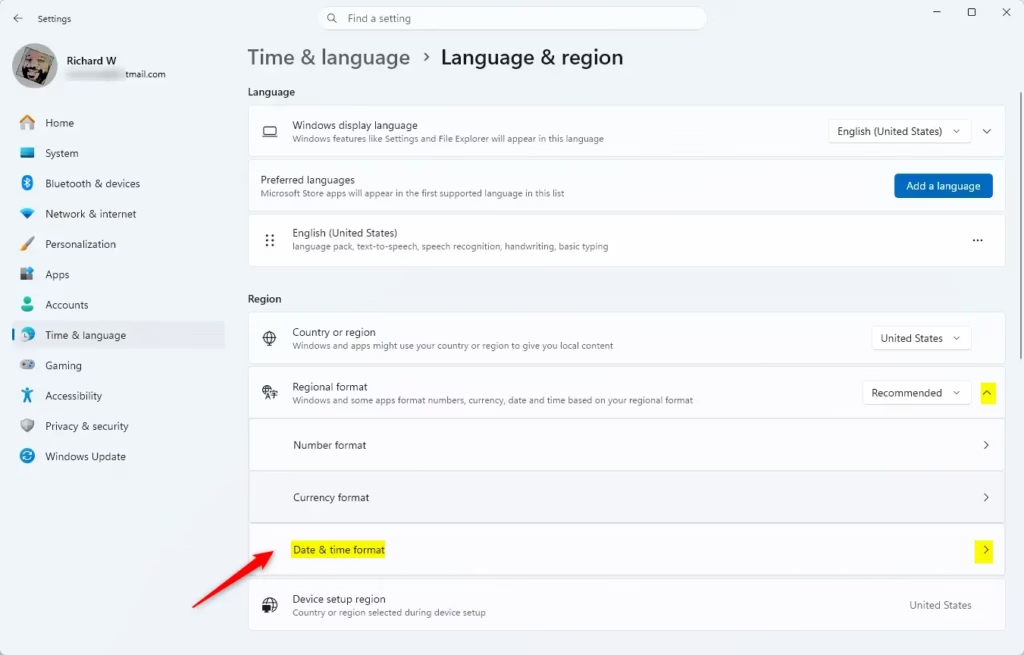
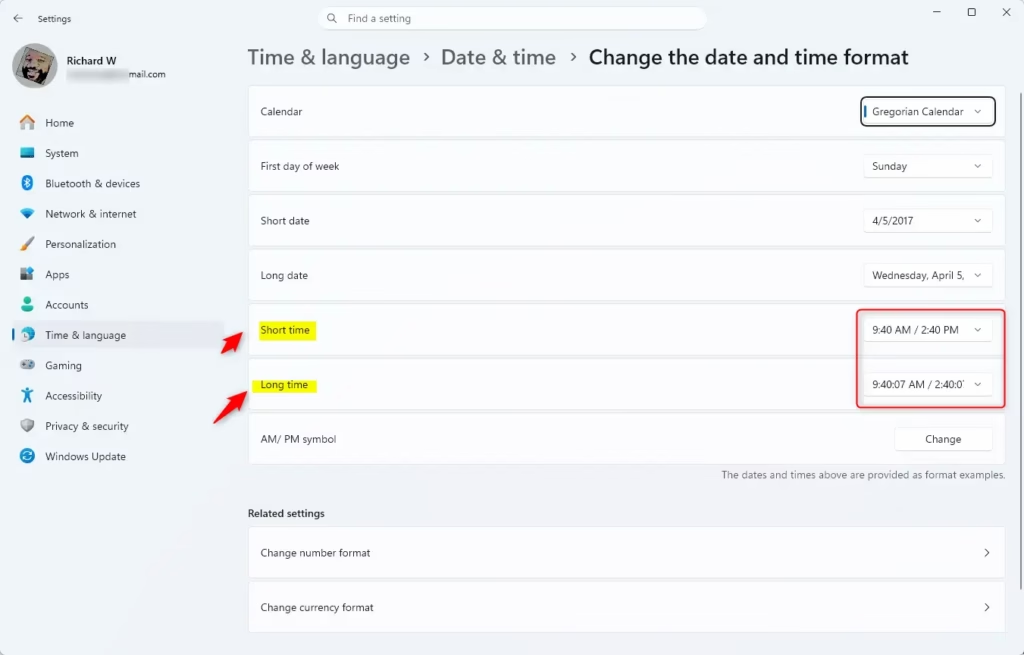
You can change the Windows 11 time format in the main Settings app without touching any advanced tools. Press Win+I, go to Time & language, select Language & region, and open your regional format options to pick a new style for your clock. The change takes effect immediately and works the same on Home and Pro editions.
Option 2Change Time Format in Region Control Panel
The classic Control Panel still offers the same setting. This is useful if you prefer the older layout or can't find the option in Settings.
- Admin privileges required. Sign in with an administrator account, or be ready to enter administrator credentials if prompted. Open the Control Panel and switch the view to icons (Large icons or Small icons) so every item is listed.
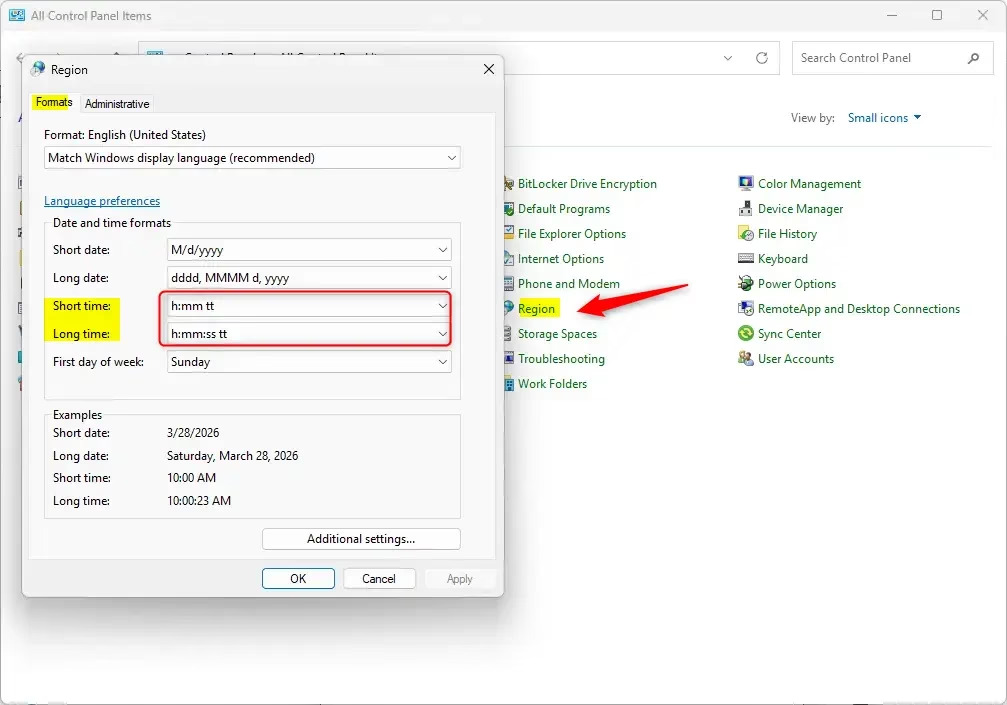
- Click the Region icon. The Region dialog opens.
- Go to the Formats tab.
- Use the dropdown menus to select your preferred format for Short time and Long time. The Examples area in the dialog shows how the time will look.
- Click OK to save your changes. The taskbar clock should update right away.
To go back, reopen the same dialog and choose your earlier formats. You can also pick a preset from the Format dropdown at the top of the tab, which resets all formats to that region's defaults.
Option 3Change Time Format with Custom Settings
You can set a custom Windows 11 time format using the classic Control Panel if you want more control than the main settings app allows. Open the Control Panel, click Region, and open the Formats tab to type in your own custom letters for hours, minutes, and seconds.- Admin privileges required. Open the Control Panel and switch to icons view.
- Click on the Region icon.
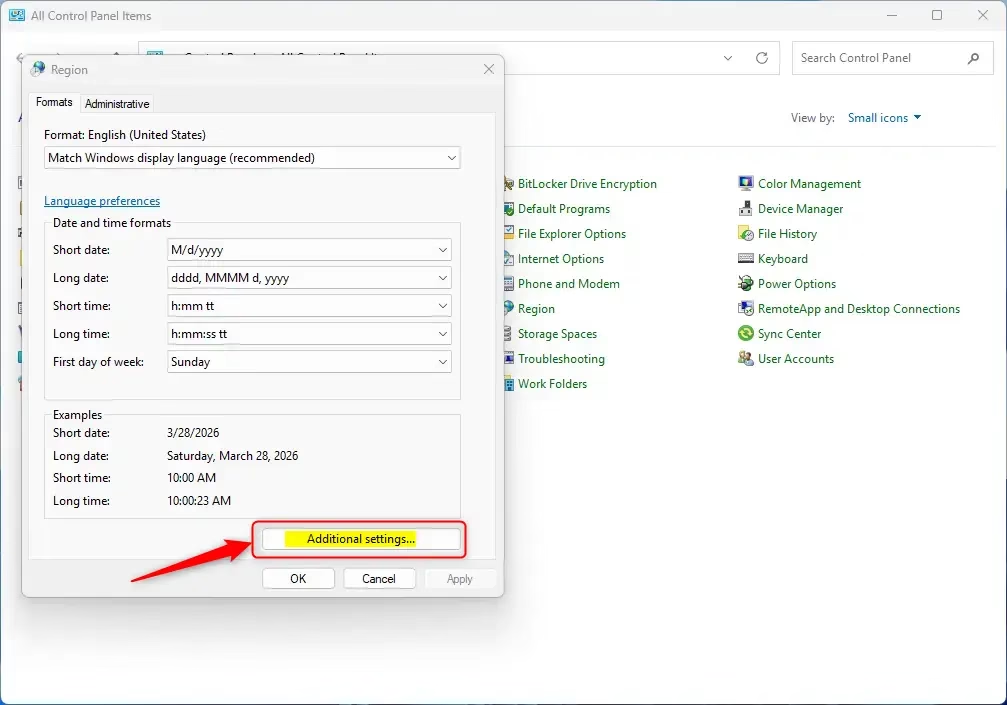
- Go to the Formats tab.
- Click on Additional settings.
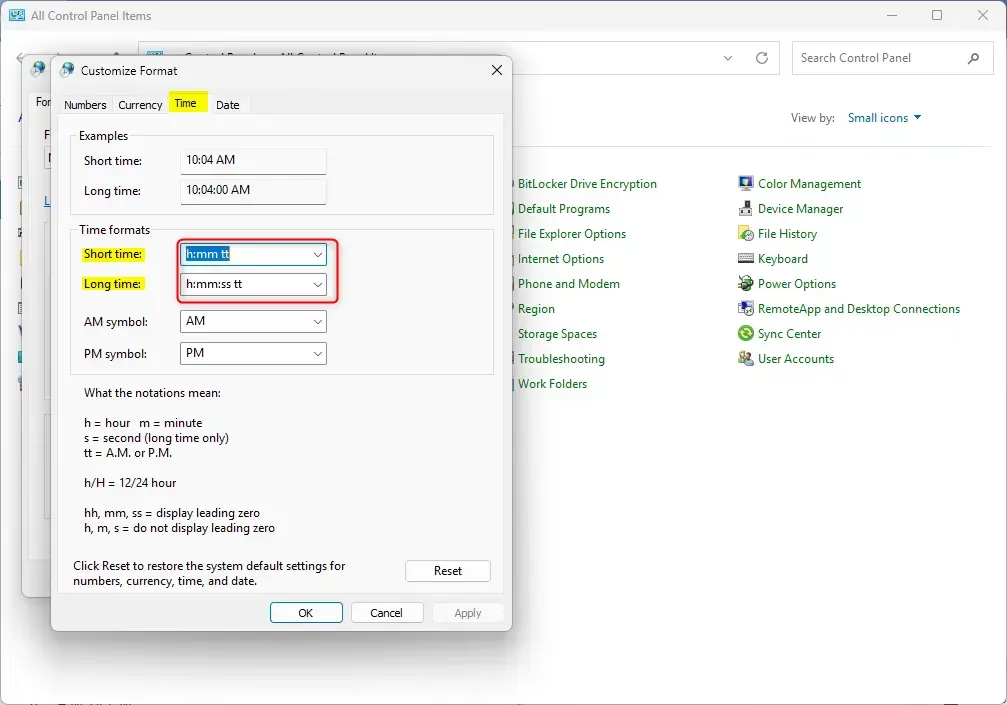
- Click on the Time tab.
- In the dropdown menus, select a format for Short time and Long time. You can also type a custom format in the text boxes if you want something different.
- Click OK.
- Click OK again to close the Region window.
Summary
Adjusting your Windows 11 time format offers clear options within both Settings and the Control Panel.
How do I change the time on my computer on 🪟 Windows 11?
Open Settings, select Time & language, then click Date & time. Turn off Set time automatically, then select Change next to Set the date and time manually. Enter the date and time, then select Change. Your clock updates straight away, and you can turn Set time automatically back on later.
Why can't I change my time zone in 🪟 Windows 11?
Your time zone is usually locked because Set time zone automatically is turned on. Open Settings, go to Time & language, then Date & time, and turn off Set time zone automatically. The Time zone list will then become available. If the option is still greyed out, your organization or an administrator may control it.
How do I change to military time on Windows?
Switch to the 24-hour clock in Settings. Open Time & language, select Language & region, then choose Regional format. Select Change formats, open the Short time list, and pick the option that shows HH:mm, such as 15:45. The taskbar clock changes right away. Repeat for Long time if you want the same style there.
How do I change the Date and time?
Open Settings, select Time & language, then click Date & time. To set them yourself, turn off Set time automatically, select Change under Set the date and time manually, enter the new values, and select Change again. Your clock updates straight away.
Was this guide helpful?

About the Author
Richard
Tech Writer, IT Professional
Richard is a writer at Geek Rewind who turns complex IT tasks into clear, step-by-step guides. He draws on years of hands-on experience in system administration and enterprise IT operations, focusing on Windows, Linux and WordPress: the problems people actually run into, and the fixes that work. His server and WordPress guides come from systems he runs himself. Richard builds and maintains the platform behind Geek Rewind, from its Ubuntu servers and Nginx configuration to its custom WordPress plugins. Many new tutorials start with readers' questions, and he's always glad to answer them in the comments.
No comments yet — be the first to share your thoughts!