How to Enable or Disable Time Zone Automatic Setting in Windows 11

Set time zone automatically in Windows 11 is a feature that uses your computer’s location to keep your clock updated.
This setting checks your location and adjusts your PC’s time zone, even managing Daylight Saving Time for you. For example, Windows 11 uses location data to change your time zone when you travel.
Keeping this feature turned on means your computer’s clock is always correct. This helps with important tasks like scheduling meetings or making sure your files sync properly.
If you turn off automatic time zone setting, you must manually change your time and handle Daylight Saving Time yourself. Windows 11 will then stop updating your time zone on its own.
Go to Settings > Time & language > Date & time. Toggle “Set time zone automatically” to On to enable it, or Off to disable it.
Using the Settings App
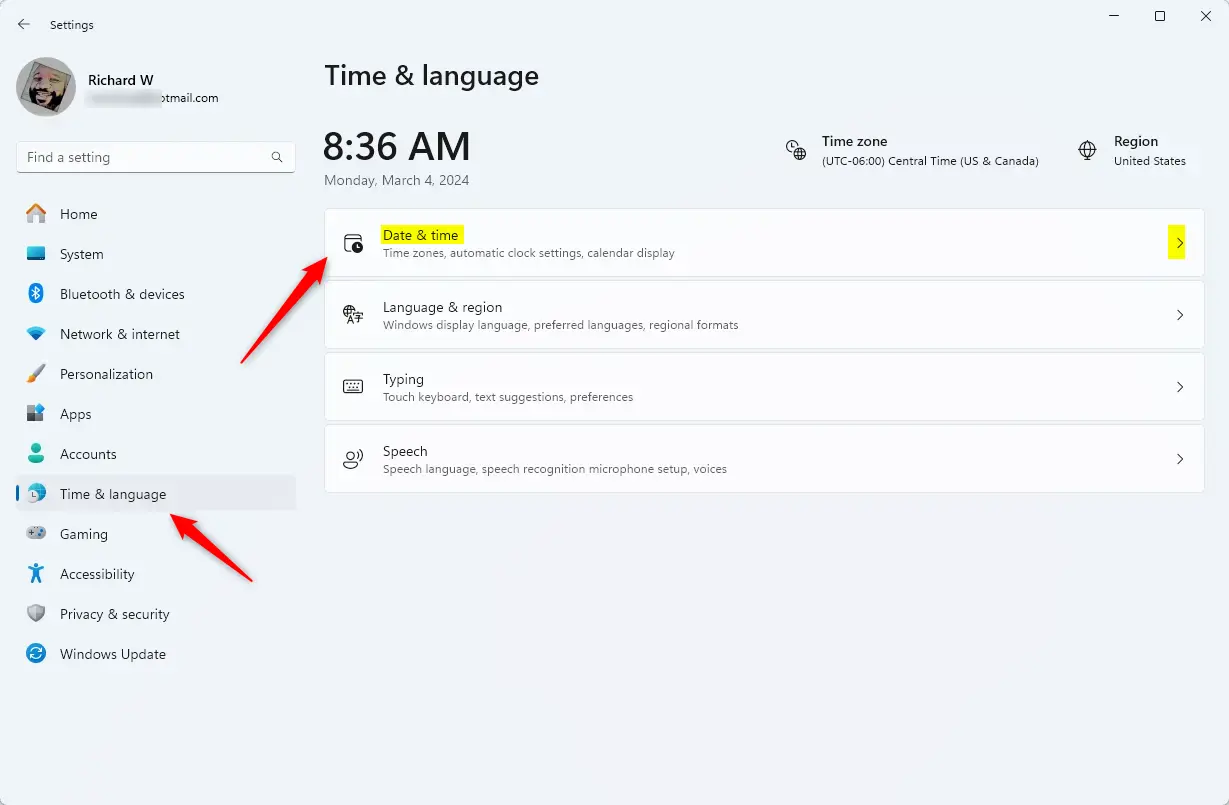
You can change your Windows 11 time zone settings to update automatically right from the main Settings app. To do this, open Settings, navigate to Time & language, and then select Date & time to find the option for automatic time zone setting.
- Open the Settings app by pressing Windows key + I on your keyboard or clicking Start > Settings.

- Click on Time & language on the left side of the screen.
- Select the Date & time tile on the right.
- Find the “Set time zone automatically” option.
- Toggle the switch to On to enable it , or Off to disable it .
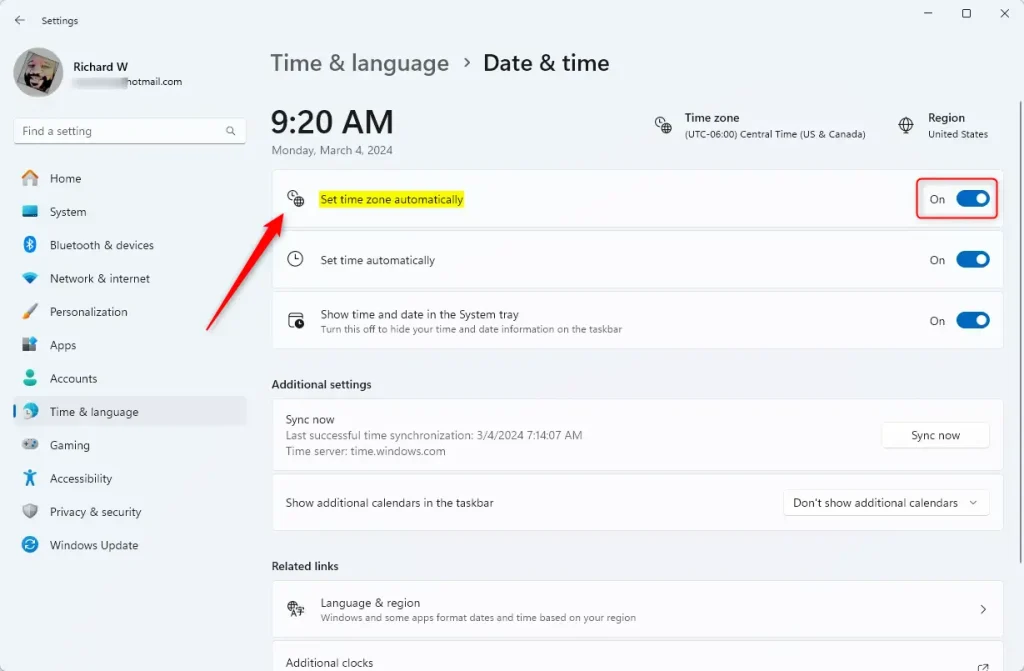
You can now close the Windows settings app.
Checking Location Services
If your Windows 11 time zone automatic setting is greyed out, you likely need to turn on Location Services. This lets Windows know your current location, which is needed for the automatic time zone feature to work correctly. Go to Settings, then Privacy & security, and click Location to check this.
- Go to Settings > Privacy & security.
- Click Location.
- Ensure Location services is turned On.
- Scroll down to Let apps access your location and ensure it is enabled.
Using the Windows Registry (Admin Privileges Required)
You can enable or disable the Windows 11 time zone automatic update using the Windows Registry if you have admin rights. This advanced method involves navigating to a specific registry path and changing a value there. Be sure to follow the steps exactly to avoid issues.
- Open the Windows Registry by searching for it in the taskbar search box.
- Navigate to this folder path:
HKEY_LOCAL_MACHINE\SYSTEM\CurrentControlSet\Services\tzautoupdate - Look for the Start item in the right pane. If you do not see it, right-click on a blank space, choose New > DWORD (32-bit) Value, and name it
Start. - Double-click Start and change the value:
- Enter
3to turn automatic time zones On. - Enter
4to turn automatic time zones Off.
- Enter
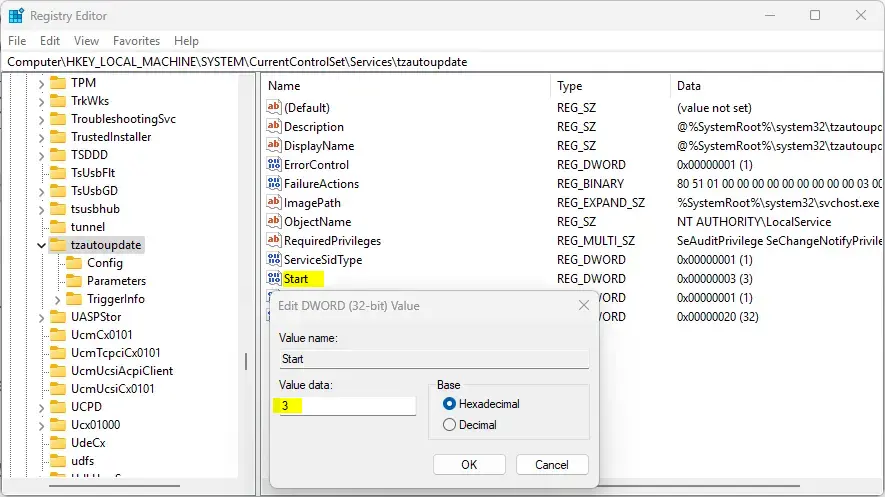
- Save your changes and restart your computer for the updates to take effect.
Troubleshooting Windows Time Synchronization
If your Windows 11 clock shows the wrong time or drifts, you can troubleshoot Windows time synchronization. Using the Windows Time Service can fix this by syncing with an accurate server.
w32tm /resyncLegacy Control Panel Method
You can still use the old-school method to sync your time.
- Search for Control Panel and open it.
- Select Clock and Region > Date and Time.
- Click the Internet Time tab.
- Click Change settings and ensure Synchronize with an internet time server is checked.
Summary
Summary: Adjusting your Windows 11 time zone settings automatically keeps your computer’s clock accurate, which is important for daily tasks and scheduling.
Why does my 🪟 Windows 11 time zone keep changing automatically?
This usually happens because the “Set time zone automatically” feature is enabled and your computer is detecting your location via Wi-Fi or IP address. If you are using a VPN, Windows might misidentify your location, causing the time zone to shift unexpectedly. Disable the feature to stop this.
How do I force 🪟 Windows 11 to sync time with an internet server?
You can force a sync by opening the Command Prompt as an administrator. Type the command w32tm /resync and press Enter. This forces the Windows Time service to contact the configured NTP server (Network Time Protocol server) immediately, correcting any clock drift that has occurred on your system.
Was this guide helpful?

About the Author
Richard
Tech Writer, IT Professional
Richard, a writer for Geek Rewind, is a tech enthusiast who loves breaking down complex IT topics into simple, easy-to-understand ideas. With years of hands-on experience in system administration and enterprise IT operations, he’s developed a knack for offering practical tips and solutions. Richard aims to make technology more accessible and actionable. He's deeply committed to the Geek Rewind community, always ready to answer questions and engage in discussions.


[…] Settings app that lets you configure many settings for your device. For example, you can change the time zone, add and remove devices, and rename your […]