How to Set Date & Time in Windows 11

Setting the date and time in Windows 11 ensures your apps display accurate information and system functions run correctly. The date and time settings control everything from file timestamps to scheduled tasks.
You can easily change the date, time, and time zone directly through the Windows 11 Settings app. This quick adjustment helps keep your computer’s clock in sync with the real world.
Open Settings (Windows key + I), go to Time & language > Date & time. Select your time zone from the dropdown menu, or turn off “Set time automatically” to adjust the date and time manually. Click “Sync now” if the time doesn’t update immediately.
Why Does This Matter?
Having the correct date and time on your Windows 11 computer matters. It ensures your clock is accurate for appointments and updates. It also helps Windows adjust automatically for daylight saving time.
How to Change Your Time Zone in 🪟 Windows 11
You can change your time zone in Windows 11 through the Settings app. This is useful if you travel or if your computer’s clock shows the wrong time because it’s set to a different region. To open Settings, press Windows key + I, click the Start button then Settings, or type ‘Settings’ in the taskbar search box.
To open Settings, you can:
- Press
Windows key + Ion your keyboard, OR - Click the Start button, then click Settings
Another way is to click the search box on your taskbar. Type Settings. Click the Settings app when it appears.

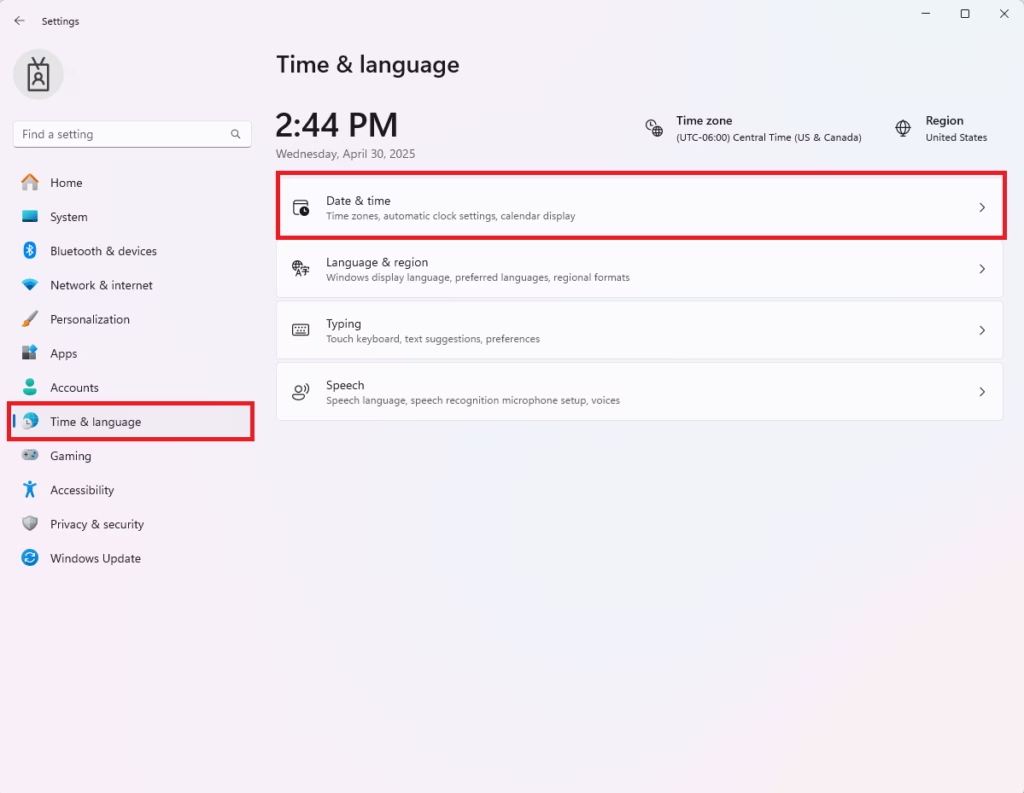
Once in Settings, look for Time & Language on the left side. Then click Date & Time on the right side.
Now, find the Time zone dropdown menu. Pick the correct zone where you live.
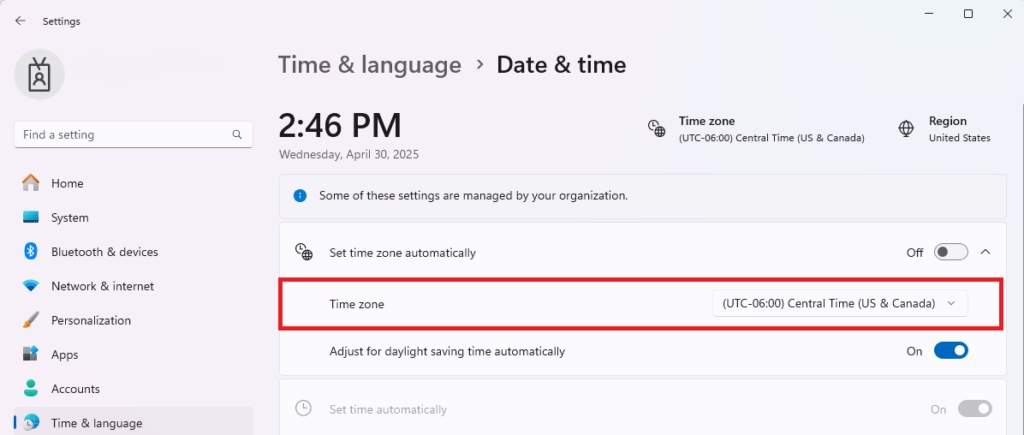
Windows will then automatically turn on the settings for adjusting your clock for daylight saving time.
If after changing the time zone, the clock doesn’t update right away, scroll down. Click the Sync now button to fix it.
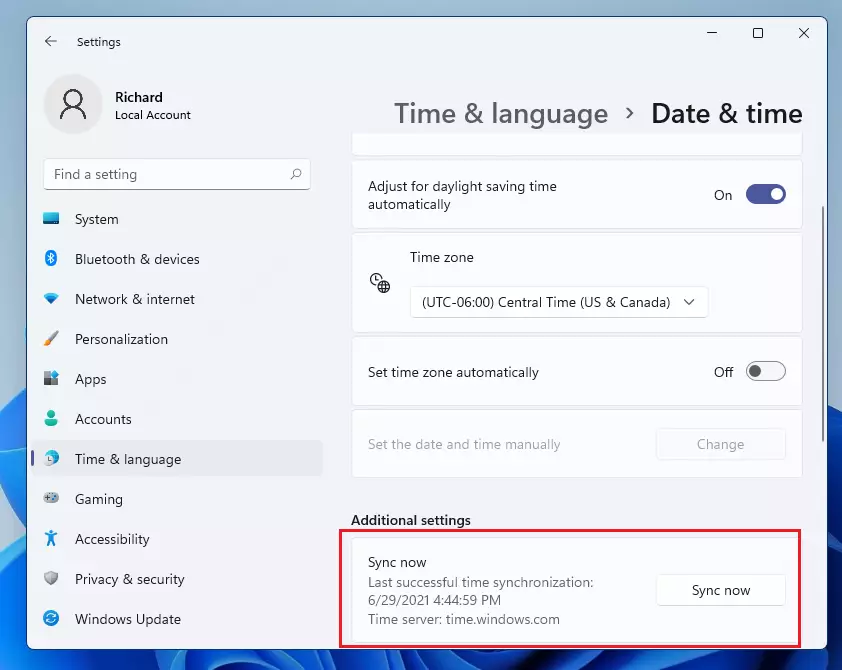
This connects your PC to an internet time server (think of it as a master clock for the internet). Your own clock will then update automatically.
If syncing doesn’t work right away, try restarting your computer. After logging back in, Windows will apply the new settings.
How to Set Date & Time Manually
If your Windows 11 PC isn’t connected to the internet, you can set the date and time manually. First, turn off the automatic settings. Then, click the ‘Change’ button on the Date & Time settings page to manually enter the correct date and time.
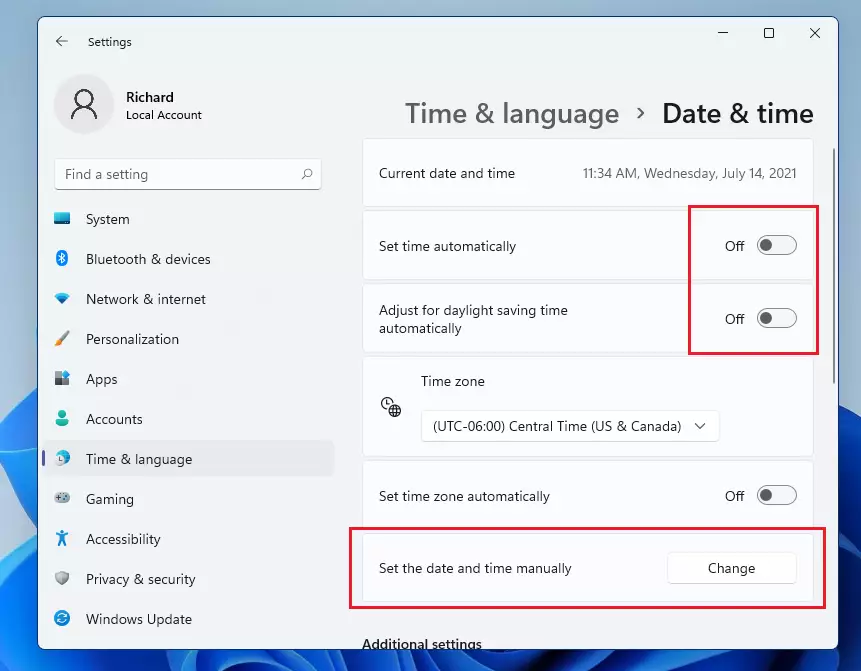
Click the Change button. This button appears under the "Set the date and time manually" section on the Date & time settings page. Clicking this button allows you to manually adjust your Windows 11 computer's date and time.
A small window will appear. Use it to pick the correct date and time. Use the calendar and the clock to do this.
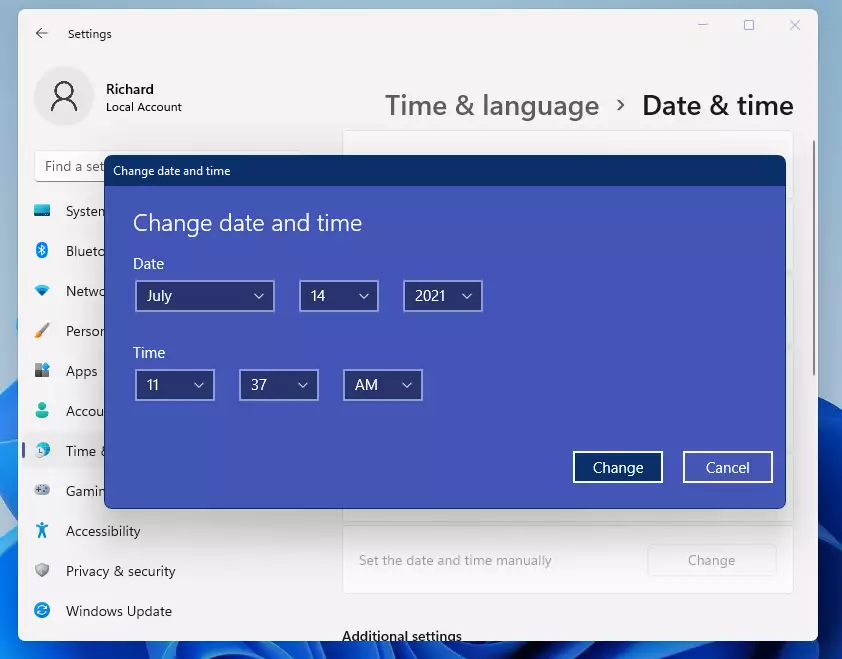
When you’re done, click Change to save your new date and time.
Your computer’s clock, shown at the bottom right corner of the screen, will now display the correct date and time.

Summary
Keeping your Windows 11 date and time correct is important for accurate appointments and timely updates. Your computer’s clock will show the right time and automatically adjusts for daylight saving time. You can also set it manually if needed by adjusting the automatic settings in the Date & Time settings page.
- Your computer’s clock shows the right time for appointments, reminders, and updates
- It automatically adjusts for daylight saving time so you don’t have to change it yourself
- You can set time manually if you don’t have internet or if automatic updates don’t work
- Having the correct time helps your PC work better and avoid errors
Remember to check your settings and sync your clock regularly. By following these steps, you’ll ensure your Windows 11 PC always has the right time.
For more Windows 11 tips, check out the official Microsoft support website.
How do I manually set date and time in 🪟 Windows 11?
Select Start > Settings > Time & language > Date & time. To set the date and time automatically, make sure the option Set time automatically is turned On. To set the date and time manually, Make sure the toggle Set time automatically is turned Off.
Was this guide helpful?

About the Author
Richard
Tech Writer, IT Professional
Richard, a writer for Geek Rewind, is a tech enthusiast who loves breaking down complex IT topics into simple, easy-to-understand ideas. With years of hands-on experience in system administration and enterprise IT operations, he’s developed a knack for offering practical tips and solutions. Richard aims to make technology more accessible and actionable. He's deeply committed to the Geek Rewind community, always ready to answer questions and engage in discussions.




No comments yet — be the first to share your thoughts!