
This article explains how to change the download location in the Microsoft Teams chat list.
Microsoft Teams is a collaboration platform developed by Microsoft that integrates chat, video meetings, file storage, and application integration.
The free version is installed on Windows with its icon on the Taskbar.
There are many settings one can enable in the Microsoft Teams app. You can sync contacts with Teams, connect to Google Calendar, link your mobile device, turn message preview on or off, manage teams notifications during calls, set default speakers, set default microphone, enable high fidelity sound, change mic sensitivity, set default camera, hide message preview in chat list, and more.
By default, Microsoft Teams downloads all files to the Downloads folder in your home directory. A new update lets you set the default location to a different folder or drive on your computer.
Change download location in Teams
As mentioned, users can change the default download location in the Microsoft Teams app.
Here’s how to do it.
First, launch the Microsoft Teams app by clicking the Start menu and selecting it on the All Apps list.

You can also launch the app from the Taskbar or Taskbar overflow.

In the full Teams window, click the Settings and more ( …) button next to your profile picture and select Settings from the menu.

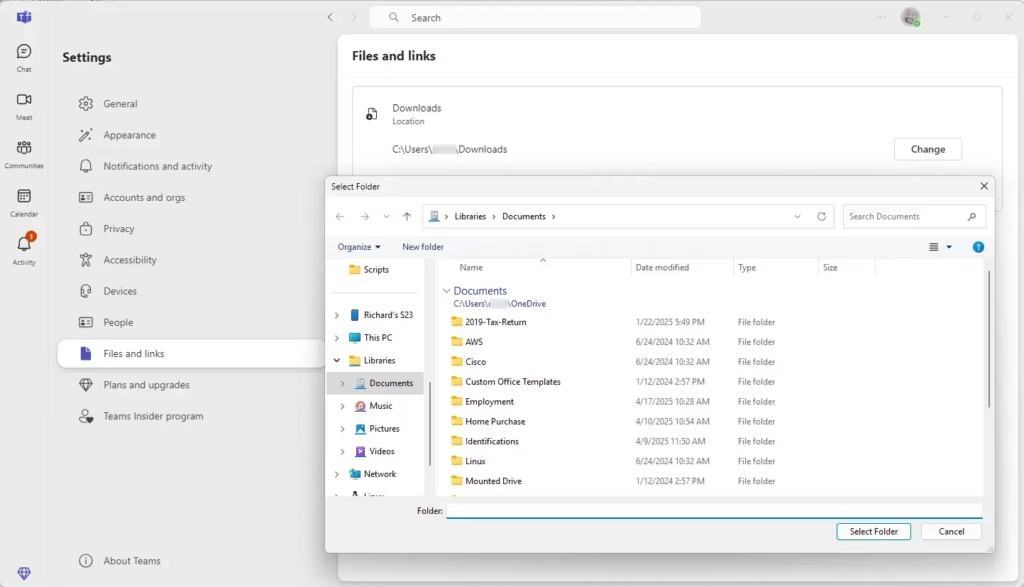
Next, click the Files and links tab on the left of the Settings page. On the right, click the “Change” button under Downloads to choose the default download location.

Browse and select a folder in the new location.
That should do it!
Conclusion:
- Changing the download location in Microsoft Teams helps you organize your files better.
- The process is straightforward and can be completed in just a few steps.
- This feature is handy if you prefer to save files to a specific drive or folder.
- Keeping your downloads organized can improve your productivity and workflow.
- Remember to periodically check your chosen download folder for any necessary file management.


Leave a Reply