Every Windows 11 Recovery Mode Command Prompt Command You Need

WinRE (the Windows Recovery Environment) is a built-in repair tool that opens outside of your normal desktop so you can fix a PC that won’t start. The Recovery Mode Command Prompt lets you run text-based commands to scan your hard drive, repair startup files, and rescue your data when Windows 11 fails to load.
Using these commands stops you from panicking or paying for expensive repairs when a quick fix brings your system back to life.
Every Windows 11 recovery mode command prompt command you need includes the System File Checker and Deployment Image Servicing and Management tools to repair broken system files. Access the Command Prompt by navigating to Troubleshoot, Advanced options, and Command Prompt in the Windows Recovery Environment, then run sfc /scannow or DISM /Image:📁C:\
What Is the Windows Recovery Environment and How Do You Open It?
The Windows Recovery Environment is a built-in troubleshooting screen that runs separately from your normal operating system to help you fix computer startup problems. You can open it from inside Windows 11 by opening Settings, going to System, and choosing Recovery. Alternatively, you can turn your computer on and off three times during startup to force the automatic repair screen to appear.
Here are a few ways to open it:
- From inside Windows 11 (if your PC turns on): Click the Start button , open your Settings, go to System, and then click Recovery. Next to Advanced startup, click the Restart now button. Your computer will restart into the recovery options screen.
- Using the power button trick (if your PC will not boot): Turn on your computer. As soon as you see the logo or the loading dots, press and hold the physical power button for about 10 seconds to force a hard shutdown. Turn the computer back on and repeat this process two to three times. On the next startup, Windows will notice the problem and load the Automatic Repair screen, where you can open advanced options.
- Using installation media: If your computer is completely broken, you can boot your PC from a Windows 11 USB installation drive, click Next on the first setup screen, and then click Repair your computer in the bottom-left corner.
Once you reach the blue recovery screen, go to Troubleshoot, then Advanced options, and click on Command Prompt. A black window with white text will open. This is your command line workspace.
Essential 🪟 Windows 11 Recovery Mode Command Prompt Commands
When you open the Command Prompt in recovery mode, your computer might use a temporary drive letter for your main operating system. Recovery mode often uses D: for your main Windows drive instead of the usual C: drive. Keep this in mind when you run commands.

1Run SFC to Repair Windows System Files
Run SFC (System File Checker) to scan your system files for damage, missing pieces, or modifications. If the tool finds a broken file, it replaces it with a healthy backup from your computer's hidden storage to help your PC boot properly again.
Type the following command and press Enter:
sfc /scannow /offbootdir=C:\ /offwindir=C:\windows2Run DISM to Repair Windows System Images
Run DISM (Deployment Image Servicing and Management, a tool that repairs core system files) to fix the base system image when SFC cannot. This command downloads and replaces corrupted image files using clean recovery sources.
Type the following command and press Enter:
DISM /Image:C:\ /Cleanup-Image /RestoreHealthThis command checks the health of your Windows image on drive C: and repairs any damage it finds.
3Run CHKDSK to Repair File System and Bad Sectors
Running the Check Disk utility, or CHKDSK, in the Windows 11 recovery mode command prompt scans your hard drive or solid-state drive for bad sectors, fixes file errors, and saves readable data when crashes stem from storage corruption. This essential repair command helps resolve disk read errors that stop your computer from starting up.
Type the following command and press Enter:
chkdsk C: /f /rThe /f option tells the tool to fix any errors it finds. The /r option looks for bad sectors and saves readable information. This process can take a few minutes or a few hours depending on the size and speed of your drive.
4Run BOOTREC to Fix Boot Startup Failures
Running the boot repair utility tools in the Windows 11 recovery mode command prompt fixes startup failures when your computer turns on and shows a blue screen saying it cannot find a boot device. These specific bootrec commands rebuild your master boot record, partition boot sector, and boot configuration data.
Type the following commands one by one, and press Enter after each line:
bootrec /fixmbr
bootrec /fixboot
bootrec /scanos
bootrec /rebuildbcd
These commands repair the Master Boot Record, write a new boot sector to your system drive, scan your drives for installed operating systems, and rebuild the boot database from scratch.
5Manage Disks and Partitions Using DISKPART
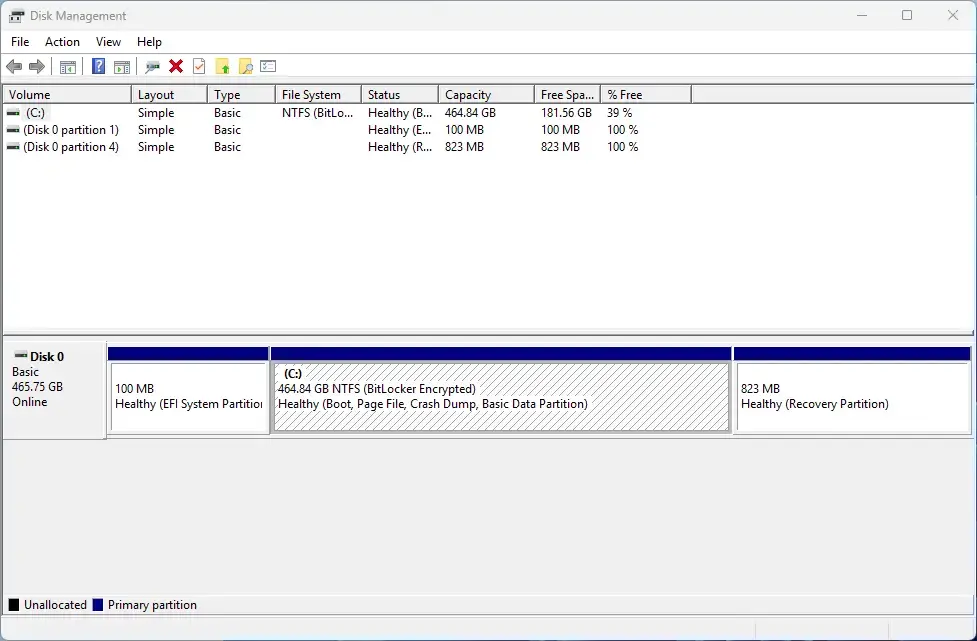
Using the DISKPART tool inside the Windows 11 recovery mode command prompt lets you look at your drive partitions, clean a drive, or assign drive letters while fixing your PC. This command line utility gives you raw partition and drive controls directly inside the recovery environment.
To use DISKPART, type the following command and press Enter:
diskpartOnce the prompt changes to show you are inside Diskpart, you can type the following commands:
list disk
select disk 0
list volume
exit
These commands show all connected storage drives, select your primary hard disk, list all available volumes and their drive letters, and safely exit the disk tool.
Advanced Troubleshooting: Diagnosing Hardware and Recovering Files
Along with repairing system files and boot records, the recovery Command Prompt lets you run hardware tests and rescue your personal files before you try a factory reset or clean install.
Diagnosing Memory Problems with MDSCHED
Running the Windows Memory Diagnostic tool, or MDSCHED, helps check your computer hardware for bad RAM, which is a main cause of random computer crashes, unexpected restarts, and blue screen errors. You can launch this diagnostic tool during troubleshooting to test your memory modules for hardware defects.
Type the following command and press Enter:
mdsched.exeA window will pop up and ask if you want to restart your computer and check for problems now or the next time you start your computer. Choose the restart option to let Windows test your physical memory for hardware problems.
Rescuing Personal Files Using XCOPY and Notepad
Rescuing personal files using Notepad and copy commands in the Windows 11 recovery mode command prompt lets you back up your important documents, photos, and files to an external USB drive if your computer cannot be fixed. This method gives you a reliable way to save your data before you reinstall Windows.
First, plug in an external USB drive. Find out its assigned drive letter by typing notepad and pressing Enter. A simple Notepad window will open. Click File Open, change the view to "All Files," and look at "This PC" to see the drive letter for your USB flash drive, such as E: or F:. Close Notepad.
Next, use the copy command to back up your user folder. For example, type:
xcopy C:\Users\USERNAME\Documents E:\BackupDocuments /E /I /HAlternative Recovery Methods When Commands Fail
Choosing alternative recovery methods when command prompt tools fail gives you options like using the Reset this PC feature to fix severe system damage in Windows 11. If your system still does not work after running repair commands, you can return to the Troubleshoot menu to reinstall core files or safely factory reset your device.
Reset this PC: Go back to the Troubleshoot menu in the Windows Recovery Environment and select "Reset this PC." You can choose to keep your personal files while wiping and reinstalling the core Windows system files.
Clean Installation: If your recovery partition is completely broken, use another working computer to download the official Windows 11 installation media creation tool, put it on a blank USB flash drive, and perform a completely clean installation of Windows 11.
Summary
If this didn't work
If startup repairs fail entirely, try using the Reset this PC feature or perform a clean installation from a USB drive.
Was this guide helpful?

About the Author
Richard
Tech Writer, IT Professional
Richard is a writer at Geek Rewind who turns complex IT tasks into clear, step-by-step guides. He draws on years of hands-on experience in system administration and enterprise IT operations, focusing on Windows, Linux and WordPress: the problems people actually run into, and the fixes that work. His server and WordPress guides come from systems he runs himself. Richard builds and maintains the platform behind Geek Rewind, from its Ubuntu servers and Nginx configuration to its custom WordPress plugins. Many new tutorials start with readers' questions, and he's always glad to answer them in the comments.
No comments yet — be the first to share your thoughts!