What to Do When Windows 11 Prompts for BitLocker Recovery After Every Reboot


A BitLocker recovery loop on Windows 11 forces you to enter a 48-digit recovery key every time your computer starts. BitLocker is the built-in drive encryption tool. It scrambles your files so nobody can read them if your PC or drive is stolen.
The loop usually starts after a hardware change, a BIOS or UEFI update, or a change to the boot files. Any of these can confuse the Trusted Platform Module (TPM), the security chip on your motherboard. Windows then thinks someone is tampering with the system and locks the drive on every boot as a precaution.
You can usually break the loop by suspending BitLocker protection, clearing the TPM, turning off Fast Startup, or fixing the startup order and external devices. Updating the firmware, or reverting a recent firmware or Secure Boot change, helps when that change caused the loop. Find your recovery key first, because several of these fixes can bring the blue recovery screen back for one more boot.
When Windows 11 asks for a BitLocker recovery key after every reboot, the Trusted Platform Module (TPM) has detected a change in your hardware, BIOS settings, or startup files and is locking the drive as a precaution.
What Causes 🪟 Windows 11 to Ask for a Recovery Key Repeatedly?
Windows 11 asks for the BitLocker recovery key repeatedly when the TPM (Trusted Platform Module, a hardware chip that secures your PC) sees a change in your hardware, startup files, or BIOS settings. The alarm is usually false. The system treats the change as an attempt to get at your encrypted drive, and it does so on every start until the stored measurements match again.
Each time the computer powers on, the TPM checks the hardware and startup files against values it saved earlier. If they match, Windows starts normally. If they don’t, BitLocker protection kicks in. These are the common causes:
- BIOS or UEFI Updates: Updating your computer’s main motherboard software changes the startup signature, which makes BitLocker think a different computer is starting.
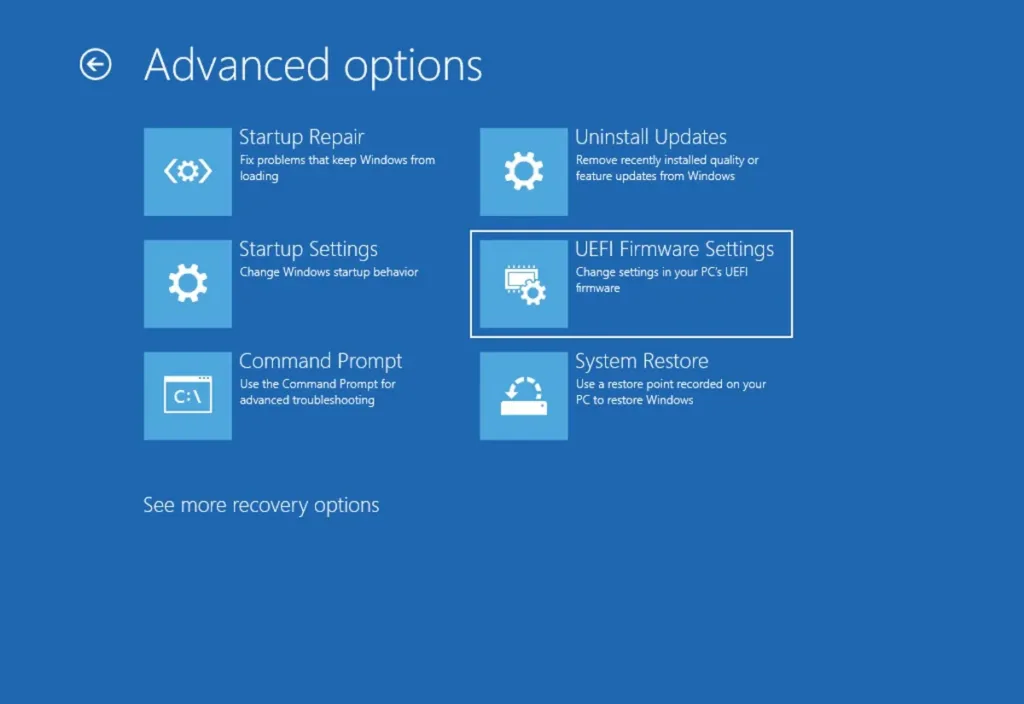
BIOS / UEFI - Hardware Changes: Adding a new solid-state drive (SSD), installing more memory (RAM), or plugging in certain external devices can change system values.
- Secure Boot Settings: Changing Secure Boot or virtualization settings in the BIOS menu can break the chain of trust that the TPM relies on.
- Pending System Updates: Interrupted Windows updates or driver installations can leave the system in an unstable state and force a security check.
How to Find Your BitLocker Recovery Key
This 48-digit number is required to unlock the drive before you can fix the loop.
The recovery screen shows a key ID, which is the first few characters of an identifier. When you look up your keys, match that ID to the right entry. Many accounts hold more than one key, and only the matching one will work.
You can usually find your BitLocker recovery key in one of these places:
- Your Microsoft Account: On a phone or another computer, open a web browser and go to the Microsoft account recovery page (typically microsoft.com/recoverykey). Sign in with the same email address you use on your Windows 11 computer. Your key will be listed there.
- A Printed Paper Copy: When you or someone else first set up the computer, the recovery key may have been printed and stored somewhere safe.
- A USB Flash Drive: If you saved the key to a USB drive during setup, plug it into another computer and open the text file that holds the code.
- Your Work or School Account: If an office or school manages your computer, the IT staff may hold the key in their system. Contact them and give them the key ID from the recovery screen.
Step-by-Step Fixes for the BitLocker Startup Loop
Once you have the 48-digit recovery key written down or saved somewhere safe, you can work through the fixes below. Try them in order, and restart once after each to see whether the prompt is gone before moving on.
Method 1Enter the Recovery Key and Suspend BitLocker Temporarily
Suspending BitLocker resets the link between your encrypted drive and the motherboard's TPM. While protection is suspended, Windows stores the key in the clear on the drive, so the next boot is not checked against the old measurements. You enter your recovery key at the blue screen, open Command Prompt as an administrator, and suspend protection. When Windows starts cleanly, you turn protection back on.
- Type your 48-digit BitLocker recovery key on the blue screen and press Enter. Windows 11 should now start to the sign-in screen or the desktop.
- Click Start, type cmd, right-click Command Prompt, and choose Run as administrator. Click Yes if User Account Control asks for permission. A black window with an administrator title should open.

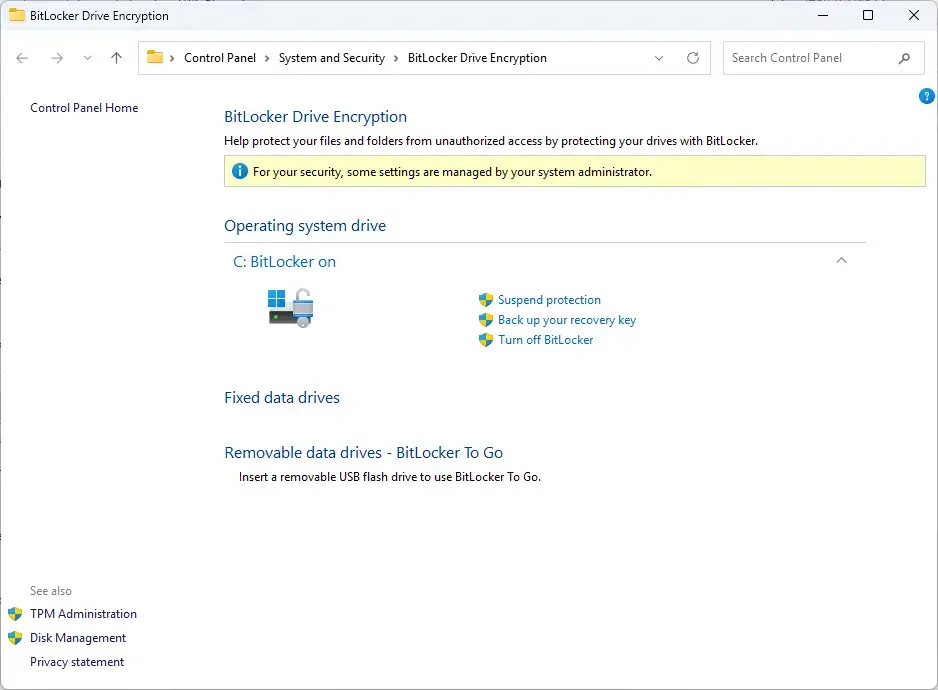
Command Prompt - In that window, run the BitLocker command that suspends protection on your Windows drive, then press Enter. If you would rather not type commands, you can do the same thing in Control Panel System and Security BitLocker Drive Encryption by clicking Suspend protection next to your Windows drive.
- Restart the computer. If it starts straight into Windows without the blue screen, the loop is broken.
- Open Control Panel System and Security BitLocker Drive Encryption and click Resume protection if the drive still shows as suspended. Restart once more to confirm the prompt does not return.
On Windows 11 Home, the full BitLocker panel may not be available. Home uses Device encryption instead, under Settings Privacy & security Device encryption The recovery key and TPM behavior are the same, but you have fewer controls.
If the prompt returns after you resume protection, the TPM is probably holding bad data. The next method clears it.
Clearing the TPM in your BIOS fixes persistent recovery loops by wiping the stored security data on the chip, so Windows can set up a fresh link. To do it, restart the computer, enter the BIOS or UEFI settings menu with a key such as F2 or Del, find the security settings, and select the option to clear the TPM.
Suspend BitLocker first if you can, as in the previous method. Clearing the TPM removes the keys it holds, and without a suspended state or your recovery key the drive stays locked.
- Restart your computer and tap the correct key (such as F2, F12, Del, or Esc, depending on your computer brand) to open the BIOS or UEFI settings menu. The brand name usually flashes on screen at startup and often shows the key to press.
- Look for a tab named Security, Advanced, or Trusted Computing. Menu names differ between manufacturers.
- Find the setting labeled TPM State, Security Device Support, or Intel PTT / AMD fTPM.
- Select Clear TPM or Reset TPM, and confirm if asked. This clears saved security keys, which is why having your BitLocker recovery key ready first is so important.
- Save your changes and exit the BIOS, usually by pressing F10.
- Let the computer restart into Windows 11, and enter your recovery key one last time when prompted. Windows should then create a new link between the drive and the TPM, which stops future loops.
- After you sign in, open Control Panel System and Security BitLocker Drive Encryption and check the drive status. If protection is off or suspended, click Resume protection or turn BitLocker back on.
Method 3: Disable Fast Startup in Windows 11
Fast Startup makes Windows save part of the system state to disk when you shut down, instead of doing a full shutdown. That can confuse BitLocker and trigger false recovery prompts. You turn it off in the classic Control Panel under Power Options. You need administrator rights.
- Click the Start button, type Control Panel, and open the classic Control Panel app.
- Click Hardware and Sound, then select Power Options.
- On the left side of the window, click Choose what the power buttons do.
- Click the blue text near the top that says Change settings that are currently unavailable. This needs administrator privileges. The options at the bottom should now stop being greyed out.
- Look at the bottom of the window under Shutdown settings. Uncheck the box next to Turn on fast startup (recommended).
- Click the Save changes button at the bottom.
If the Fast Startup box is missing, hibernation may be turned off on your PC, which also removes the option. In that case there is nothing to disable. To undo this change, repeat the steps and tick the box again. A restart is not required, but do a full restart afterward to test.
Unique Expert Tips: Undocumented Causes and Workarounds
Most guides stop at a simple restart or turning BitLocker off and on. Everyday setups often have deeper causes behind continuous recovery prompts. These two tips help with stubborn loops:
The External Dock and USB Storage Trap
Leaving USB flash drives, external hard drives, or multi-port docking stations plugged in during a restart can trigger recovery prompts if the BIOS tries to boot from them. Unplug all external storage and fix the boot order so the PC always starts from the internal encrypted drive.
If the BIOS boot order puts USB storage ahead of the internal drive, or a connected dock changes the hardware setup during startup, BitLocker assumes someone is trying to bypass system security.
- Shut down the PC and unplug all non-essential USB drives, memory cards, and docking stations.
- Start the PC and open the BIOS or UEFI menu with the same key you used earlier.
- Find the boot order setting, often under a tab named Boot, and move your internal drive (often listed as Windows Boot Manager) to the top.
- Save and exit, then let Windows start. Once it starts successfully, plug your accessories back in.
Checking Registry Integrity for Auto-Unlock Failures
When Windows can't talk properly to your encrypted drive settings, it may keep asking for the key. You can check the drive status in the BitLocker control panel and make sure the drive unlocks automatically without asking for the recovery key. That is the check in this section.
- Click the Start button, type Control Panel, and open it.
- Go to System and Security and click BitLocker Drive Encryption.
- Look at your operating system drive. If it says protection is temporarily suspended, click Resume protection.
- If the status is normal but the loop continues, turn BitLocker off entirely using the Command Prompt steps shown earlier. Wait ten minutes, and turn it back on to force a clean encryption setup. Decryption can take longer on a large drive, so check that the status shows BitLocker off before you turn it back on.
Preventing Future BitLocker Loops
You can prevent most recovery loops by keeping your 48-digit recovery key in a secure place and pausing encryption before big hardware or firmware changes. That way you can still get into your computer if the motherboard security state changes unexpectedly.
- Back Up Your Key Constantly: After any major change to your system, make sure your 48-digit recovery key is saved in your Microsoft account or printed out, and that you know where it is.
- Pause BitLocker Before Updating BIOS: If your computer maker sends a notice to update the BIOS or firmware, suspend BitLocker before starting the update. Turn protection back on only after the update finishes and the computer has restarted successfully once.
- Avoid Random Hardware Tweaks: Don't swap internal parts unless you need to, and always suspend drive encryption before installing a new hard drive or memory sticks.
Summary
To fix the Windows 11 BitLocker recovery loop, find your backup key, suspend encryption, clear the TPM, turn off Fast Startup, and remove any conflicting USB devices. Work through these in order and test with a restart after each. Together they restore normal startup and stop the blue recovery screen from returning.
Was this guide helpful?

About the Author
Richard
Tech Writer, IT Professional
Richard is a writer at Geek Rewind who turns complex IT tasks into clear, step-by-step guides. He draws on years of hands-on experience in system administration and enterprise IT operations, focusing on Windows, Linux and WordPress: the problems people actually run into, and the fixes that work. His server and WordPress guides come from systems he runs himself. Richard builds and maintains the platform behind Geek Rewind, from its Ubuntu servers and Nginx configuration to its custom WordPress plugins. Many new tutorials start with readers' questions, and he's always glad to answer them in the comments.




No comments yet — be the first to share your thoughts!