What to Do When Windows 11 Fails to Boot After an Update

- 42 steps
- Includes a restart or sign-out
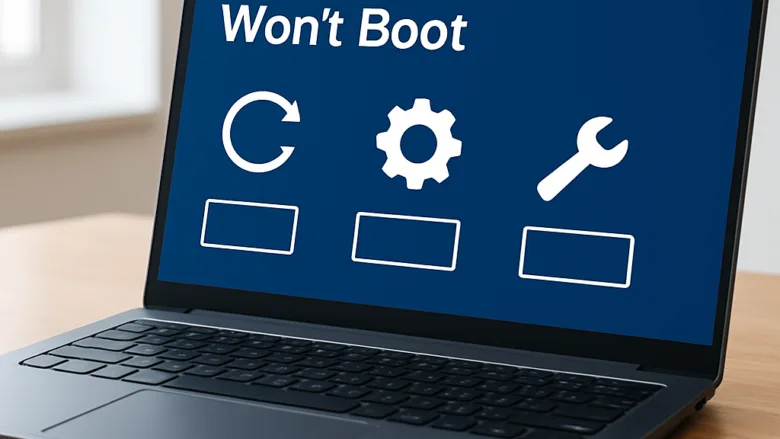
When Windows 11 fails to boot after an update, the PC gets stuck on a black screen, a blue screen, or a spinning loading wheel instead of reaching your desktop. This usually happens when a newly installed patch conflicts with your hardware, a driver, or your existing system files.
You can usually fix it with the recovery tools built into Windows. They let you remove the bad update or roll the system back, and they skip the startup loop. Work through the steps below in order, starting with the simplest. Most of them leave your personal files alone.
If Windows 11 fails to boot after an update, first unplug all external USB devices and try a normal restart. If it still stalls, force the PC into the Recovery Environment (WinRE) by interrupting startup three times with the power button. Then choose Advanced options and Uninstall Updates to remove the latest patch, or use System Restore to roll back. Your personal files stay in place.
Step 1Disconnect All External USB Devices
Unplugging all external USB devices is the quickest fix to try. A faulty mouse, printer, or external drive can freeze the system during startup, and removing these accessories lets the computer get past the hardware check and start normally.
When Windows restarts after an update, it checks all connected hardware. If an external hard drive, thumb drive, printer, or game controller has a glitch, the computer might freeze while trying to read it. This is more likely right after an update, because new drivers load for the first time.
How to disconnect your hardware:
- Shut down the computer completely. Press and hold the physical power button on your tower or laptop for about ten seconds until the lights go out.
- Unplug every USB cable. This includes external hard drives, flash drives, printers, webcams, and extra accessories. Leave only your monitor, keyboard, and mouse connected.
- Remove any memory cards or SD cards from their slots.
- Press the power button once to turn the computer back on, and wait to see whether it reaches the sign-in screen or desktop.
If the computer now boots to the normal desktop, one of your devices caused the problem. Plug the devices back in one at a time, restarting if needed, until the problem returns. The last device you connected is the culprit. Leave it unplugged and check the manufacturer’s site for an updated driver.
If nothing changes, leave the accessories unplugged for the rest of this guide and move on.
Step 2Enter the Windows Recovery Environment (WinRE)
The Windows Recovery Environment (WinRE) is a separate mini system that holds the troubleshooting tools you need when the normal desktop will not load. Since you cannot reach it from Settings, you force your PC into it by interrupting startup with the power button.
Windows is designed to open WinRE on its own after it fails to start a few times in a row. You are simply causing those failures on purpose.
How to open the Recovery Environment:
- Press and hold the physical power button for ten seconds to turn the computer completely off.
- Press the power button once to turn it back on.
- As soon as you see the computer brand logo or the little spinning dots for Windows, press and hold the power button again for ten seconds to force it off.
- Turn the computer on again.
- Repeat the cycle of turning it on and forcing it off after a few seconds. Do this two to three times in total.
- On the next start, let the computer run without interrupting it.
On the third or fourth start, Windows recognizes that something is wrong. It will open a blue screen titled Automatic Repair or Choose an option. If you see Automatic Repair, click Advanced options to get to the full menu.
Once you see the blue screen, you are in the recovery environment. Leave the computer on this screen and move on to the next step. You will use this same method to get back here for each fix below.
If the PC never shows the blue screen and always boots into the same error, you may need a Windows 11 USB installation drive made on another computer. You can boot from it and choose Repair your computer to reach the same tools.
Step 3Uninstall the Latest Windows Update

Uninstalling the latest update from the recovery menu is the most direct fix when a bad installation caused the failure. It removes the recent update without touching your personal files, photos, or installed apps.
Windows offers two choices. A quality update is a smaller monthly bug-fix and security patch. A feature update is a major yearly upgrade. For most startup failures, removing the latest quality update solves the problem right away.
How to remove a recent update:
- On the main blue recovery screen, click Troubleshoot.
- Click Advanced options.
- Click Uninstall Updates. You should now see two choices: Uninstall latest quality update and Uninstall latest feature update.
- Click Uninstall latest quality update first, as this is usually the culprit.
- If asked, pick your user account and enter your password. Then follow the on-screen instructions and confirm your choice when the uninstall button appears.
- Wait while the computer removes the update. It will then restart.
If the computer still does not boot, return to the same screen and choose Uninstall latest feature update instead.
Two things to know. Windows only keeps the files needed to remove a feature update for a limited time, about ten days by default, so on an older upgrade this option may fail or have nothing to remove. Also, once the update is gone, Windows may try to install it again later. After the PC is stable, you can pause updates in Settings Windows Update to give yourself time to check for a fixed version.
Step 4Use Startup Repair to Fix Broken System Files
Startup Repair scans for broken or missing boot files left behind by a failed update and tries to fix them automatically. You run it from the blue recovery menu, and you do not have to type any commands.
How to run Startup Repair:
- Turn the computer on and interrupt it with the power button method until you reach the blue recovery menu again.
- Click Troubleshoot.
- Click Advanced options.
- Click Startup Repair.
- Select your user account. Enter the account password if asked. A Windows Hello PIN usually does not work here, so use the full password.
Windows will start scanning, and a screen will say it is diagnosing your PC. This can take a few minutes. Let the computer work and do not turn it off.
If Startup Repair finds a problem with your boot files, it fixes it and restarts the computer. If it says it could not repair your PC, do not worry. That is common, and you have more options to try below. Click Advanced options to go back to the menu.
Step 5Use System Restore to Go Back in Time
System Restore rolls Windows back to the state it was in before the bad update broke your boot sequence. It applies a saved snapshot, called a restore point, and it does not touch your personal files.
System Restore will not delete your personal files, pictures, or documents. It only changes system settings and removes apps, drivers, and updates installed after that snapshot was taken.
System Restore only helps if restore points exist. System Protection is not always turned on by default in Windows 11. If the list is empty, skip to the next section.
How to use System Restore from the recovery menu:
- Open the blue recovery menu by restarting and interrupting the computer.
- Click Troubleshoot.
- Click Advanced options.
- Click System Restore.
- Choose your user account and type your password if requested.
A window will appear with a list of restore points. Look for a date and time right before the computer installed the failing update.
Click that restore point to select it, and then click Next.
Click Finish to confirm your choice.
A warning will tell you that System Restore cannot be interrupted once it starts. Click Yes to proceed. The computer will restart and apply the older, working settings. This can take several minutes, so leave it alone until it finishes.
Step 6Repair Corrupted System Files Using Command Prompt
Command Prompt lets you scan and replace damaged system files by hand when the automatic repair tools fail. A couple of text commands tell Windows to check its important system files and swap broken ones for clean copies.
Type each command exactly as shown. Command Prompt does not forgive typos, and a missing space can make the command fail.
How to run system scans:
- Go to the blue recovery menu and click Troubleshoot.
- Click Advanced options.
- Click Command Prompt. If asked, choose your account and enter its password. A black window with text will open.
- Type the following command carefully, making sure to include the space before the slash:
sfc /scannow - Press Enter.
Wait patiently while the computer scans its files. This can take ten to fifteen minutes, and the progress percentage may sit still for a while. That is normal.
When the scan finishes, read the message on the screen. If it says it found corrupt files and repaired them, type the next command:
DISM /Online /Cleanup-Image /RestoreHealthPress Enter to run it.
Type exit and press Enter to close the black window.
Click Continue to exit the recovery menu and restart your computer normally.
Step 7Check and Fix Hard Drive Errors (Unique Expert Tip)
Checking the hard drive for errors can fix failed updates caused by bad sectors or data corruption. When a large update writes new data, drive errors can corrupt the boot sector. A scan can repair these faults and restore normal startup.
The check disk command runs from the recovery environment. It scans your storage drive for physical flaws and repairs file system errors that stop Windows from starting.
How to check your hard drive for errors:
- Open the blue recovery menu and select Troubleshoot.
- Click Advanced options.
- Click Command Prompt to open the black text window.

Command Prompt - Type the following command to check your main Windows drive:
chkdsk C: /f /r. The letter C stands for the drive where Windows is installed. The /f option fixes errors, and the /r option locates bad sectors and recovers readable data. Inside the recovery environment, drive letters can differ from what you see in Windows, so if the command reports that the drive cannot be found, check which letter holds your Windows folder and use that one. - Press Enter.
The computer will begin scanning your storage drive. If it asks whether you want to force the volume to dismount, type Y for yes and press Enter.
Let the scan run completely. It can take anywhere from twenty minutes to a few hours, depending on the speed and size of the drive. Do not turn the computer off partway through. On a laptop, plug in the charger first.
When the scan finishes, type exit, press Enter, and then restart your PC.
Back up your files as soon as you can get into Windows, and consider replacing the drive.
Step 8Reset Your PC (The Last Resort)
Resetting your PC reinstalls fresh system files. It is the last resort when the computer still will not boot after everything else. You can choose an option that keeps your personal files while it replaces the broken system software and updates.
The Reset this PC tool reinstalls Windows 11. If you pick the right option, your personal files, photos, and downloaded documents stay in place. Your installed apps and custom settings are removed, so you will need to reinstall your programs afterward.
How to reset your computer and keep your files:
- Open the blue recovery menu by turning the computer on and off three times, as described earlier.
- Click Troubleshoot.
- Click Reset this PC.
- Click Keep my files. This removes your apps and settings but leaves your personal files untouched. Warning: never select Remove everything unless you want a completely blank computer and have a backup of your files.
- Choose how to reinstall Windows: Cloud download or Local reinstall. Choose Local reinstall if your internet is slow. Cloud download needs a working internet connection and downloads a fresh copy.
- Review what the reset will do, and then click Reset.
The screen may ask for your BitLocker recovery key before it continues. This happens on some PCs that use drive encryption. You can find the key by signing in to your Microsoft account on another device.
The computer will restart and spend the next twenty to sixty minutes installing a fresh copy of Windows 11. Do not turn it off during this time. When it finishes, the computer will boot to your desktop, and your personal files will be waiting in your folders.
Summary
A Windows 11 PC that fails to boot after an update can usually be fixed with a few steps. Unplug your USB devices, open the recovery tools, uninstall the bad update, and run Startup Repair. If those fail, use System Restore, run the system and disk checks, and reset the PC as a last resort. Start with the simplest fix and work down the list. Most startup loops can be resolved this way without paying for a repair service.
Have a question about this guide?
Answered by AI from this guide. Good questions may be added to this page — please don't include personal details.
Did this guide fix your problem?

About the Author
Richard
Tech Writer, IT Professional
Richard is a writer at Geek Rewind who turns complex IT tasks into clear, step-by-step guides. He draws on years of hands-on experience in system administration and enterprise IT operations, focusing on Windows, Linux and WordPress: the problems people actually run into, and the fixes that work. His server and WordPress guides come from systems he runs himself. Richard builds and maintains the platform behind Geek Rewind, from its Ubuntu servers and Nginx configuration to its custom WordPress plugins. Many new tutorials start with readers' questions, and he's always glad to answer them in the comments.
No comments yet — be the first to share your thoughts!