How to Clean Boot Windows 11

A clean boot in Windows 11 starts your PC with only the basic software and drivers it needs to run. This process helps you find problems caused by other programs that start automatically when Windows loads.
By temporarily turning off extra startup programs and services, you can see if they are the reason your computer is acting up, like crashing or running slowly. This is helpful for pinpointing the exact software causing conflicts.
You would use a clean boot when you suspect a new app, perhaps a game released in 2023, is making your Windows 11 system unstable.
Perform a clean boot by disabling all non-Microsoft startup services and startup programs. Open System Configuration (msconfig), go to the Services tab, hide Microsoft services, click Disable all, then disable all startup items in Task Manager. Restart your PC to apply.
Why perform a clean boot?
A clean boot starts a Windows 11 PC without extra installed programs. This process clears the system, acting like a fresh start. Isolating startup programs and essential system services helps pinpoint the cause of system issues.
What happens when done?
Your computer restarts with only essential programs running after a clean boot in Windows 11, helping you find out if a background app is causing problems.
Step 1Disable Startup Apps
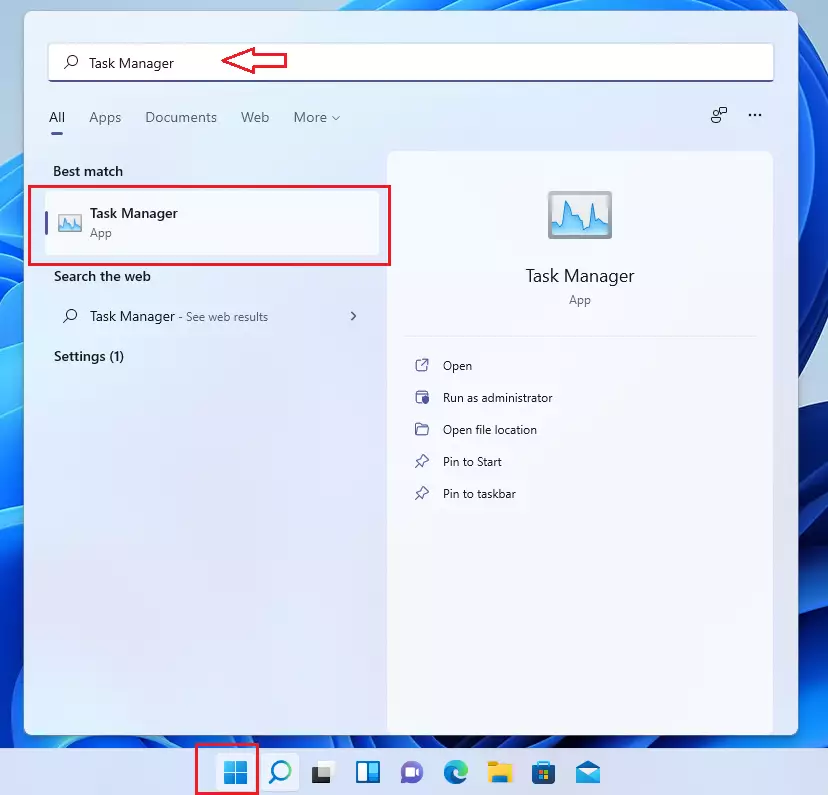
- Press Ctrl+Shift+Esc on your keyboard to open the Task Manager.
- If you see a small window, click More details.
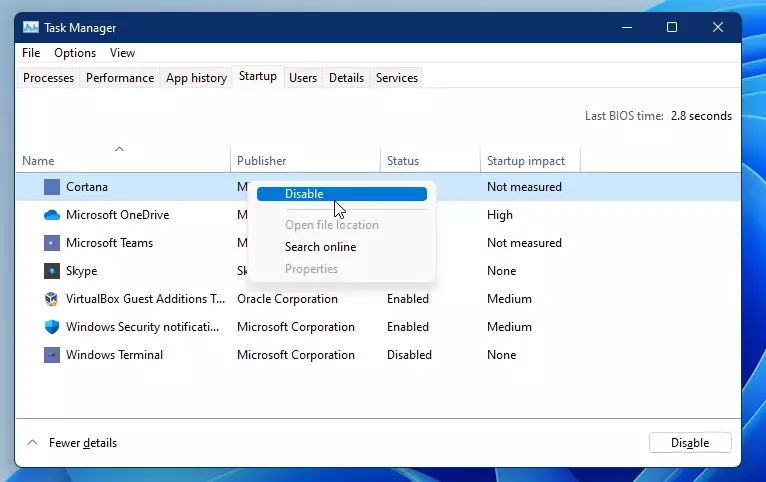
- Click on the Startup tab.
- For every item in the list, right-click it and select Disable.
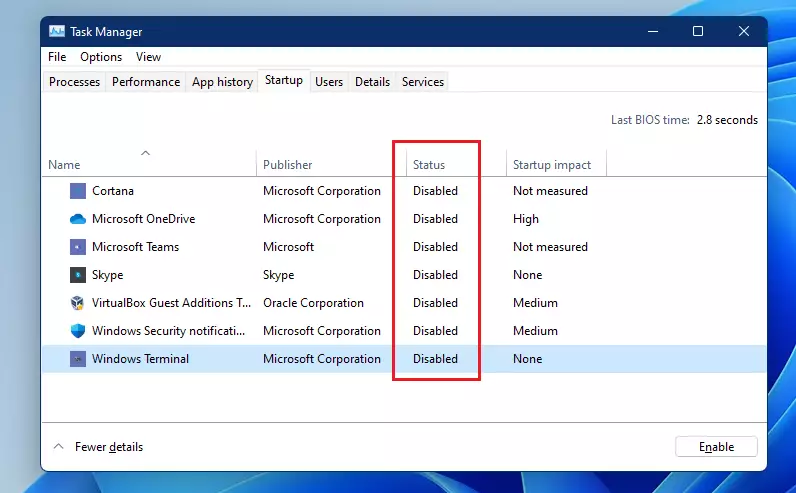
Close the Task Manager when you are finished.
Step 2Disable Background Services
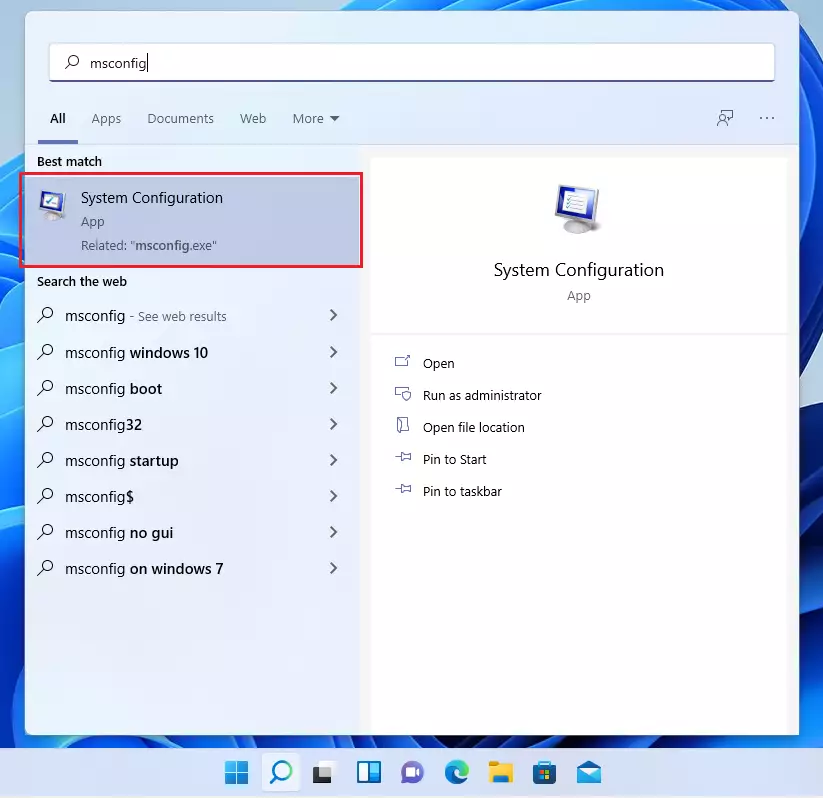
To begin a clean boot in Windows 11 and find out if a background program is causing issues, you need to disable startup services (background programs that start automatically with Windows). This process helps isolate problems by starting Windows with only essential services, making it easier to identify which app or service is misbehaving.- Click the Start button and type
msconfig. - Select System Configuration from the list.
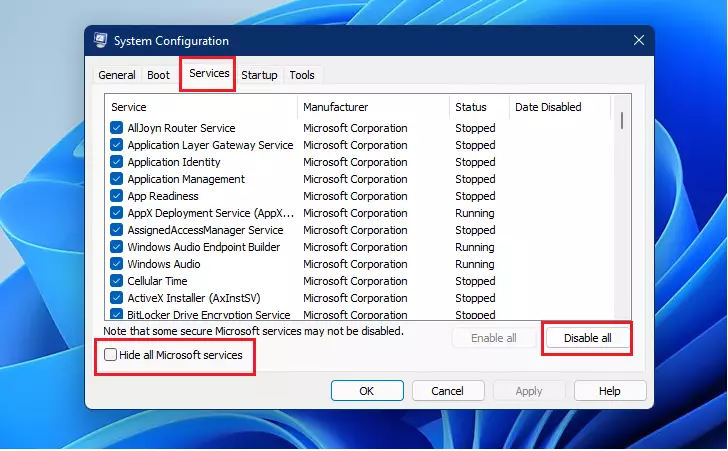
- Click on the Services tab.
- Check the box that says Hide all Microsoft services. This is very important so you do not turn off vital Windows features.
- Click the Disable all button.
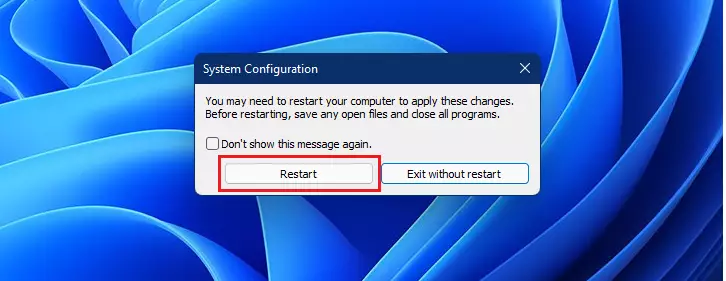
- Click OK and restart your computer.
How to Revert to Normal Boot
Reverting to a normal startup in Windows 11 after troubleshooting with a clean boot is important so all your programs and services run as usual. This normal startup process ensures your computer starts with all its usual features enabled, preventing unexpected issues with your daily software use.
- Open System Configuration (msconfig) again.
- On the General tab, select Normal startup.
- Go to the Services tab and uncheck Hide all Microsoft services.
- Click Enable all.
- Restart your computer to apply the changes.
Clean Boot vs. Safe Mode
| Feature | Clean Boot | Safe Mode |
|---|---|---|
| Purpose | Isolate software conflicts | Repair system corruption |
| Drivers | Loads all drivers | Loads minimal drivers |
| Customization | You choose what to disable | Automated limited environment |
Troubleshooting Methodology
To troubleshoot issues found during a clean boot, try testing services in halves. Restarting each time helps narrow down the exact program causing the problem.
Summary
A clean boot in Windows 11 is an effective method for finding out exactly which third-party apps or services are causing slowdowns or errors.
Is a clean boot the same as Safe Mode?
No, they are different. Safe Mode loads only the most basic drivers needed to run Windows, often for fixing deep system errors. A clean boot allows you to keep your normal drivers while disabling third-party startup programs, which is better for finding software conflicts.
Will a clean boot delete my personal files?
No, a clean boot will not delete any of your personal files, photos, or documents. It only temporarily changes how Windows starts by preventing certain background programs from launching automatically. Your data remains completely safe and untouched during this entire troubleshooting process.
What should I do if my computer won’t boot after these changes?
If your computer fails to start, you can access the Windows Recovery Environment. Restart your PC three times during the boot process to trigger it. From there, select Troubleshoot, then Advanced Options, and use Startup Repair or System Restore to revert your system to a working state.
Was this guide helpful?

About the Author
Richard
Tech Writer, IT Professional
Richard, a writer for Geek Rewind, is a tech enthusiast who loves breaking down complex IT topics into simple, easy-to-understand ideas. With years of hands-on experience in system administration and enterprise IT operations, he’s developed a knack for offering practical tips and solutions. Richard aims to make technology more accessible and actionable. He's deeply committed to the Geek Rewind community, always ready to answer questions and engage in discussions.


No comments yet — be the first to share your thoughts!