Why Does Windows 11 Device Usage Personalization Prompt Keep Reappearing

The Windows 11 device usage personalization prompt is a recurring setup screen that asks how you plan to use your computer: gaming, school, family, creative work, entertainment, or business. It keeps coming back because Windows 11 fails to save your answers, or because a recent system update reset your preferences.
Background system settings and user account glitches can stop Windows from remembering what you picked, so the prompt shows up again after every reboot. In most cases you can stop it by turning off tailored experiences and setup suggestions in the Settings app . This guide covers that fix first, then the deeper checks for when it doesn’t work.
Windows 11 Device Usage personalization prompt keeps reappearing because Windows fails to save your answers or a system update reset your preferences. To fix it, open Settings , go to Personalization Device usage, turn on the switches for how you actually use your PC, then restart your computer. If that doesn’t work, check Startup apps in Settings Apps Startup and disable any unfamiliar setup assistants.
Understanding the 🪟 Windows 11 Device Usage Feature
Device Usage is a setup screen that asks how you plan to use your PC. Microsoft uses your answers to suggest tips, apps, and features that fit your needs. It usually appears when you set up a new PC or after a major feature update. The choices are:
- Gaming
- Family
- Creative work
- School work
- Business
- Entertainment
You can pick one option or several. Windows then tailors its suggestions. If you choose gaming, you may see tips, apps, or settings related to Xbox features and performance. If you choose business, it may highlight productivity tools and cloud storage options. None of this changes how Windows works. It only changes which suggestions you see.
Normally you answer the prompt once and Windows saves your choice quietly in the background. The prompt returns when the settings file fails to update, or when your user profile has a glitch. Windows then thinks you never finished the setup, so it shows the prompt again every time you sign in.
How to Stop the Device Usage Prompt Through the Settings App
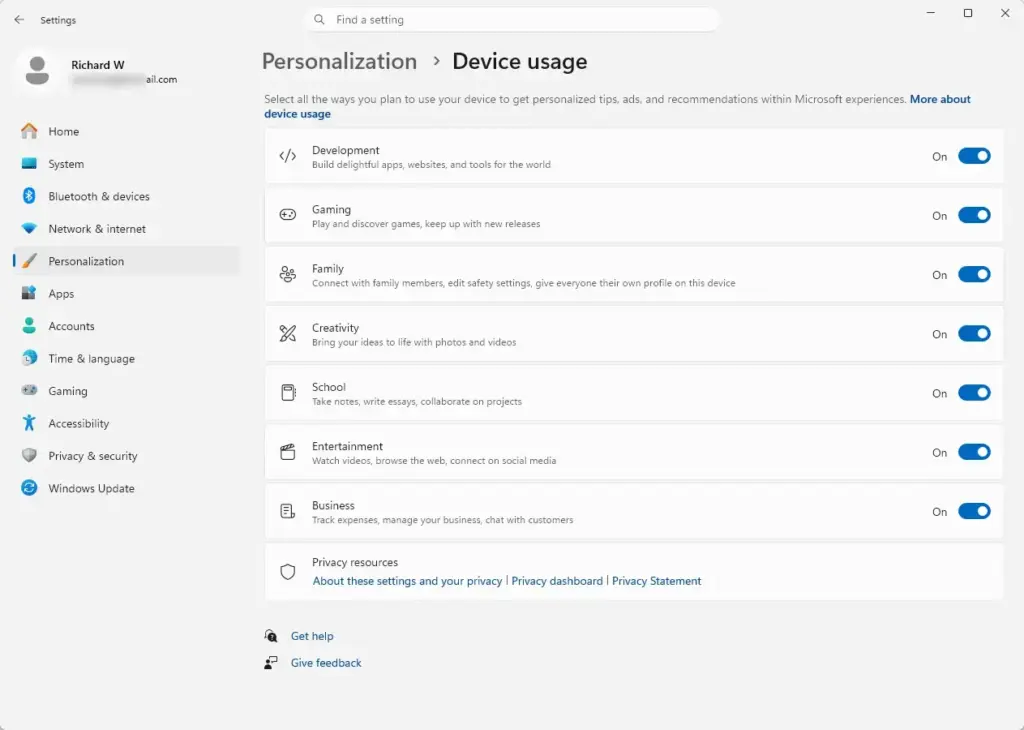
The first thing to try is setting your device usage preferences directly in the Settings app. Device usage lives under Personalization. The related tailored experiences switch lives under Privacy & security. Saving your choices in Settings tells Windows the setup is done, which often stops the pop-up at startup.
Note that the Device usage page only exists in Windows 11 version 22H2 and later. If you can't find it, check that Windows Update is current.
Check and update your device usage preferences with these steps:
- Click the Start button on your taskbar.
- Select the Settings app, which looks like a small gear. You can also press the Windows key + I to open it directly. The Settings window should now be open.

Settings - In the menu on the left, click Personalization. The personalization options appear on the right.
- Scroll down on the right and click Device usage. If you don't see it, type "Device usage" into the search bar at the top of the Settings window and pick the result.
- Look at the list of categories, such as Gaming, Family, and Business. Turn on the switches for the ways you really use your computer. If you'd rather not share this information, turn them all off.
- Close the Settings window, then restart your computer. Sign in and see whether the prompt stays away.
To undo this, go back to the same page and flip the switches to their previous positions.
Managing Startup Apps and Background Setup Prompts
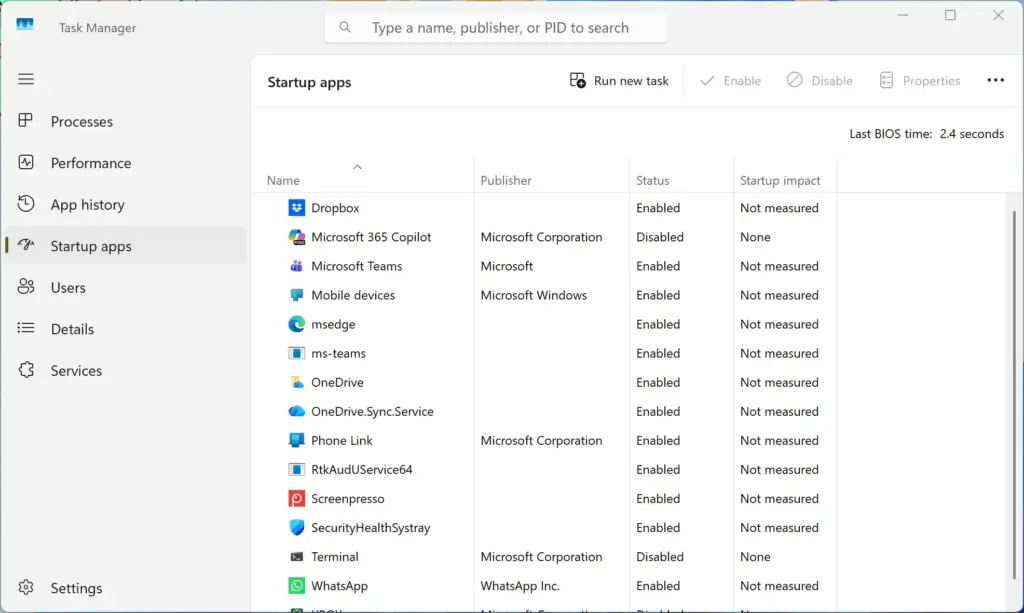
If changing the settings didn't help, look at what runs when you sign in. After some updates, Windows 11 runs a welcome or setup helper in the background. If that helper gets stuck in a loop, it triggers the prompt every time your user profile loads.
Check your startup apps to make sure nothing is interfering with a normal desktop boot:
- Press the Windows key + I to open the Settings app.
- Click Apps in the left-hand menu.
- Click Startup on the right. You should see a list of apps with an On/Off switch beside each.
- Review the list of programs that open automatically when you turn on your computer.
- Look for unfamiliar setup assistants or tools tied to your user account. Click the switch next to any suspect item so it reads Off. Don't disable anything you don't recognize without looking it up first, such as security software or drivers.
- Restart your computer and see whether the prompt returns.
If it makes no difference, turn the items back on the same way. Disabling a startup entry doesn't uninstall anything.
Checking User Account Permissions and Sign-In Issues
If Windows can't write changes to your user profile, whatever you pick in the prompt is lost the moment you sign out. A Microsoft account that needs re-verification can cause the same thing.
Make sure your account is healthy and that you are signed in with the right Microsoft account:
- Open the Settings app.
- Click Accounts on the left side.
- Check the top of the page. Your profile information should be correct, and there should be no warnings asking you to verify your identity or fix account errors.
- If you see a button such as Verify or Sign in again, click it and follow the on-screen steps to reconnect your Microsoft account.
- Restart your computer. When the device usage prompt appears, answer it one last time and check whether the answer sticks on the next restart.
If you sign in with a local account, there is nothing to verify here. Move on to the next section.
Unique Expert Tip: Adjusting Experience Settings and Notifications
Hidden tips and tailored recommendations can also drive these pop-ups. If your privacy settings stop Windows from saving your choices, the device usage screen keeps coming back. Turning off tailored experiences tells Windows to stop asking how you use your computer.
Turn off tailored experiences and personalized recommendations like this:
- Open the Settings app.
- Click Privacy & security on the left menu.
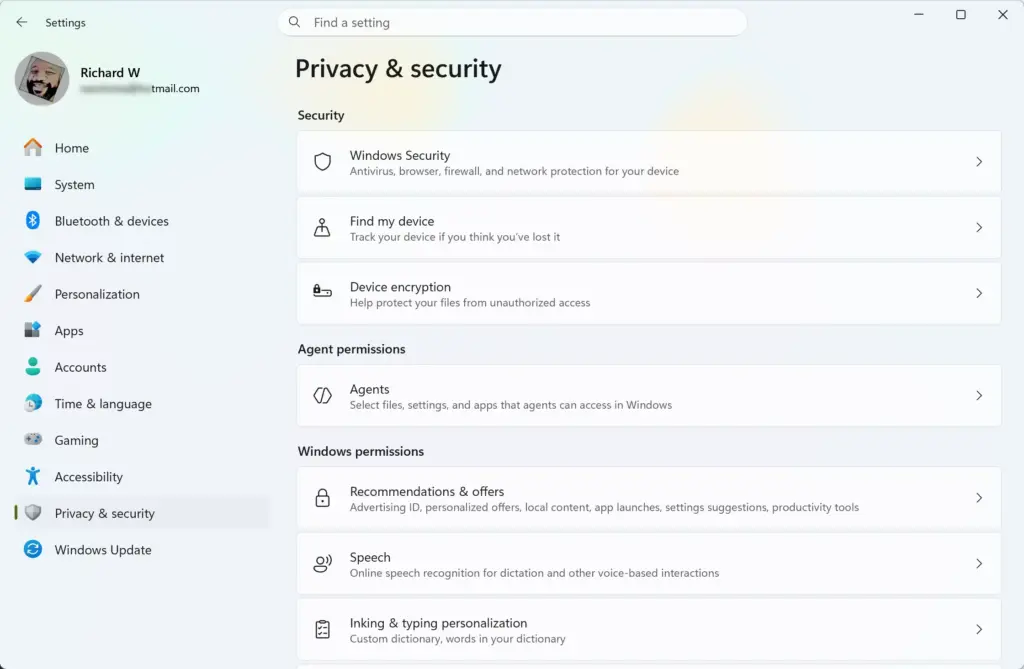
Settings › Privacy & security - Click Diagnostics & feedback.
- Find the Tailored experiences section. You may need to scroll down or expand it.
- Set the switch to Off. This stops Windows from using your diagnostic data to offer personalized tips and setup prompts.
- Go back to the main Privacy & security page and click General.
- Turn off options like "Let apps show me personalized ads by using my advertising ID" and "Show me suggested content in the Settings app".
- Open System Notifications and expand Additional settings. Clear the checkboxes for the Windows welcome experience and for suggestions on finishing device setup. The exact wording varies slightly between builds.
- Restart your computer. With personalization turned off, the repeating setup prompts often stop.
You can turn any of these back on later by returning to the same page. Some of the options on these pages differ slightly between Windows 11 builds, so skip any that you don't see.
Unique Expert Tip: Creating a Local User Account Test
If nothing so far has worked, test whether your user profile is damaged. When a profile is corrupted, Windows can't save your settings or preferences. A fresh test account shows whether the pop-up disappears on a clean profile.
Create a brand-new local user account to test:
- Open the Settings app.
- Click Accounts on the left menu.
- Click Other users or Family & other users, depending on your version of Windows 11.
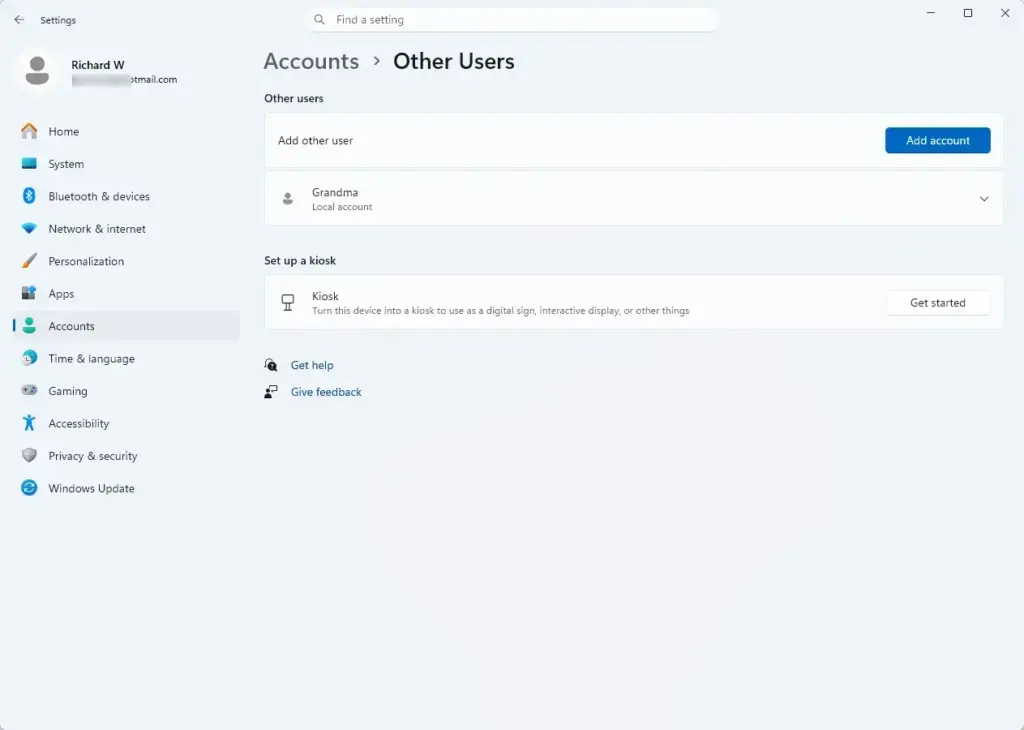
Settings › Accounts › Other users - Click the Add account button next to "Add other user". A Microsoft account sign-in window opens.
- Choose "I don't have this person's sign-in information", then select "Add a user without a Microsoft account". Some builds hide or change this option. If you don't see it, you may need to follow the on-screen prompts for a different route.
- Type a simple name for the account, such as TEST-USER. Create a password if you like. If you set a password, you may also be asked to fill in security questions.
- Save the changes. Then sign out of your current account: click the Start button, click your profile picture, and select Sign out.
- Sign in to the new TEST-USER account and see whether the device usage prompt appears. If it doesn't, your original profile is probably damaged. Moving your personal files to a new account should solve the problem for good.
When you're done testing, you can remove TEST-USER from Settings Accounts Other users
Summary
To stop the Windows 11 Device Usage prompt from returning after every restart or update, work through these fixes in order: update your personalization settings, check your startup apps, verify your Microsoft account, turn off tailored experiences, and test your profile with a new account. Together they cover the usual causes and should stop the pop-up for good.
Have a question about this guide?
Answered by AI from this guide. Good questions may be added to this page — please don't include personal details.
Did this guide fix your problem?

About the Author
Richard
Tech Writer, IT Professional
Richard is a writer at Geek Rewind who turns complex IT tasks into clear, step-by-step guides. He draws on years of hands-on experience in system administration and enterprise IT operations, focusing on Windows, Linux and WordPress: the problems people actually run into, and the fixes that work. His server and WordPress guides come from systems he runs himself. Richard builds and maintains the platform behind Geek Rewind, from its Ubuntu servers and Nginx configuration to its custom WordPress plugins. Many new tutorials start with readers' questions, and he's always glad to answer them in the comments.
No comments yet — be the first to share your thoughts!