How to Add a Hardware Device to a Windows 11 PC

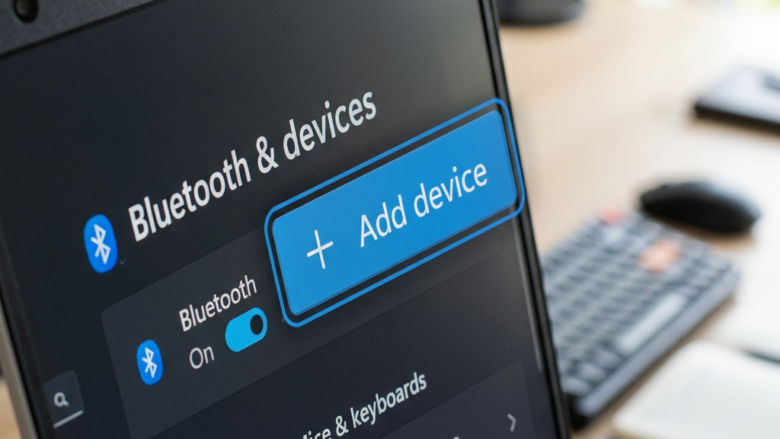
Adding a hardware device to a Windows 11 PC lets you connect physical gear like a printer, webcam, or mouse so your computer can use it. The setup takes under 10 minutes. It also installs the driver, which is the software that tells Windows how to use your new device.
Windows 11 usually detects new gear automatically when you plug it into a USB port or turn on Bluetooth . Sometimes you need to step in and add the device manually through the Settings app. This guide covers that manual route, plus the checks to make first so the search succeeds.
Open Settings , go to Bluetooth & devices, click Devices, then select Add device at the top of the page. Windows scans for nearby hardware and displays matches. Select your device from the list to install its driver and complete the connection.
Why Does Windows Need a Helping Hand?
Windows 11 sometimes needs help because it relies on drivers to talk to new devices. Without the right driver, the PC cannot see or use the hardware. The device does nothing when you plug it in or turn it on. Windows includes drivers for many common devices and can often download others through Windows Update , but not every device is covered.
Adding a device by hand is the right move in cases like these:
- The device is not seen at all when you plug it in or turn it on.
- You are connecting something that uses Bluetooth or another wireless method.
- It’s a new external device that Windows has not seen before.
The same steps help if a port seems to be missing or a device is not recognized. Wired devices rely on the Universal Serial Bus (USB) standard. If a wired device is not detected, try a different USB port, or plug it straight into the PC instead of through a hub, before you go further.
Windows may ask for administrator approval while it installs a driver. If you use a work PC, you may need an admin to approve it. The steps are the same on Windows 11 Home and Pro.
Step 1Make Sure Your New Device is Ready to Go
Make sure the hardware has working power. If it is a wireless or Bluetooth accessory, put it into pairing mode, usually by holding its connection button until a light flashes.
- Power it On: Make sure your new hardware is plugged in and turned on. Look for any lights that show it has power. If it runs on batteries, check that they are fresh.
- Pairing Mode (for Bluetooth/Wireless): If your device uses Bluetooth or wireless, you might need to put it in "pairing mode." This tells your computer it's ready to be found. Check your device's manual for how to do this. It often involves pressing a button for a few seconds. A flashing light is the usual sign that pairing mode is on. Many devices leave pairing mode after a minute or two, so start the search soon after.
- Keep it Close: For Bluetooth devices, make sure they are near your computer when you set them up. A weak signal can stop the connection.
Many laptops do, but some desktops do not. Without a Bluetooth adapter, the Bluetooth option will not appear in the steps below. A small USB Bluetooth adapter fixes that.
Step 2Accessing the 'Devices' Settings in 🪟 Windows 11
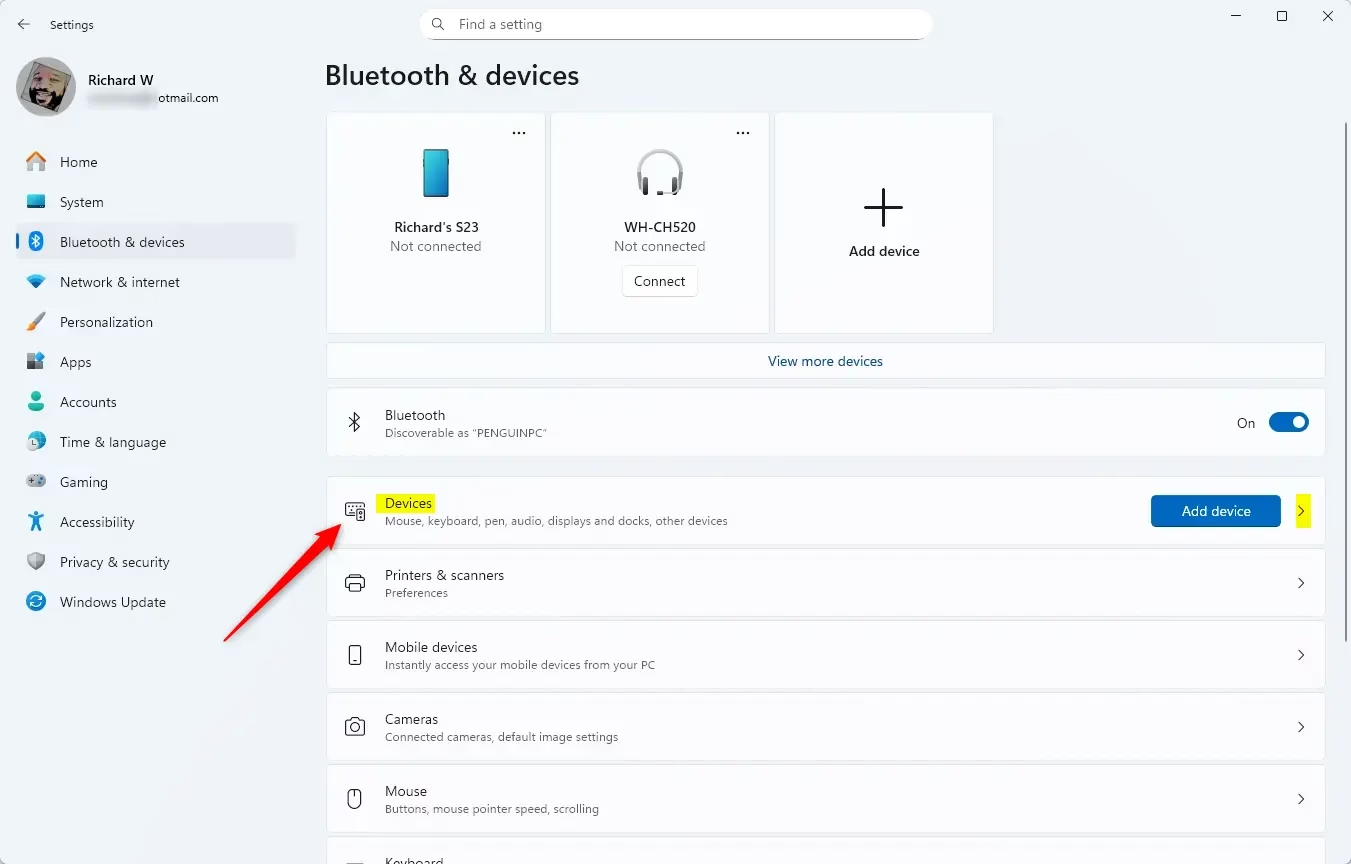
Open the Settings app, then go to the Devices page. This is where Windows 11 lists everything connected to your PC and where you start the manual setup.
- Click the Start button, the Windows icon, usually in the bottom-left corner or centered on the taskbar. The Start menu opens.
- Select Settings, the gear icon. If you don't see it, type Settings into the search box. You can also press the Windows key plus I to open it directly. The Settings window opens.
- Click Bluetooth & devices in the left pane.
- Click Devices. You should now see a list of connected and discoverable hardware. Any Bluetooth device you paired earlier is listed here too.
The path in short is Settings Bluetooth & devices Devices If you are adding Bluetooth hardware, check that the Bluetooth switch at the top of the Bluetooth & devices page is set to On. If it is off, the scan will not find anything.
Step 3Adding Your Device in 🪟 Windows 11
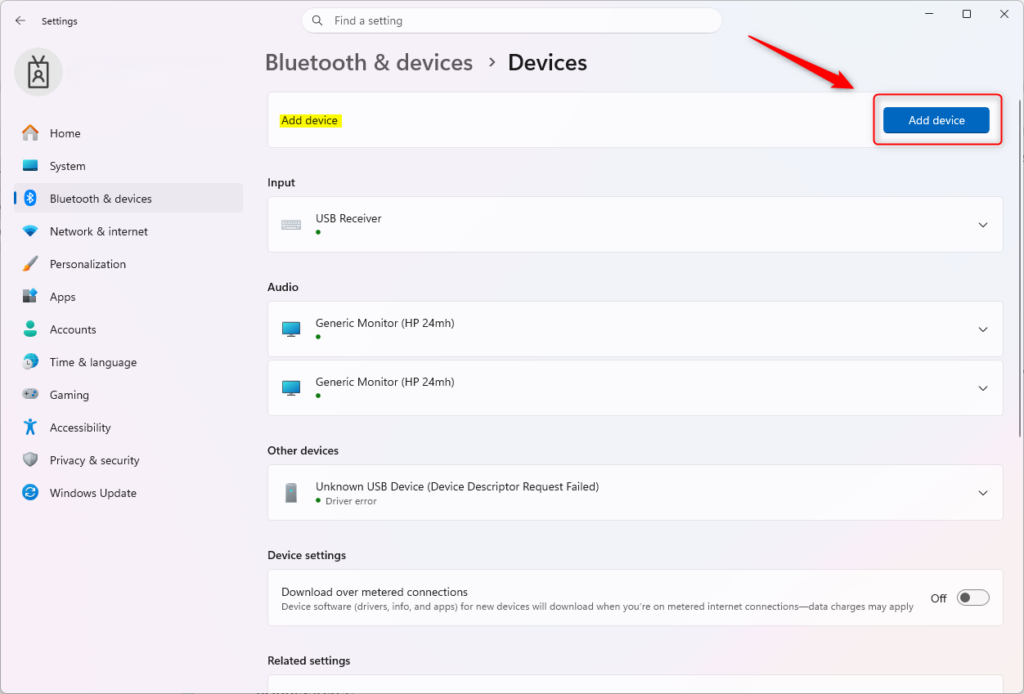
Now start the search. The Add device button at the top of the Devices page opens a menu where you choose the kind of device you are adding. That tells Windows how to look for it.
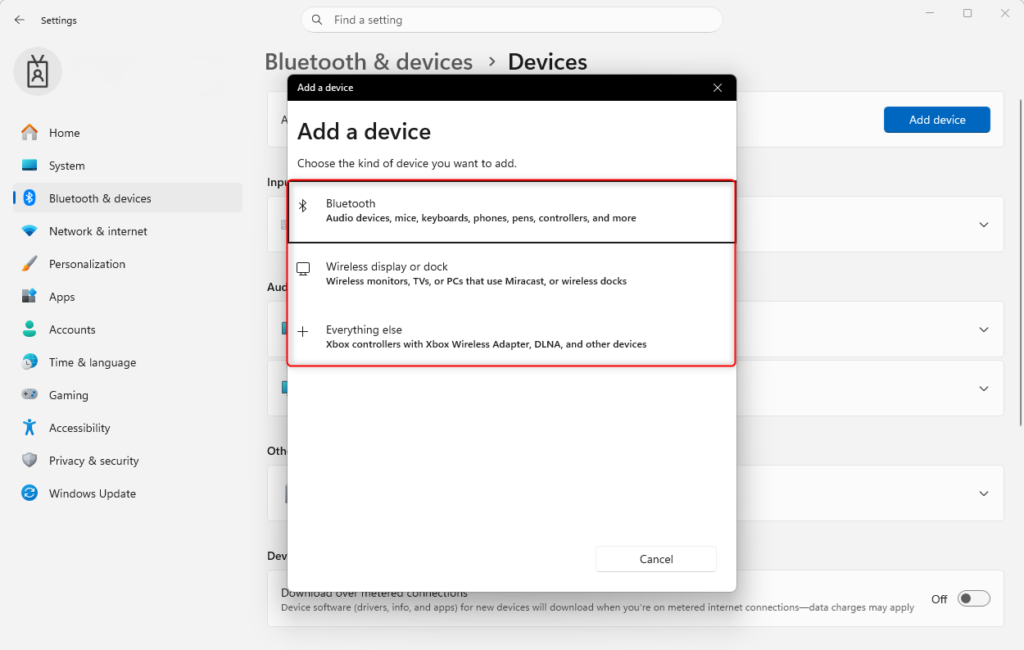
- Click Add device at the top of the Devices page. An "Add a device" window opens and asks what kind of device you want to add.
- Select the device type. For most accessories like mice, keyboards, or speakers, choose Bluetooth, wireless, input, video and more. The exact wording of these options can differ slightly between Windows 11 versions. Look for the Bluetooth choice, or the one that lists mice, keyboards, and audio devices. If you are adding a printer or projector, you might pick a different option. For a printer, you can also look in Settings Bluetooth & devices Printers & scanners
- Let Windows scan. It looks for devices that are discoverable and in pairing mode. This may take a minute or two. Your device's name should appear in the list. If it doesn't, check that the device is still in pairing mode and close to the PC. Many devices time out and need the pairing button pressed again.
- Click your device when it shows up, then follow the on-screen prompts. This might include confirming a code or just waiting for the connection to finish. Windows will show a message when the device is ready.
If something goes wrong, you can undo it. Go back to Settings Bluetooth & devices Devices, click the three dots on the device's tile, and choose Remove device. Then put the device back in pairing mode and try the steps again. A restart is not normally needed, but if a device is still not found after a retry, restarting the PC is a reasonable next step. Also check Windows Update, or the manufacturer's website, for a driver.
What Happens When Done?
Once the device is added, Windows 11 installs the drivers it needs to communicate with it. The device should then be ready to use and show up in your device list. To confirm, open Settings Bluetooth & devices Devices and look for it there. Then try it out. Move the mouse, type on the keyboard, or play a sound through the speaker.
Reference:
https://support.microsoft.com/en-US/Windows/Hardware/add-a-hardware-device-to-a-windows-device
Summary
To recap: check that the device has power and is in pairing mode, then use the Settings app to add it. Windows then recognizes the device and sets it up correctly. If a device does not appear, check Bluetooth, the distance, and the USB port before you try again.
Did this guide fix your problem?

About the Author
Richard
Tech Writer, IT Professional
Richard is a writer at Geek Rewind who turns complex IT tasks into clear, step-by-step guides. He draws on years of hands-on experience in system administration and enterprise IT operations, focusing on Windows, Linux and WordPress: the problems people actually run into, and the fixes that work. His server and WordPress guides come from systems he runs himself. Richard builds and maintains the platform behind Geek Rewind, from its Ubuntu servers and Nginx configuration to its custom WordPress plugins. Many new tutorials start with readers' questions, and he's always glad to answer them in the comments.
No comments yet — be the first to share your thoughts!