How to Use the Settings App to Remove a Device in Windows 11
Removing a device in Windows 11 formally disconnects hardware from your PC, helping to prevent data loss or other problems.
This process ensures Windows knows a device is no longer connected, which is useful when you upgrade components, fix hardware, or simply want to disconnect an external drive.
The Settings app provides a straightforward way to manage these connections.
Removing a device using the Windows 11 Settings app provides a safe way to disconnect hardware. This process is crucial for safely removing USB drives or disconnecting Bluetooth devices from your computer.
How to Use the Settings App to Remove a Device in 🪟 Windows 11
The Settings app offers a clean way to remove devices. This is beneficial for devices that don’t appear in the system tray, and it’s especially helpful for Bluetooth devices, printers, or other gadgets you no longer need Windows to recognize.
Open the Settings App
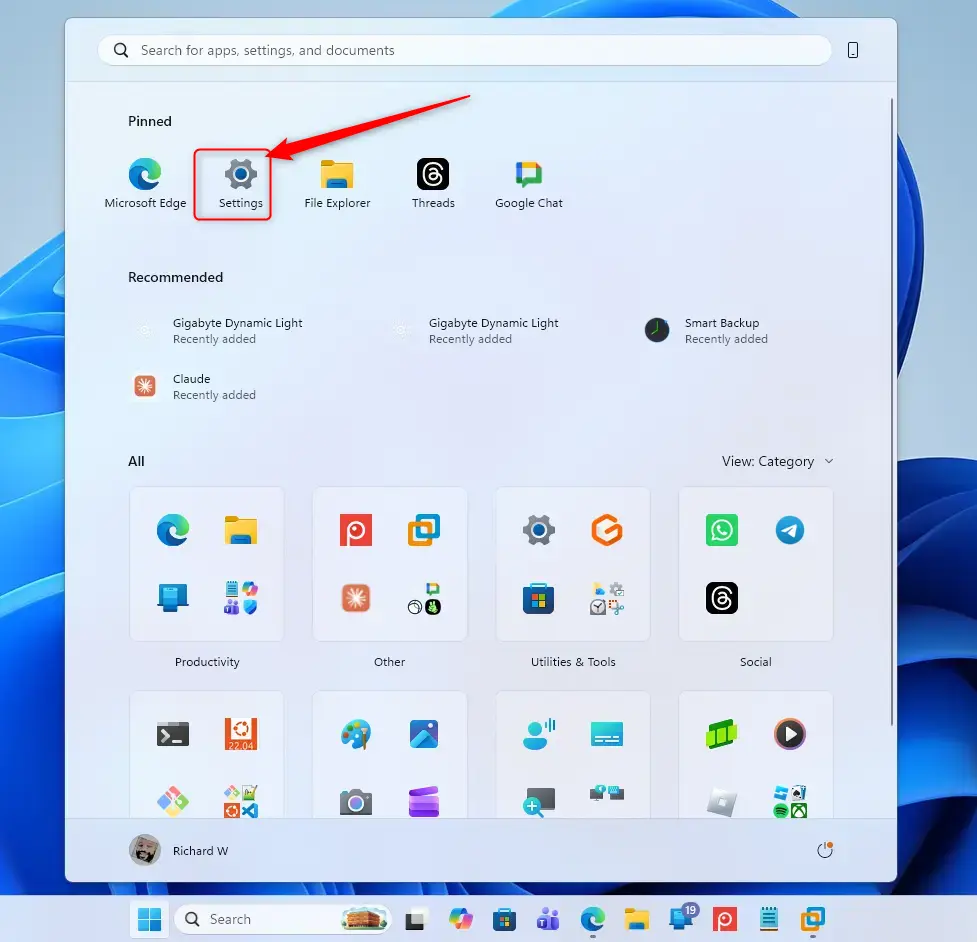
First, let’s open the Windows 11 Settings app. You can do this in a few ways. The fastest method is pressing Windows key + I on your keyboard. Alternatively, click the Start button on your taskbar, then click the Settings icon (it resembles a gear).
Go to Devices
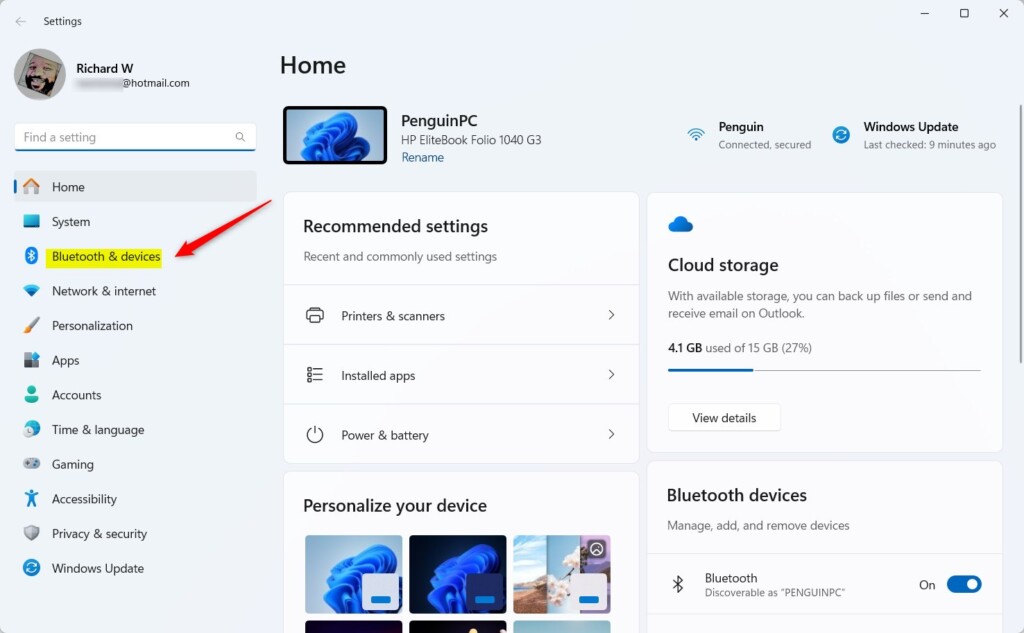
With the Settings app open, observe the left side. A list of options appears. Locate and click on Bluetooth & devices. This is where Windows manages all the hardware connected to your PC.
Select the ‘Devices’ Sub-menu
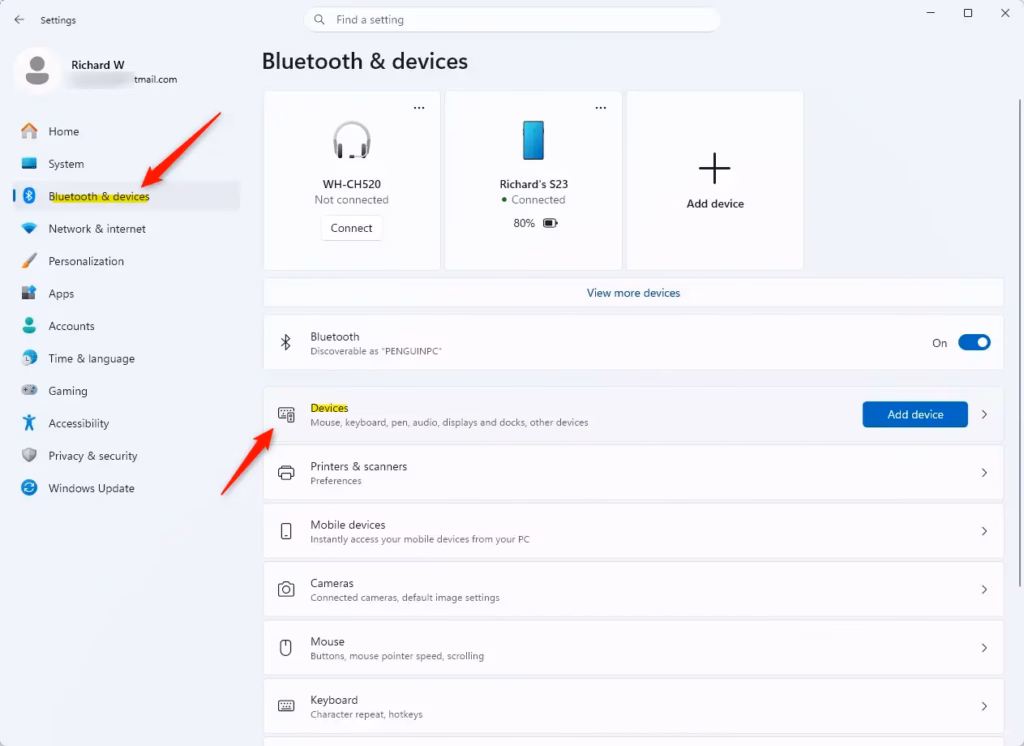
The Bluetooth & devices section in Windows 11 provides more choices. Clicking the Devices sub-menu shows a list of all hardware Windows recognizes, including both currently connected and previously connected devices.
Find the Device You Want to Remove
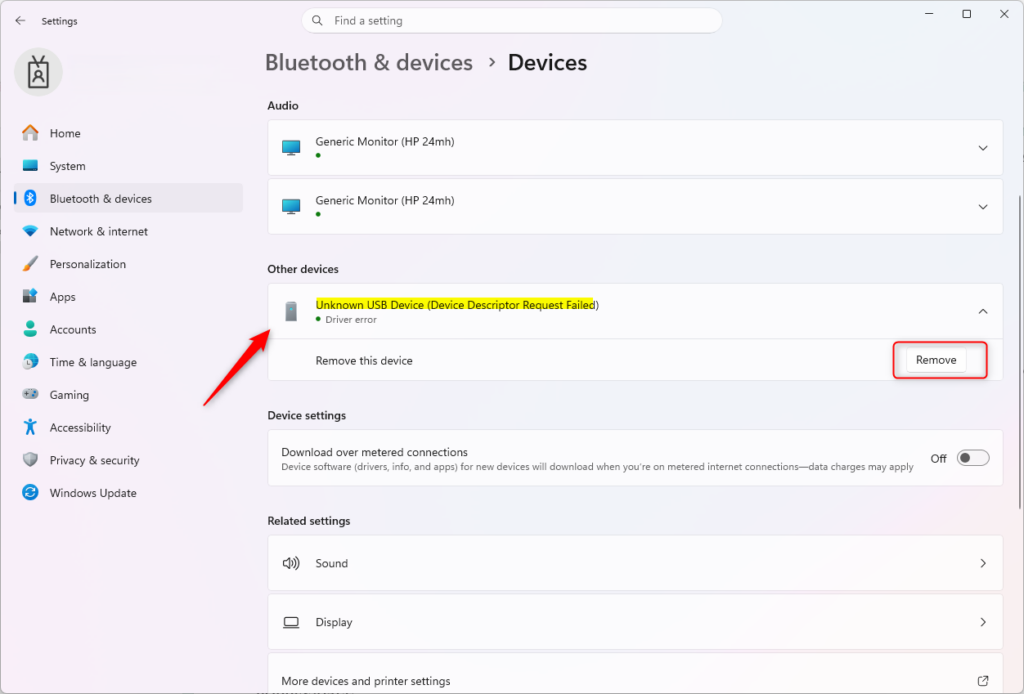
Scroll through the device list. You will find categories such as “Bluetooth,” “Printers & scanners,” and “Other devices.” The Other devices section often houses gadgets that don’t fit into other categories. This can include USB devices you’ve connected. Find the specific hardware you intend to remove from this list.
Show More Device Details
The Settings app in Windows 11 allows you to manage connected hardware. After finding the specific device you want to remove, click on the device's name. This action opens a new screen displaying more controls for that particular piece of hardware.
Start the Removal Process
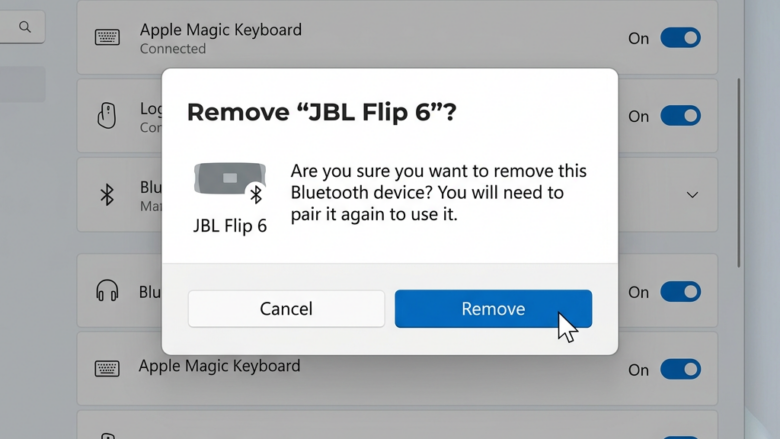
After clicking the device name, a "Remove device" button appears. Click this button, which usually sits directly below the device name or within the device's details.
Confirm the Removal
Check if the Device is Gone
After your confirmation, the selected device vanishes from the "Other devices" list within the Windows 11 Settings app. This successful removal shows Windows has updated its records to show the device is no longer connected or recognized.
Reference:
https://support.microsoft.com/en-US/Windows/Hardware/safely-remove-hardware-in-windows
Summary
You can easily remove a device from your Windows 11 PC using the Settings app by going to Bluetooth & devices, then Devices, finding the device, clicking it, and selecting ‘Remove device’.
How do I force remove a device from 🪟 Windows 11?
And there you have to click on the uninstall. Button Once you click on the uninstall.
How do I Uninstall a device on 🪟 Windows 11?
Click Start – All Apps – Windows Tool. Click Control Panel. Click Uninstall a program (or Programs and Features). Select the driver of the machine to delete by clicking it, and then click Uninstall.
Why can't I remove a device from Bluetooth on PC?
Device. This is my first failure this is where it says it can't do that because it doesn't even have the Bluetooth dongle. Or card in your system anymore.
Was this guide helpful?

About the Author
Richard
Tech Writer, IT Professional
Richard, a writer for Geek Rewind, is a tech enthusiast who loves breaking down complex IT topics into simple, easy-to-understand ideas. With years of hands-on experience in system administration and enterprise IT operations, he’s developed a knack for offering practical tips and solutions. Richard aims to make technology more accessible and actionable. He's deeply committed to the Geek Rewind community, always ready to answer questions and engage in discussions.

No comments yet — be the first to share your thoughts!