What to Do When Windows 11 Stuck on Restarting Screen

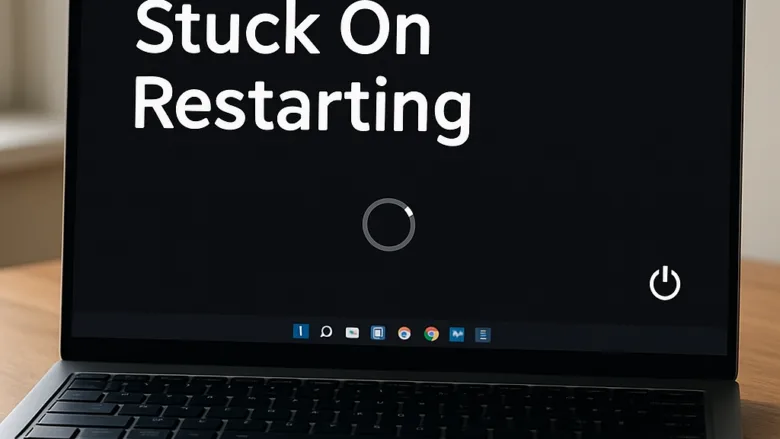
A Windows 11 PC gets stuck on the restarting screen when a background app refuses to close, a system update hangs, or a driver crashes during shutdown. This common glitch freezes your computer indefinitely and stops standard power buttons from working.
You can fix a frozen restart loop by forcing a hard shutdown, unplugging external USB devices, or running built-in repair tools to clear stuck system files.
When Windows 11 gets stuck on the restarting screen, wait thirty minutes for background updates to finish, then unplug all non-essential USB devices. If the screen remains frozen, perform a safe forced shutdown by pressing and holding the physical power button on your computer for ten to fifteen seconds until it turns off.
Understanding Why 🪟 Windows 11 Gets Stuck on Restarting
Windows 11 gets stuck on restarting when the operating system fails to close open apps, stop background services, or tell hardware to power down. This breakdown happens because of a stubborn software process, a corrupted system file, a faulty device driver, or an interrupted background update trying to finish before the computer shuts completely off.
If any single item on that checklist fails to respond, the entire process freezes. For example, a frozen software program might ignore the shutdown command. A stubborn Windows Update might get stuck trying to install system files. A faulty external hard drive might fail to disconnect, causing the system to wait endlessly for a response. When Windows waits for these stuck processes, it traps your computer on the restarting screen indefinitely.
Step 1Wait It Out and Disconnect External Devices
Waiting thirty minutes and disconnecting all external devices is the best first step when your Windows 11 computer is stuck on restarting. Leaving the computer alone gives it time to finish installing background updates. Unplugging printers, USB drives, and extra monitors stops Windows from getting confused by hardware trying to communicate while the system shuts down.
If thirty minutes pass and the screen still shows the spinning dots, external devices are likely causing the freeze. Windows might be trying to communicate with a USB device that is not responding.
- Unplug all non-essential USB devices from your computer. This includes external hard drives, thumb drives, printers, webcams, game controllers, and docking stations.
- Leave only your basic keyboard and mouse connected.
- Watch the screen to see if the computer finally finishes restarting and reaches your login screen.
Step 2Perform a Safe Forced Shutdown
Performing a safe forced shutdown when Windows 11 is stuck on restarting requires pressing and holding the physical power button on your computer for ten to fifteen seconds until the screen goes black. This cuts power when normal shutdown routines fail, allowing you to turn the computer back on and fix the underlying glitch causing the freeze.
- Locate the physical power button on your desktop tower or laptop.
- Press and hold the power button down continuously for about ten to fifteen seconds.
- Wait until the screen goes completely black and all lights on the computer turn off.
- Unplug the power cable from the back of your desktop or from your laptop wall charger. If your laptop has a removable battery, take the battery out.
- Wait for sixty full seconds to let all electrical power drain completely from the system components.
- Reconnect the power cable or put the laptop battery back in.
- Press the power button normally to turn your computer back on.
Step 3Boot into Safe Mode to Remove Faulty Updates or Drivers
Booting into Safe Mode lets you remove faulty updates or broken drivers when Windows 11 repeatedly gets stuck on restarting. Safe Mode starts your computer using only essential system files and basic drivers, blocking third-party software interference so you can safely uninstall the bad update or buggy driver causing the shutdown freeze.
- Once you reach your desktop in Safe Mode, click the Start button and open the Settings app.
- Click on Windows Update in the left menu.

Settings › Windows Update - Click on Update history to see the list of recently installed updates.
- Click on the Uninstall updates link near the bottom of the page.
- Find the update that installed right before your computer started freezing, and click the Uninstall button next to it.
- Restart your computer normally to see if the issue is gone.
Step 4Run System File and Disk Checks
Running built-in system file and disk checks repairs corrupted files that frequently cause Windows 11 to freeze on the restarting screen. Using simple command prompt tools like SFC and DISM allows your computer to automatically scan system storage, locate damaged operating system components, and replace them with healthy working copies to fix the startup loop.
- Click the Start button, type cmd into the search bar.
- Right-click on Command Prompt in the search results and choose Run as administrator. *(Requires Admin Privileges)*

Command Prompt - Type this command into the command prompt window:
DISM.exe /Online /Cleanup-image /Restorehealth - Press the Enter key on your keyboard and wait for the scan to finish completely. This process downloads healthy replacement files from the internet if it finds any damage.
- Next, type the following command into the same window:
sfc /scannow - Press the Enter key. This tool scans all protected system files and replaces broken ones.
- When both scans finish, close the command window and restart your computer normally.
Step 5Disable Fast Startup to Prevent Future Freezes
Disabling Fast Startup in Windows 11 prevents future restarting and shutdown freezes by stopping the operating system from saving partial system states to your hard drive. Turning off this default power feature forces your computer to perform a clean, fresh shutdown every single time, which stops residual memory errors from trapping your screen.
- Click the Start button, type Control Panel into the search bar, and click to open it.

Control Panel - In the top right corner of the Control Panel window, set the "View by" option to Large icons or Small icons.
- Click on the Power Options icon.
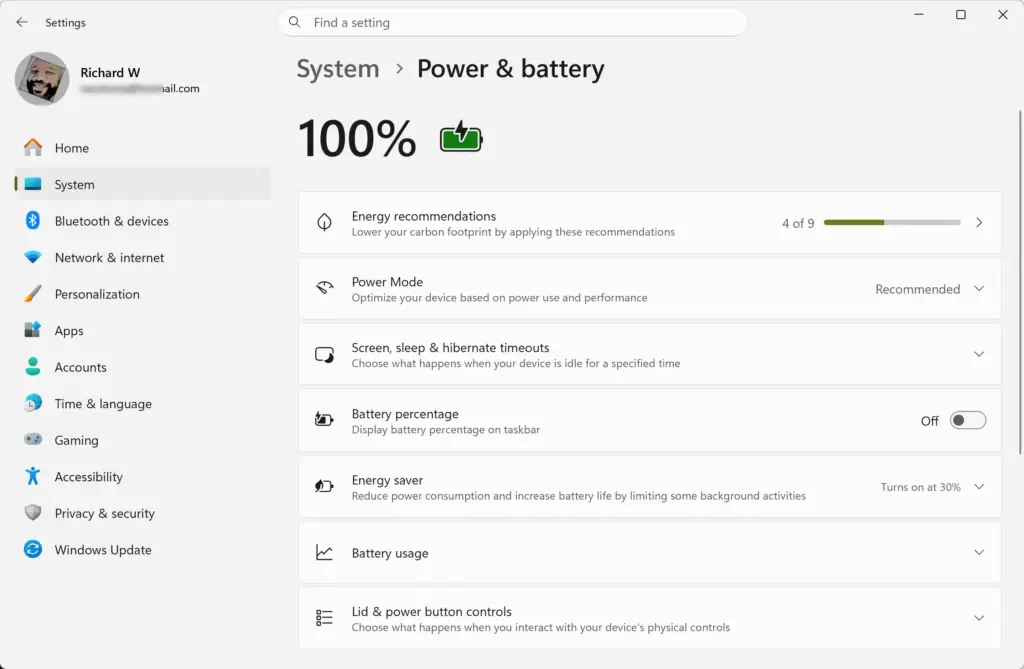
Settings › System › Power - In the left menu column, click the link that says Choose what the power buttons do.
- Look near the top of the new window for a link that says Change settings that are currently unavailable and click it. *(Requires Admin Privileges)*
- Look at the bottom of the window under the Shutdown settings section. Uncheck the box next to Turn on fast startup (recommended).
- Click the Save changes button at the bottom.
Unique Expert Tips: Fixing the Background Service Hang
Most standard troubleshooting guides stop at Fast Startup and system file checks. However, advanced users often encounter a deeper issue where a stubborn Windows service refuses to stop during the restart sequence. Here are two unique methods to solve this persistent problem.
Unique Method 1: Adjusting the Wait Time for Closing Apps
Adjusting the wait time for closing apps tells Windows 11 to force-close stubborn background programs much faster so they never trap your system on the restarting screen. Changing this registry timeout value prevents slow-responding applications from hanging up the entire shutdown process and leaving your computer stuck on the spinning dots.
- Click the Start button, open the Start menu search bar, and type Settings, then press Enter. *(Requires Admin Privileges)*
- In the Settings window, click on System in the left menu, then click on About on the right side.
- Scroll down to look at your Windows specifications, or use the Settings search bar to find and open the Registry Editor by typing regedit and pressing Enter.
- In the Registry Editor, use the left sidebar to click through Computer, then HKEY_LOCAL_MACHINE, then SYSTEM, then CurrentControlSet, and finally click on Control.
- Click on the Control folder, then look at the main window on the right side.
- Locate the registry key named WaitToKillServiceTimeout. If you do not see it, right-click an empty space in the right pane, select New, and choose String Value. Name it exactly WaitToKillServiceTimeout.
- Double-click on WaitToKillServiceTimeout and change the value data from its default number to 2000 (which represents two thousand milliseconds, or two seconds).
- Click OK and close the Registry Editor.
Unique Method 2: Clearing the Page File at Shutdown
Clearing the page file at shutdown forces Windows 11 to wipe out residual virtual memory data every single time you restart your computer. Automatically deleting this temporary overflow data prevents corrupted cache files from hanging around in memory and blocking your computer from finishing the restart sequence.
- Click the Start button, type Control Panel, and open it.
- Search for Advanced system settings in the top right search box of the Control Panel and click to open it. *(Requires Admin Privileges)*
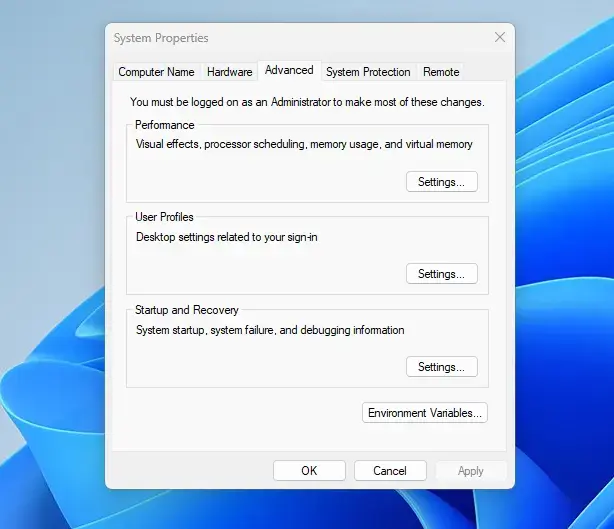
System Properties - Under the Advanced tab, look at the Performance section and click the Settings button.
- Go to the Advanced tab in the new Performance Options window, and click the Change button under Virtual Memory.
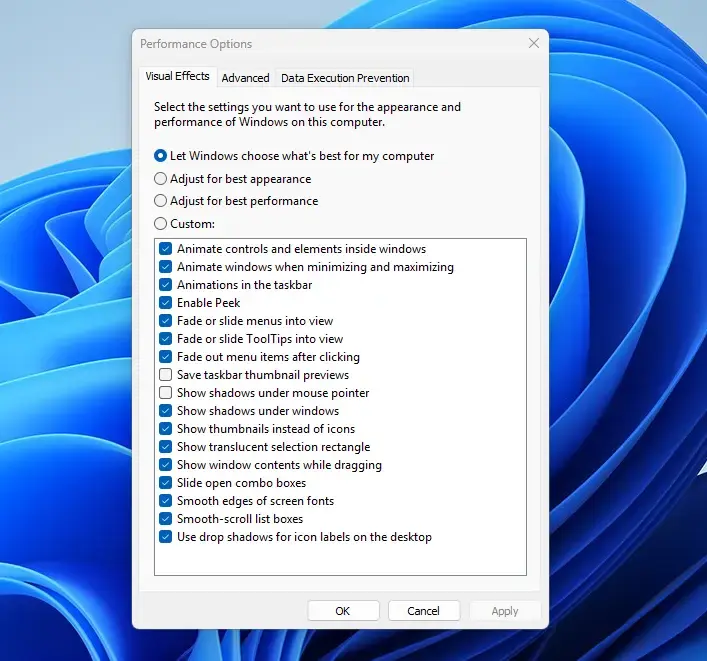
Performance Options - Uncheck the box at the top that says Automatically manage paging file size for all drives.
- Open your Windows settings or search via the Start menu for Local Security Policy by typing secpol.msc and pressing Enter. *(Requires Admin Privileges)*
- In the Local Security Policy window, click the arrow next to Local Policies in the left menu to expand it, then click on Security Options.
- Scroll down the right list to find Shutdown: Clear virtual memory pagefile.
- Double-click it, select the Enabled option, and click OK.
Summary
Fixing a Windows 11 computer stuck on the restarting screen involves simple troubleshooting steps ranging from waiting out updates and disconnecting external USB devices to running system repair scans, disabling Fast Startup, and adjusting background service timeouts. Following these practical methods quickly restores your computer to normal working order without losing your important files.
Start with the simplest fixes like waiting and disconnecting peripherals before moving on to advanced system repairs. To prevent this issue from happening again in the future, keep your system files clean, update your drivers regularly, and turn off Fast Startup. If you want to learn more about keeping your system healthy, check out our related guides on optimizing Windows 11 performance and troubleshooting boot errors.
For more detailed tutorials on solving everyday computer problems, explore our main Windows section for step-by-step guides written in plain, easy-to-understand language. HKEY_LOCAL_MACHINE\SYSTEM\CurrentControlSet\Control
Was this guide helpful?

About the Author
Richard
Tech Writer, IT Professional
Richard is a writer at Geek Rewind who turns complex IT tasks into clear, step-by-step guides. He draws on years of hands-on experience in system administration and enterprise IT operations, focusing on Windows, Linux and WordPress: the problems people actually run into, and the fixes that work. His server and WordPress guides come from systems he runs himself. Richard builds and maintains the platform behind Geek Rewind, from its Ubuntu servers and Nginx configuration to its custom WordPress plugins. Many new tutorials start with readers' questions, and he's always glad to answer them in the comments.



No comments yet — be the first to share your thoughts!