How to Safely Eject External Devices in Windows 11

Safely ejecting external devices in Windows 11 prevents data corruption and hardware damage.
Safely ejecting, also known as “safely remove hardware,” is the process of telling your operating system that you’re finished using a connected USB drive, external hard drive, or other removable media.
Failing to eject properly can lead to lost files or even render your drive unreadable, especially during active write operations in Windows 11. This is because Windows may still be writing data to the device in the background, even if it appears idle.
Safely eject your external drive by clicking the “Safely Remove Hardware and Eject Media” icon in the taskbar’s hidden icons, then selecting your drive. Alternatively, right-click the drive in File Explorer and choose “Eject.” This prevents data corruption by ensuring all write operations are complete.
Why should you safely eject your devices?
What happens when you safely eject?
When you use the eject command, Windows stops all active communication with the drive. It then tells any programs to stop using the files on that drive. Once Windows confirms it’s safe, you can physically unplug the device without worry.
Method 1Using the Taskbar
- Look at the bottom right corner of your screen near the clock.
- Click the small arrow to see hidden icons.
- Find the “Safely Remove Hardware and Eject Media” icon.
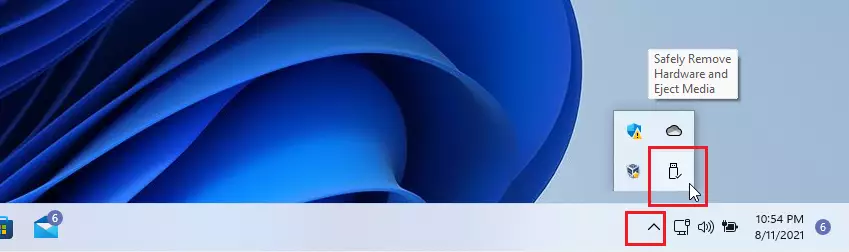
You can safely eject external devices in Windows 11 using the taskbar icon. Look for the small arrow in the bottom right corner of your screen, near the clock, to reveal hidden icons.
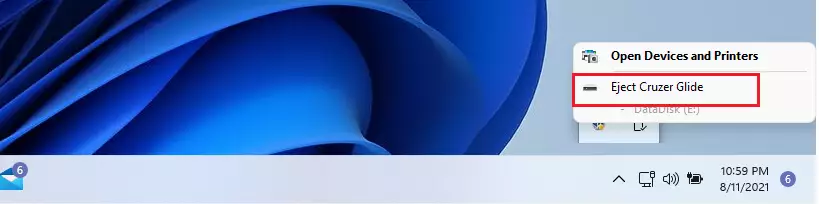
- Click the icon to see a list of your connected devices.
- Select the name of the drive you want to remove.
You can safely eject external devices in Windows 11 using the taskbar icon. Look for the small arrow in the bottom right corner of your screen, near the clock, to reveal hidden icons.
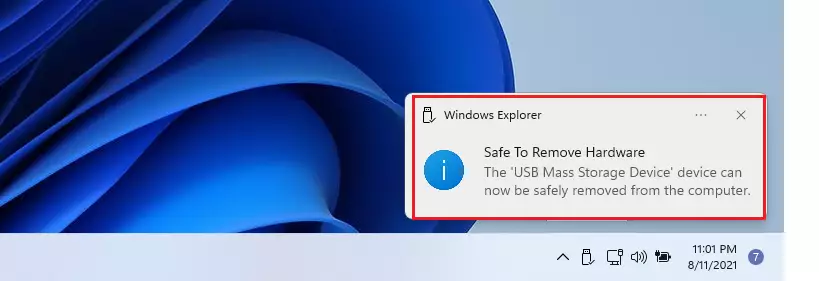
After you click eject, Windows 11 displays a notification confirming "Safe to Remove Hardware," indicating that all data transfers are complete. This notification ensures that unplugging your external device, like a USB flash drive, will not corrupt any files.
You can safely eject external devices in Windows 11 using the taskbar icon. Look for the small arrow in the bottom right corner of your screen, near the clock, to reveal hidden icons.
Method 2Using File Explorer
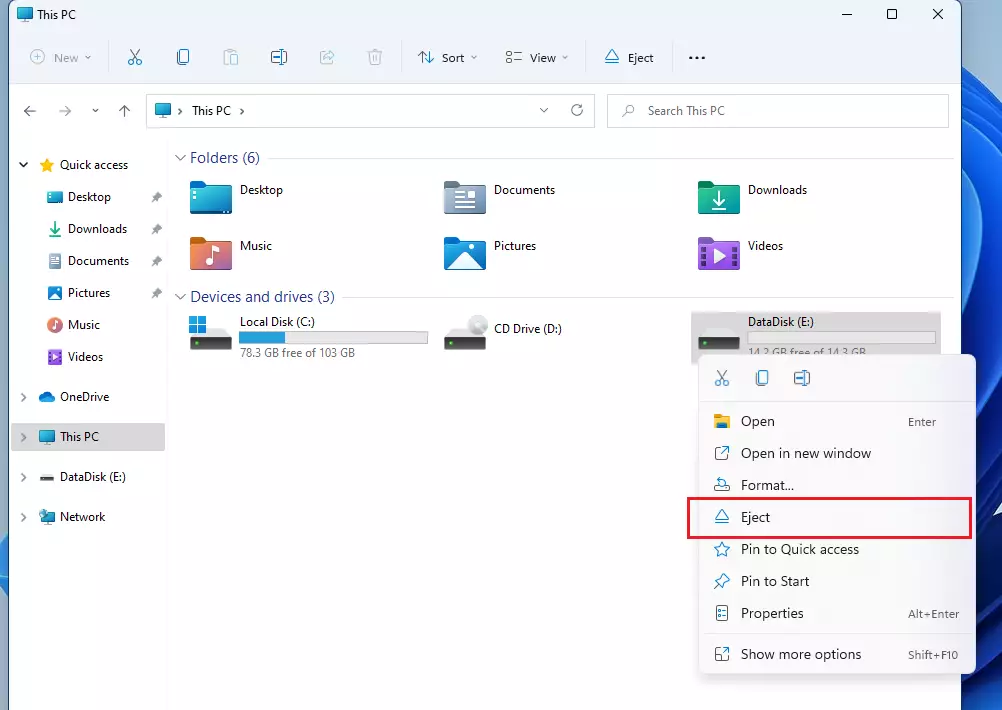
- Open File Explorer on your computer.
- Find your external drive in the list on the left side.
- Right-click the name of the drive.
- Select Eject from the menu.
Troubleshooting
If you can’t safely eject external devices because the disk is busy, it usually means a file is still open. Close any programs or files using the drive, then try ejecting again.
Summary
Safely ejecting external devices protects your data. Before disconnecting a device, close all open files related to that device. This simple step prevents data loss and helps external drives work reliably. This habit is important for all Windows users.
Was this guide helpful?

About the Author
Richard
Tech Writer, IT Professional
Richard, a writer for Geek Rewind, is a tech enthusiast who loves breaking down complex IT topics into simple, easy-to-understand ideas. With years of hands-on experience in system administration and enterprise IT operations, he’s developed a knack for offering practical tips and solutions. Richard aims to make technology more accessible and actionable. He's deeply committed to the Geek Rewind community, always ready to answer questions and engage in discussions.


This is no longer necessary, per Microsoft default behavior change.
https://docs.microsoft.com/en-AU/windows/client-management/change-default-removal-policy-external-storage-media
On my new Windows 11 There is NO Icon to remove external Hardware safely .What do I do?
I agree! Trying to find solution. Even though turned on in my Personalization/Taskbar settings, it does not appear. Haven’t figured it out yet…
I have just upgraded to Windows 11. There is NO icon I can find to safely remove external drives.
How can I fix this?
By the way, be sure to restart your computer. You might not see the icon(s) until you restart.
[…] can safely unplug the disks from the computer if they are external. If the disks are internal, turn off the computer […]
[…] Removal: This policy lets you remove the device without using the “Safely Remove Hardware” option. Windows automatically disables write caching for the device, meaning data is […]
[…] How to eject removable drives in Windows 11 […]
[…] If your disk is external (like a USB drive), you can safely unplug it. […]
[…] more details, see how to Safely Remove External Drives in Windows 11 and how to enable write caching for better […]