How to Move a Hard Drive in Windows 11

Moving a secondary hard drive between Windows 11 computers lets you transfer files and programs without reinstalling Windows. This method applies only to drives that don’t hold your operating system, meaning your main C: drive with Windows on it cannot be moved this way.
Physically, you’ll disconnect the drive from your old PC and connect it to the new one. This process uses simple tools like a screwdriver to open the computer cases.
Always shut down both computers completely before disconnecting or connecting any internal hardware to avoid damaging your data or components. Once connected to the new PC, Windows 11 should recognize the drive.
Physically disconnect the secondary hard drive from the old PC after taking it offline in Disk Management and uninstalling it in Device Manager. Then, connect it to the new PC and use Disk Management to rescan disks and import if necessary.
Before You Start
If your disk is external (like a USB drive), you can safely unplug it.
If your disk is inside the computer (internal), turn off your PC before removing the disk.
Make sure your disk is healthy and has no errors before moving it.
Step 1Check Your Disk’s Health and Prepare to Remove It
- Open the Windows Settings app:
- Click the Start menu button and select Settings, or
- Press Windows key + I on your keyboard.

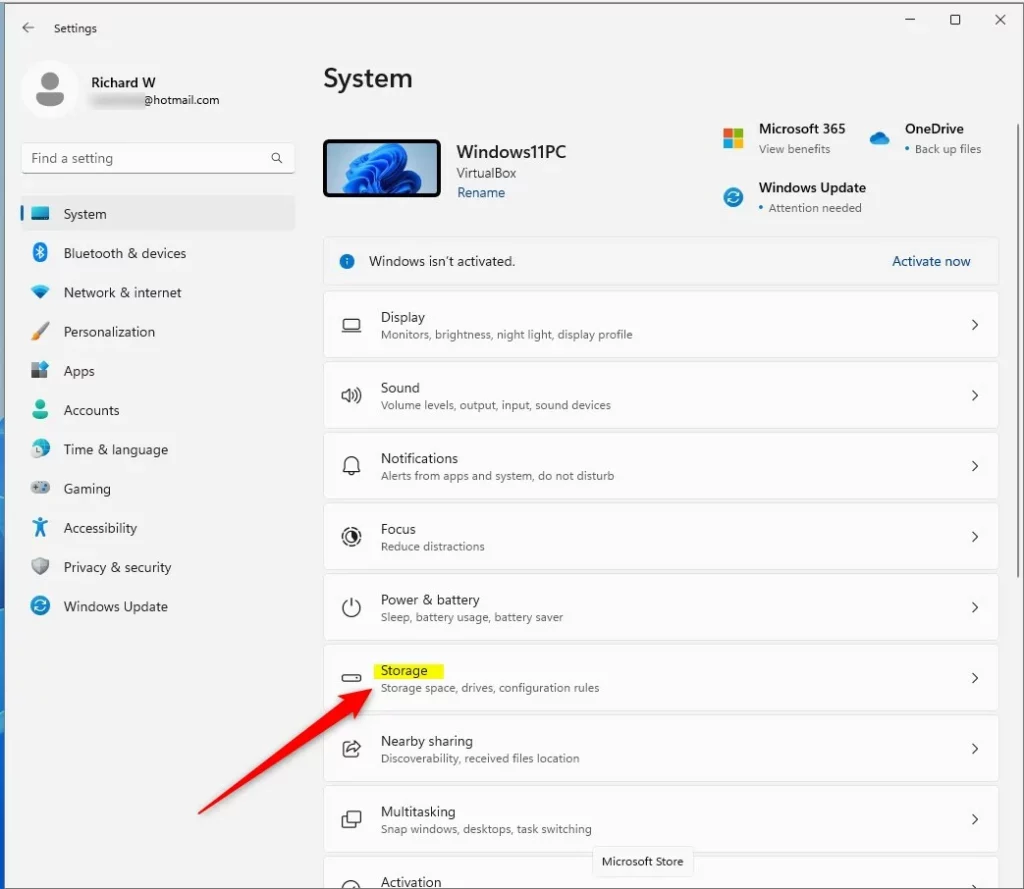
Before moving a hard drive in Windows 11, it’s a good idea to check if the disk is working well. Open Windows Settings (click the Start menu and select Settings, or press Windows key + I), then go to System, and click on Storage. This check helps ensure your data is safe before you disconnect the hard drive.
- In Settings, click System on the left, then choose Storage on the right.
Before moving a hard drive in Windows 11, check its functionality and prepare it for removal.
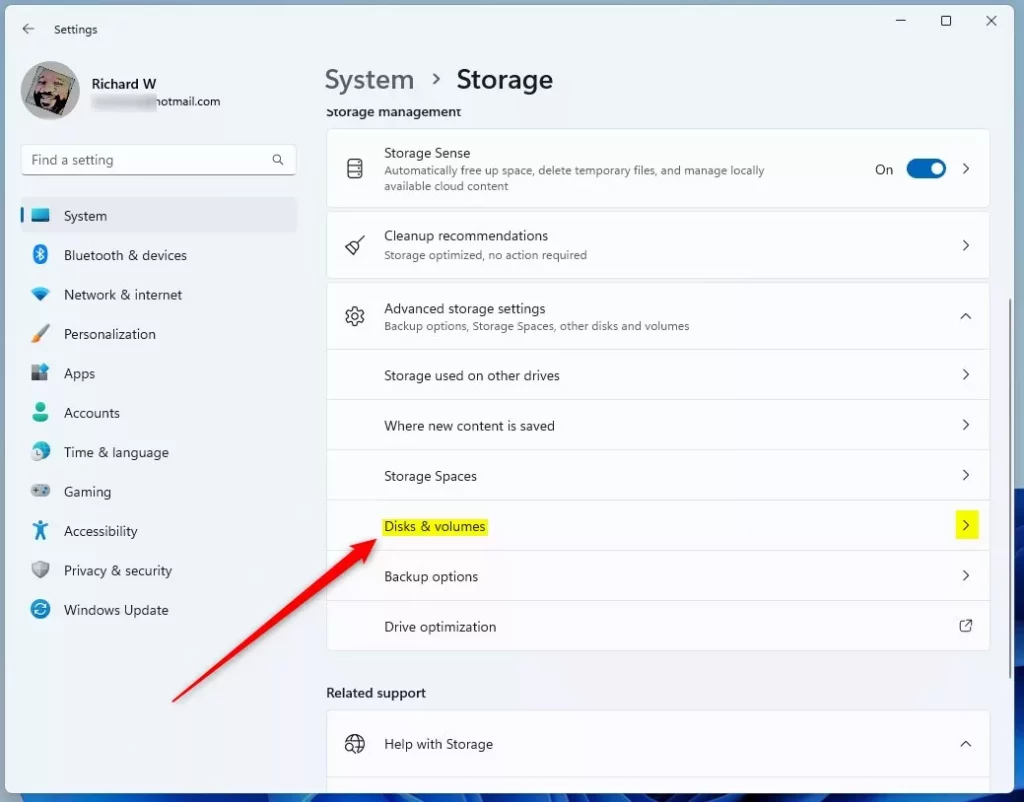
- Scroll down and click Advanced storage settings, then select Disks & volumes.
Before moving a hard drive in Windows 11, check its functionality and prepare it for safe removal.
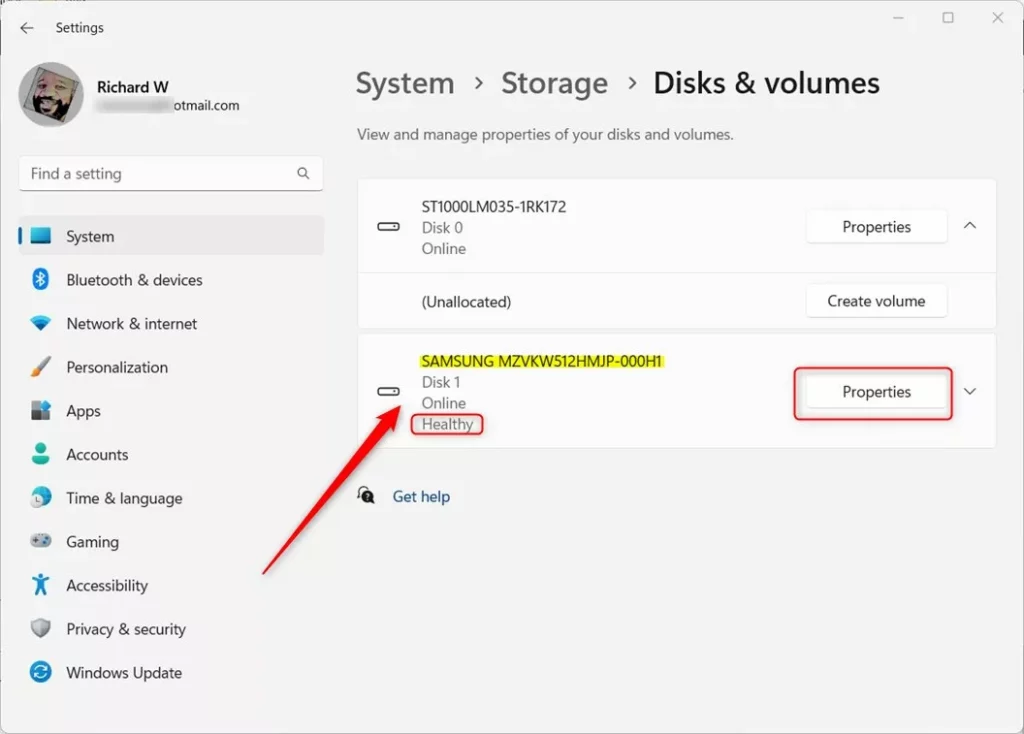
- Find the disk you want to move. Click its Properties button to check the status.
Before moving a hard drive in Windows 11, it’s a good idea to check if the hard drive is working okay and then prepare it for removal.
- If the disk looks healthy, click Take offline. This stops the disk from being used so it’s safe to remove.

Before moving a hard drive in Windows 11, it’s a good idea to check if the hard drive is working okay and then prepare it for removal.
Step 2Remove the Disk from Windows (Uninstall it)
- Open Device Manager by clicking the Start button, typing Device Manager, and selecting it.
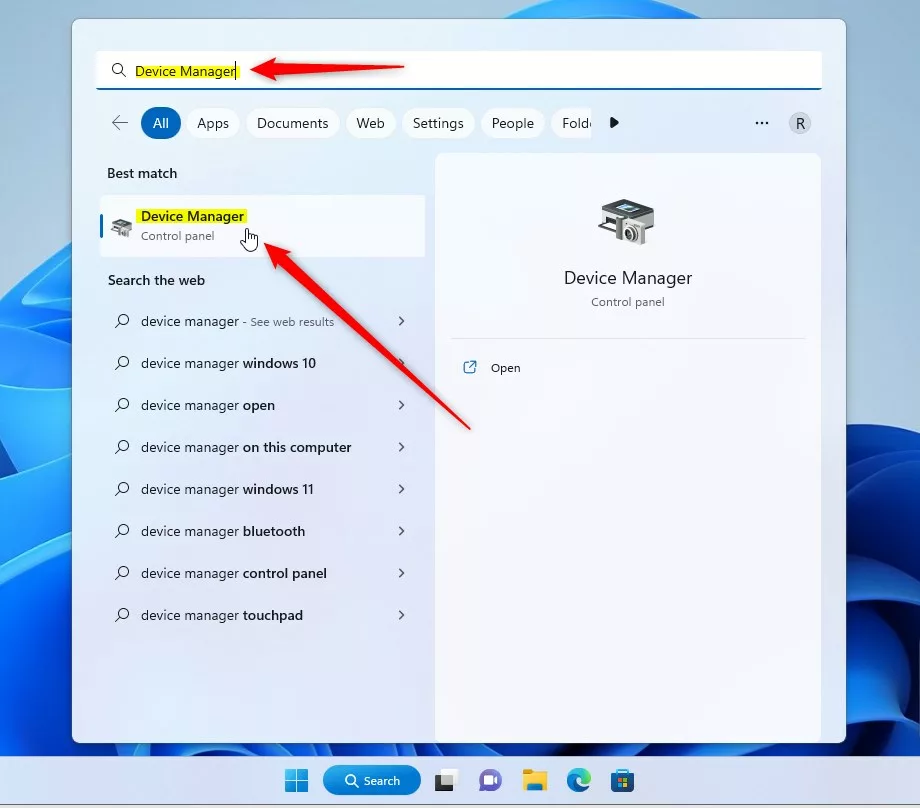
Safely removing a hard drive in Windows 11 before unplugging is important to avoid losing data. You can do this using Device Manager, which lists all your computer’s hardware. Open Device Manager by searching for it after clicking the Start button, then find and double-click ‘Disk drives’ to see your disks.
- In Device Manager, double-click Disk drives to see your disks.
- Right-click the disk you want to move, and select Uninstall device.
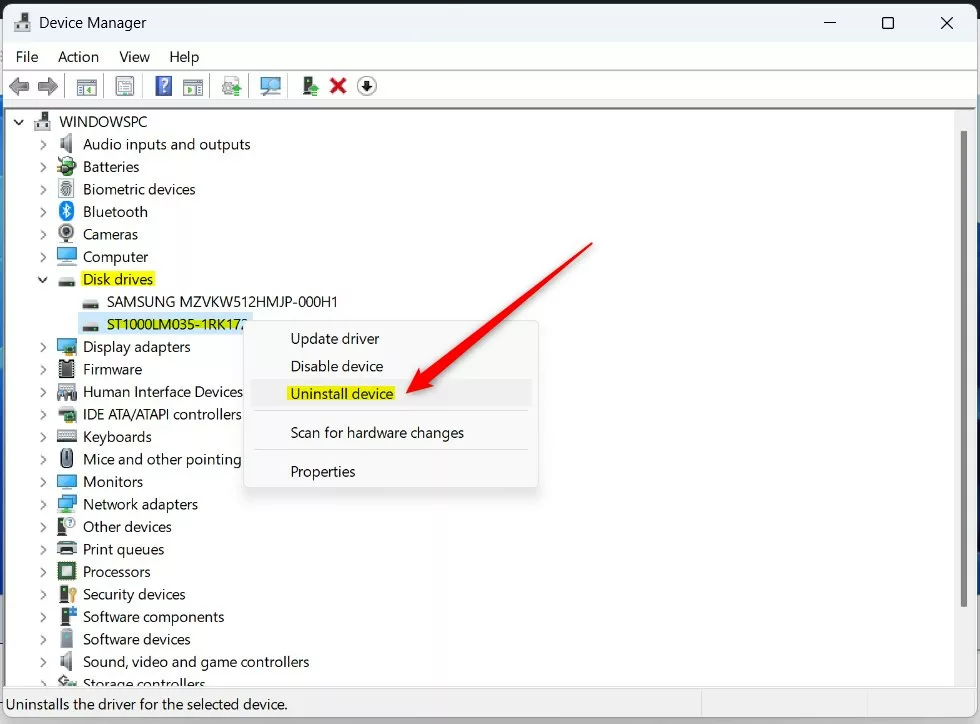
Safely removing a hard drive from Windows 11 protects your data. Open Device Manager, find your hard drive listing, right-click it, and select ‘Uninstall device’ before physically unplugging it.
- When asked to confirm, click OK.
Admin privileges are required for this step.
If you have dynamic disks, they need preparation before removal. To do this, open Disk Management, right-click the dynamic disk you want to remove, and select ‘Remove Disk.’ This readies the disk for uninstallation, protecting your data.
Step 3Physically Move the Disk to the New Computer
Physically moving a hard drive to a new computer depends on whether the hard drive is internal or external. For an external hard drive, you simply plug it into the new PC. If the hard drive is internal, you will need to turn off the computer, open the PC case, and carefully connect the internal hard drive to the motherboard and power supply.
An internal hard drive installation requires powering down the Windows 11 computer. Next, open the computer’s case, typically using a Phillips head screwdriver to remove 2-4 screws on the side panel. Then, carefully connect the hard drive to the motherboard using a SATA cable and to the power supply unit.
Once connected, turn on the new computer.
Step 4Make Windows Recognize the Disk on the New Computer
- Open Disk Management on the new computer by right-clicking the Start menu and selecting it.
- Click Action at the top menu, then click Rescan Disks. This makes Windows look for new drives.
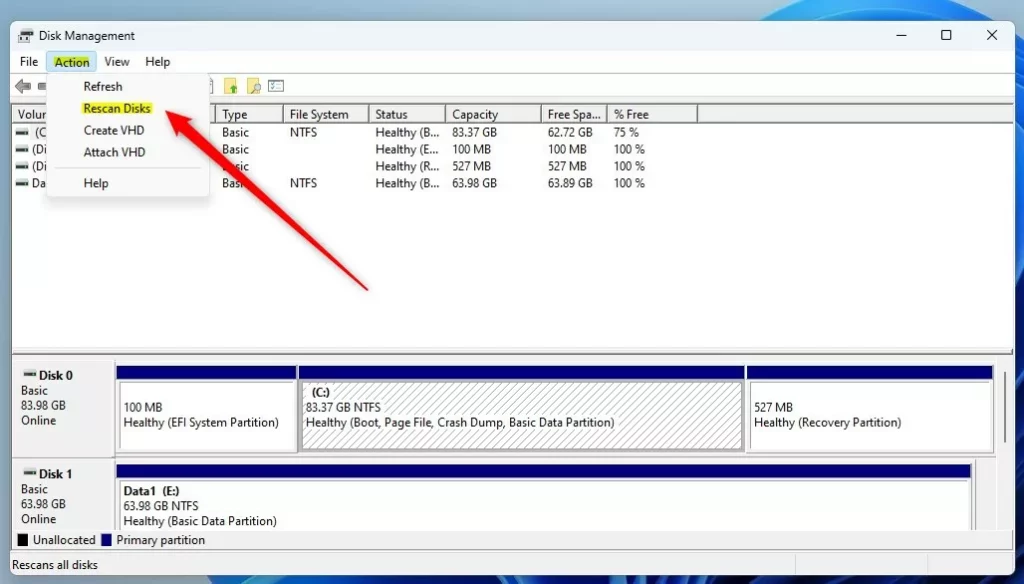
Windows 11 needs to recognize a moved hard drive before you can use it again. Open Disk Management by right-clicking the Start menu. Click ‘Action’ and then choose ‘Rescan Disks’ for Windows to find the new hard drive.
- If you see any disk marked as Foreign, right-click it and choose Import Foreign Disks. Follow any instructions you see.
That’s it! Your disk should now work on the new computer.
Where to Learn More
For more information, check out the official Microsoft guide: Move disks to another computer (Microsoft.com)
Summary
Moving a hard drive between Windows 11 computers requires careful attention to the steps involved. Always check the disk’s health and safely remove it using tools like Device Manager before unplugging. Once connected to the new computer, use Disk Management to ensure Windows recognizes the drive for a smooth transition.- Moving a second hard drive between Windows 11 computers is easy when done carefully.
- Always make sure the disk is healthy and safely removed before unplugging.
- Use Device Manager and Disk Management to prepare the disk.
- Follow the steps to install it on the new computer.
- Ask questions or share your experience below if you want help!
Can I transfer my 🪟 Windows 11 to a new hard drive?
The best way to move Windows 11 to another SSD is by cloning the system drive. A disk cloning tool can copy everything, including OS, apps, and settings so the new SSD is bootable right away. Using FTK Imager Lite to move Windows 11 to another drive is possible.
Was this guide helpful?

About the Author
Richard
Tech Writer, IT Professional
Richard, a writer for Geek Rewind, is a tech enthusiast who loves breaking down complex IT topics into simple, easy-to-understand ideas. With years of hands-on experience in system administration and enterprise IT operations, he’s developed a knack for offering practical tips and solutions. Richard aims to make technology more accessible and actionable. He's deeply committed to the Geek Rewind community, always ready to answer questions and engage in discussions.


No comments yet — be the first to share your thoughts!