How to Uninstall Updates in Windows 11 When an Update Breaks Your PC

- 38 steps
- Needs administrator rights
- Includes a restart or sign-out
Uninstalling an update in Windows 11 removes a patch that is causing blue screens, crashes, or a broken printer. A faulty update can disrupt everyday apps and hardware, leaving the PC slow or unusable.
Windows 11 has built-in tools to roll back recent changes and get the system back to a stable state. If Windows still starts, remove the update from Settings or Control Panel. If it won’t boot normally, use the Advanced startup screen, which is part of the Windows Recovery Environment. This guide also covers PowerShell, the reasons an update may refuse to uninstall, and how to avoid the same problem next time.
To uninstall a Windows 11 update, open Settings Windows Update Update history, scroll to Related settings, and click Uninstall updates. Select the update causing the crash, such as KB5023696, click Uninstall, then restart. If Windows won’t start, use the Advanced startup screen instead.
Before You Uninstall a Windows Update
Only uninstall an update if it is causing serious crashes or hardware problems. Check Windows Update again afterwards, because Microsoft often releases a corrected update.
Before you start, do the following:
- Save your open work and close your programs. Most uninstall methods need a restart, and you could lose unsaved files.
- Sign in with an administrator account. Changing installed updates needs elevated permissions, and every method here asks for them.
- Note the KB number of the update you want to remove, for example KB5023696. The number appears in the update name in Update history and makes the right update easy to find in the lists below.
Managed PCs often have update policies that reinstall a removed update.
How to Uninstall Windows Updates Using the Settings App
This is the easiest method, and you should use it when Windows still starts and you can reach the desktop. You get to the uninstall option through Settings Windows Update Update history
Depending on your Windows 11 build, Uninstall updates either opens a list inside Settings or opens the classic Installed Updates page from Control Panel. Both work the same way. Pick the update and click Uninstall.

- Click the Start button and open Settings (the gear icon). The Settings window opens.
- Click Windows Update in the menu on the left. You see the update status page.
- Click Update history. You see the updates Windows has installed, grouped by type, such as Quality Updates and Feature Updates.
- Scroll down to the Related settings section.
- Click Uninstall updates. A list of installed updates appears.
- Find the update that is causing the problem. The list is sorted by date, so the most recent entries are the likeliest culprits. Match the KB number if you know it.
- Click Uninstall next to that update.
- Confirm if a warning message appears.
- Restart if Windows asks you to. Save your work first, then restart the PC to finish removing the update.
If you don’t see Uninstall next to an update, Windows treats it as permanent or it can’t be removed this way. See the section on updates that won’t uninstall below. To undo the removal, go back to Settings Windows Update and click Check for updates. Windows will download the update again. Use Pause updates on the same page if you need time before it reinstalls.
How to Uninstall Windows Updates Using the Control Panel
The classic Control Panel is useful when the Settings app won’t open or misbehaves. It lists installed updates in a simple table that you can sort by date. Search for Control Panel from the Start menu, click Uninstall a program, then click View installed updates on the left to find the bad patch.

- Click the Start button, type Control Panel into the search box, and press Enter. Control Panel opens.
- Under the Programs heading, click Uninstall a program. The Programs and Features window opens.
- Click View installed updates in the menu on the left.
- Wait for the list to load. It shows Microsoft updates and other software patches, usually grouped by program, with Microsoft Windows near the bottom.
- Find the update you want to remove. Click the Installed On column header to sort by date, which makes the recent culprit easy to spot.
- Right-click the update name and select Uninstall. A confirmation box opens.
- Click Yes to confirm.
- When Windows finishes removing the update, follow any prompts to restart your computer.
If an update has no Uninstall option when you right-click it, Windows won’t allow it to be removed here.
How to Uninstall a Windows Update When Windows Won’t Start
If Windows won’t start normally, boot into the Windows Recovery Environment (WinRE). From the recovery menu you can remove the latest quality update or feature update without reaching the desktop.
The steps below force Windows into recovery by interrupting startup. This is safe, but do it only when the PC really won’t boot. If you can reach the sign-in screen, there is an easier route. Click the power icon, hold Shift, and click Restart. Then continue from the Troubleshoot step.
- If your PC is on, press and hold the power button for about 10 seconds to turn it off completely.
- Turn the PC back on. As soon as you see the manufacturer logo or the Windows logo, press and hold the power button for 10 seconds to turn it off again.
- Repeat this two or three times.
- On the third or fourth start, Windows detects that the PC is having trouble starting. It loads a diagnostic screen called Automatic Repair.
- Click Advanced options on the screen that appears.
- Click Troubleshoot.
- Click Advanced options again.
- Click Uninstall Updates.
- Choose Uninstall latest quality update or Uninstall latest feature update. A quality update is a regular monthly patch. A feature update is a large yearly system upgrade. If the problem started after the monthly patch, choose the quality update first.
- Select your account if asked, and enter your password. Then follow the on-screen instructions to finish removing the update.
- Restart your computer normally.
If the drive is protected by BitLocker or device encryption, Windows may ask for your recovery key before it lets you into these options. Find the key in your Microsoft account before you begin if you can. If the first option doesn’t fix the boot problem, you can come back and try the other one.
How to Uninstall Windows Updates Using PowerShell
PowerShell is a quick way to list updates and remove one without clicking through menus. It suits administrators and anyone who already knows the KB number. You open it with administrator rights by right-clicking the Start button.
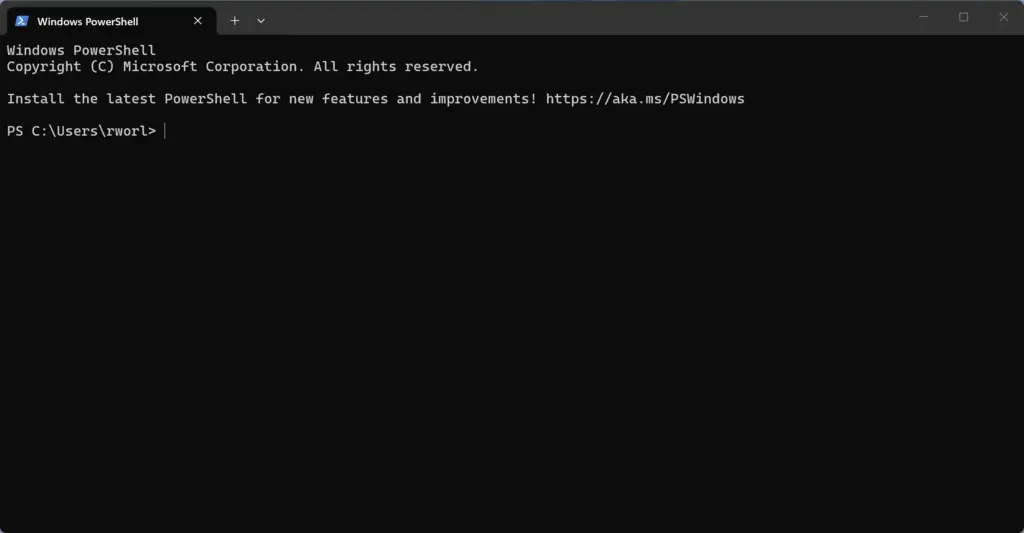
- Right-click the Start button and select Terminal (Admin) or PowerShell (Admin).
- Click Yes if a User Account Control prompt asks for permission to make changes to your device. A window opens with an administrator prompt.
- To list the installed updates so you can find the ID number, type the following command and press Enter:PowerShell
Get-HotFix - Look through the list for the update ID, such as KB5023696. The list also shows when each update was installed, which helps you pick the right one.
- To remove a specific update, type the following command, replace the placeholder with your actual update number, and press Enter:Code
wusa /uninstall /kb:USER-UPDATE-ID - Follow any prompts that appear on the screen to complete the removal, then restart your computer.
If PowerShell reports an error, check that you typed the KB number correctly and that the window says Administrator in its title bar. If the command still fails, use one of the other methods above.
Why Won’t Windows Let Me Uninstall This Update?
Windows blocks the removal of some updates. It treats certain foundational system patches as permanent once they are deeply integrated, and an update can also become impossible to remove if too much time has passed or if core files are locked by background processes. When that happens, the Uninstall button is missing or the command fails.
- The update is permanentWindows marks certain foundational system updates as permanent once they are deeply integrated or after a certain amount of time has passed. You cannot remove these updates normally.
- The rollback period expiredWindows automatically deletes the backup files needed to remove an update after 10 days to free up hard drive space. Once those files are gone, you cannot roll back the update through standard menus. This matters most for large feature updates and upgrades.
- Corrupted system filesIf important system files are damaged, the Windows servicing stack might fail to process the uninstallation command properly.
If you get an error saying that not all updates were successfully uninstalled, your best option is often the Windows Recovery Environment method described earlier in this guide. It runs before Windows loads fully, so it avoids many of the restrictions that apply on the running system.
Unique Expert Tips: Preventing Update Conflicts and Managing Disk Space
You can reduce the risk of a bad update, and give yourself more time to react, by adjusting the rollback window and clearing out corrupted update files. These are advanced steps, so use them only when you need them.
Managing the Rollback Window Safely: By default, Windows 10 and 11 keep old system files for 10 days so you can roll back updates. If you have plenty of storage space and want extra peace of mind after a major system upgrade, you can extend this window using the Deployment Image Servicing and Management (DISM) tool in an administrator command prompt. The window can be set to a maximum of 60 days. The change only helps while the old files still exist, so make it within the first 10 days. A longer window keeps more files on your drive. It gives you more time to test system stability before the backup files are automatically deleted.
Clearing the SoftwareDistribution Cache: If your update history is bugged or uninstallation commands fail repeatedly, the downloaded update files stored in your system folders might be corrupted. To clear them:
- Open the Services app, find Windows Update , and stop the service.
- Open File Explorer and go to 📁C:\
Windows\ .SoftwareDistribution - Delete the contents of the folder. Leave the folder itself in place.
- Go back to Services and start the Windows Update service again.
This clears bad downloaded data that can prevent clean uninstalls. It does not uninstall anything, though it may reset what Update history displays. Windows rebuilds the folder as it needs it.
Summary
A PC broken by a bad patch can usually be fixed by uninstalling the update through Settings, Control Panel, PowerShell, or the recovery menu. All four methods need administrator rights. Which one you use depends on how badly the update affected startup. Start with Settings if Windows boots, and fall back to the recovery menu if it doesn't. Afterwards, check Windows Update for a corrected patch and install it once it is available.
Have a question about this guide?
Answered by AI from this guide. Good questions may be added to this page — please don't include personal details.
Did this guide fix your problem?

About the Author
Richard
Tech Writer, IT Professional
Richard is a writer at Geek Rewind who turns complex IT tasks into clear, step-by-step guides. He draws on years of hands-on experience in system administration and enterprise IT operations, focusing on Windows, Linux and WordPress: the problems people actually run into, and the fixes that work. His server and WordPress guides come from systems he runs himself. Richard builds and maintains the platform behind Geek Rewind, from its Ubuntu servers and Nginx configuration to its custom WordPress plugins. Many new tutorials start with readers' questions, and he's always glad to answer them in the comments.
No comments yet — be the first to share your thoughts!