Locate the AppData Local Folder in Windows 11

AppData is a hidden folder at C:\Users\USERNAME\AppData that stores app settings, caches and temporary files for your account. To open its Local subfolder, press Win+R, type %localappdata%, and press Enter.
AppData has three subfolders: Local, LocalLow and Roaming. Local holds data that belongs to this PC only, such as browser caches, app logs and temporary files. The steps here apply to Windows 11 Home and Pro, and none of them needs a restart.
Five methods follow, from fastest to slowest. Fixes for a folder that won’t open or can’t be found come at the end.
To open the AppData Local folder on your PC, press Win+R, type 📂%localappdata%, and press Enter. File Explorer opens at 📁C:\
Open the AppData Local Folder with the Run Box
The Run box is the fastest route because it works even while AppData is hidden. These steps open the AppData folder on your PC (appdata pc) at its Local location without changing any setting.
- Press Win+R. The Run dialog box opens, with a text field labelled Open.

Run dialog - Type
%localappdata%in the Open box. This is an environment variable, a placeholder name that Windows replaces with the real folder path for the account you are signed in to. - Press Enter. File Explorer opens at
C:\Users\USERNAME\AppData\Local. The tab title reads Local.
If Windows shows “Windows cannot find ‘📂%localappdata%'”, check that you typed a percent sign at both ends and left no spaces. If you type %appdata% instead, the Roaming folder opens, and that is a different location. If the address bar ends in Roaming, go up one level and open Local, or retype the command.
This method does not need administrator rights, because the folder belongs to your own account.
Open AppData Local from the File Explorer Address Bar
The address bar accepts the same variable as the Run box. Use this method when File Explorer is already open and you want to jump straight to the folder.
- Press Windows key + E. File Explorer opens.
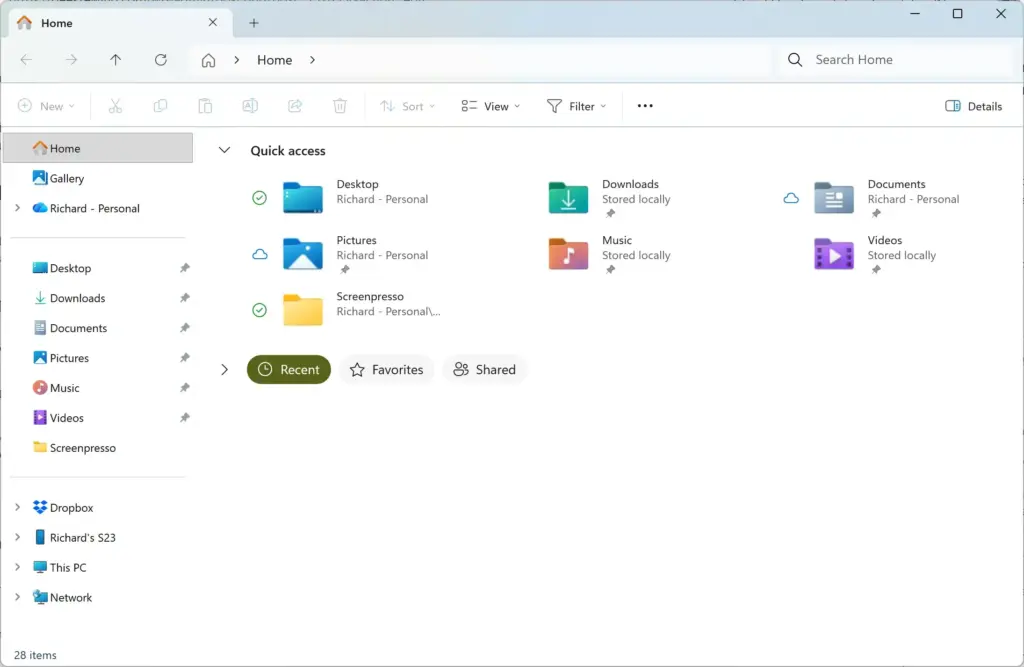
Windows 11 File Explorer showing Dropbox folder in sidebar. - Click the address bar at the top of the window. You can also press Ctrl + L. The current path turns into editable text.
- Type
%localappdata%in the address bar.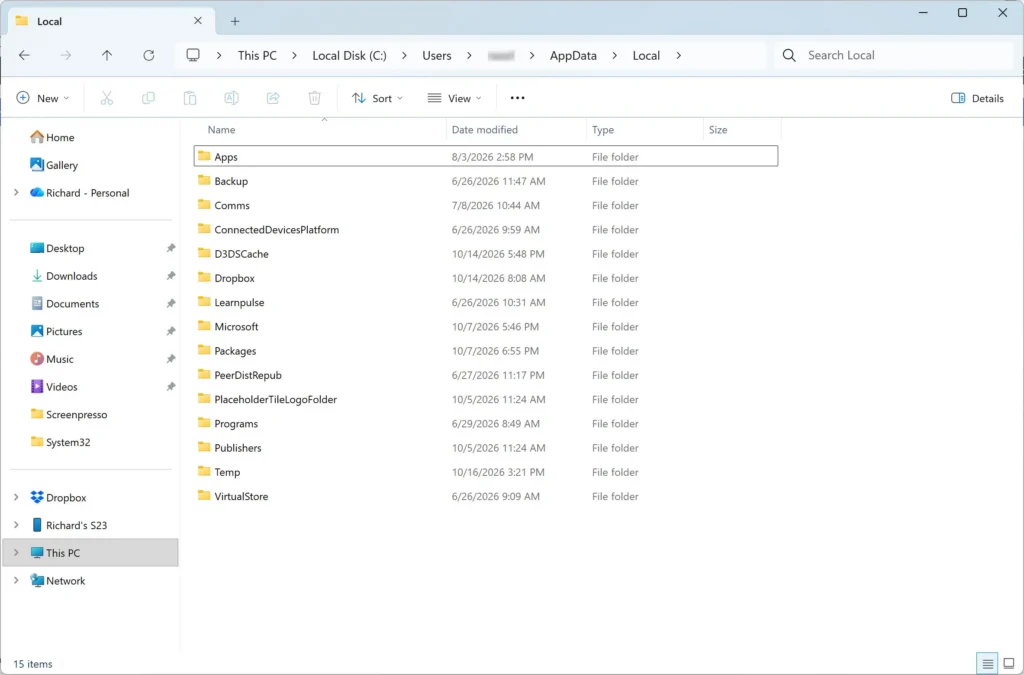
- Press Enter. The window switches to the Local folder, and the address bar shows the full path.
You can also type the full path, C:\Users\USERNAME\AppData\Local, and replace USERNAME with the name of your profile folder (the folder Windows made for your account under Users). Windows then opens the folder even if AppData is still hidden.
Find the exact name of your profile folder
The profile folder name does not always match the name shown on your sign-in screen. Windows often shortens a Microsoft account name when it creates the profile. To see the real path, open the Run box, type cmd, and press Enter.
At the prompt, type echo %USERPROFILE% and press Enter. The output is the full path to your profile folder, for example C:\Users\USERNAME.
Browse to AppData Manually by Showing Hidden Items
Windows hides AppData so that nobody deletes it by accident. This method turns on Hidden items in File Explorer so that you can click through to the folder and see AppData in your profile.
Show hidden items and open the Local folder
- Press Windows key + E. File Explorer opens.
- Select This PC in the left pane. Your drives appear on the right.
- Open Local Disk (C:). This is the drive where Windows is installed. If your system drive has another letter, open that drive.
- Open the Users folder. It holds one folder for each account on the PC.
- Open your user folder. This is the folder named after your profile, shown as USERNAME in this post.
- Select View in the command bar at the top of the window. A menu opens.
- Point to Show, then select Hidden items. A check mark appears next to the option. A faded AppData folder now appears in your user folder.
- Open AppData. You see three folders: Local, LocalLow and Roaming.
- Open Local. This is the folder the path
C:\Users\USERNAME\AppData\Localpoints to.
If you see no View menu item, the File Explorer window may be too narrow. Widen the window and look again. The setting stays on until you turn it off, including after a restart.
Use Folder Options instead
The older Folder Options dialog does the same thing. In File Explorer, select See more (the three dots) in the command bar, then select Options. Open the View tab. Under Advanced settings, choose Show hidden files, folders, and drives, then select OK.
Hide hidden items again
To undo the change, open File Explorer, select View, point to Show, and select Hidden items again. The check mark disappears and AppData vanishes from your user folder. The folder and its contents are not touched. The Run box and address bar methods still open it.
Open AppData Local from Terminal, Command Prompt or PowerShell
A command line helps when you work in a terminal already or want to script the step. The command asks File Explorer to open the folder.
- Right-click the Start button. A menu of system tools opens.
- Select Terminal. A window opens with a tab for either PowerShell or Command Prompt.
- Type the command that matches your tab. In Command Prompt, type
explorer %localappdata%. In PowerShell, typeexplorer $env:LOCALAPPDATA. - Press Enter. File Explorer opens at
C:\Users\USERNAME\AppData\Local.
The two commands differ because PowerShell replaces %localappdata% differently from Command Prompt. If you use the wrong form, File Explorer opens a different folder or shows an error. Retype the command that matches the tab title. A standard user account is enough, so do not open the terminal as an administrator for this task.
Keep AppData Local One Click Away
Pin the Local folder to Quick access
Quick access is the list of folders at the top of the File Explorer left pane. The folder must be visible before you pin it, so turn on Hidden items first if needed.
- Open the AppData folder using the manual method above.
- Right-click the Local folder. A context menu opens.
- Select Pin to Quick access. If you do not see it, select Show more options first.
The Local folder now appears under Quick access in the left pane. To remove it, right-click the entry and select Unpin from Quick access. The folder itself stays in place.
Create a desktop shortcut
- Right-click an empty area of the desktop. A context menu opens.
- Select New, then Shortcut. The Create Shortcut wizard opens.
- Type
%localappdata%in the location box. - Select Next.
- Type a name such as AppData Local, then select Finish. A folder shortcut appears on the desktop.
Double-click the shortcut to open the folder. Delete the shortcut at any time. Removing it does not affect AppData.
What You Find Inside AppData
Knowing what each folder is for helps you decide what is safe to touch. Apps create their own folders here, so your list will differ from another PC.
Local, LocalLow and Roaming compared
- Local stores data tied to this PC, such as caches, logs and settings that are too large or too specific to move between computers.
- LocalLow stores data for apps that run with restricted permissions, such as some browser components and games.
- Roaming stores settings meant to follow your account to other computers on a work or school network, such as app preferences and dictionaries.
Common folders inside Local
- Temp holds temporary files that apps and installers create. Its path is
C:\Users\USERNAME\AppData\Local\Temp. - Microsoft holds data for Windows components and Microsoft apps, including Microsoft Edge profile data.
- Packages holds the data of apps installed from the Microsoft Store.
- Google holds Chrome profile data, if Chrome is installed. Other browsers and apps create folders under their own names.
Before you change or delete anything
Close the app first, then copy the folder you plan to change to a safe location such as your Documents folder. If the app misbehaves afterward, copy the files back. Do not delete the Local folder or the AppData folder itself.
Fix Problems Opening or Finding AppData
AppData does not appear in your user folder
AppData is hidden by default, so this is expected. Turn on Hidden items with the steps in the manual method, or use the Run box. If Hidden items is unchecked again after a restart, or the option does nothing, a work or school administrator may manage the setting on your PC. Ask your IT team, or use the Run box, which does not depend on the setting.
Windows says you do not have permission
This happens when you try to open another account's AppData folder. Administrator privileges are required for this step. Open the folder from an account that is a member of the Administrators group.
When File Explorer shows "You don't currently have permission to access this folder", select Continue, then approve the User Account Control prompt (the pop-up that asks you to confirm an action as an administrator). Without an administrator account, Windows blocks access.
Reading another person's profile may breach your organisation's rules. Check before you do it on a shared or work PC.
The path shows a different user name than expected
Windows names the profile folder when the account is first created, and a later change to the account name does not rename the folder. Use %localappdata% instead of typing the path by hand. The variable always points to the folder for the account you are signed in to.
The folder opens but looks empty
You may have opened a different account's folder, or an app may store its data elsewhere. Check the address bar to confirm the path ends in AppData\Local. Some apps keep data in Roaming or LocalLow instead.
What to Do Next
To open the Roaming folder, press Windows key + R, type %appdata%, and press Enter. If you turned on Hidden items only to reach AppData, turn it off again from View Show in File Explorer. Before you clear anything in the Temp folder or an app's data, copy the files to another location so that you can restore them.
Have a question about this guide?
Answered by AI from this guide. Good questions may be added to this page — please don't include personal details.
Did this guide fix your problem?

About the Author
Richard
Tech Writer, IT Professional
Richard is a writer at Geek Rewind who turns complex IT tasks into clear, step-by-step guides. He draws on years of hands-on experience in system administration and enterprise IT operations, focusing on Windows, Linux and WordPress: the problems people actually run into, and the fixes that work. His server and WordPress guides come from systems he runs himself. Richard builds and maintains the platform behind Geek Rewind, from its Ubuntu servers and Nginx configuration to its custom WordPress plugins. Many new tutorials start with readers' questions, and he's always glad to answer them in the comments.
No comments yet — be the first to share your thoughts!