

This article explains how to show the local weather forecasts in Outlook Calendar on Windows 11.
The new Outlook for Windows brings the latest features and a modern and simplified design. It supports Exchange-backed Microsoft 365 work or school, Outlook.com, Hotmail, and Gmail accounts.
The app has many features, including support for subscription management, email forwarding, setting default From address, backing up your mailbox, changing the reading pane, opening a new window for a message, language translations, turning text predictions on or off, switch primary account, sharing a calendar, changing language, date and time format, public a calendar, show week numbers in Outlook calendar, deleting your search history, export your search history, add or remove events from emails to your Calendar, switch to dark mode, and more.
Another feature in the new Outlook is showing the local weather conditions on your calendar so you can easily plan and prepare for your day.
Showing the weather in the Outlook calendar can show the weather forecast for your location or any other city you choose, making it easier to plan outdoor activities or adjust your schedule.
This feature can be especially useful for those who work outdoors or travel frequently, as it helps them stay informed about the weather conditions at all times.
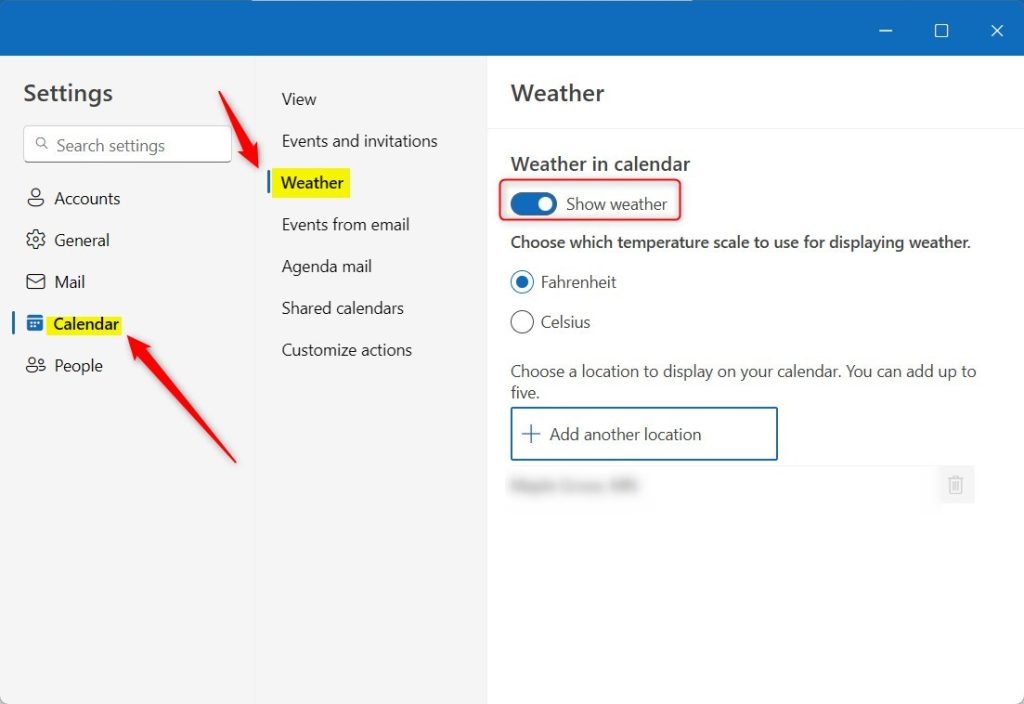
Step 1: Enable Weather in Calendar
- Open Outlook on your computer.
- Click on the “Settings” icon at the top right of the app window.
- In the Outlook Options window, click on “Calendar” in the left sidebar.
- Scroll down to the “Weather” section.
- Toggle the button to the On or Off position to “Show weather on the calendar.”
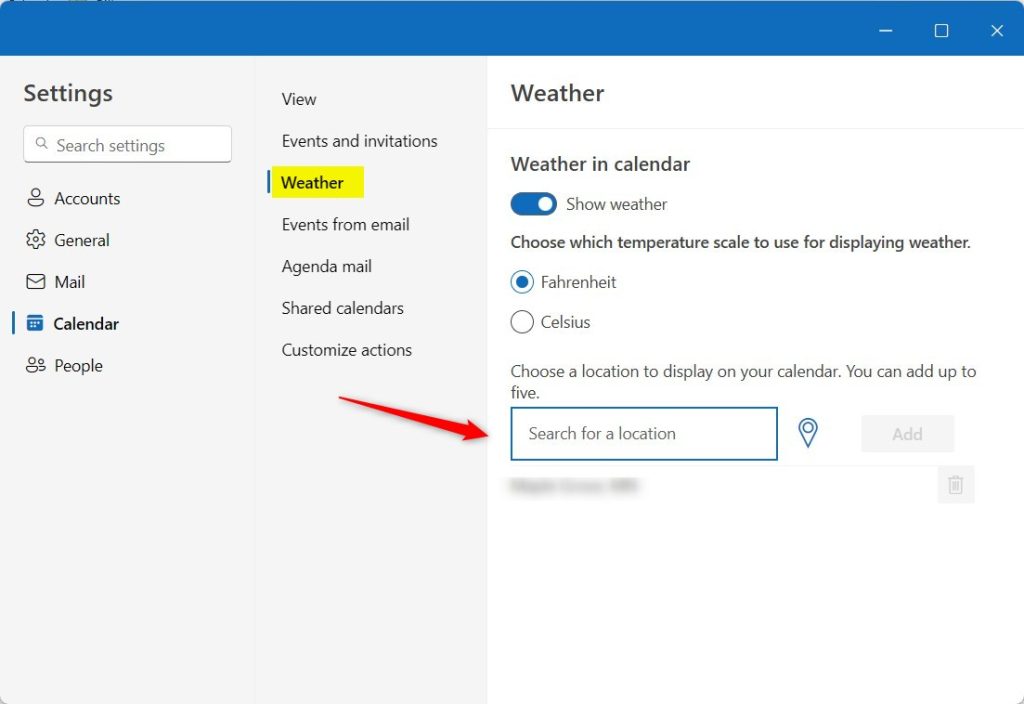
Step 2: Set the Weather Location
- If you are still in the Outlook Settings window, click on the “Calendar” tab in the sidebar.
- Under the “Weather” section, click on the “Location” button.
- In the Weather Location dialog box, enter the city or location you want to see the weather forecast.
- Click “OK” to save the changes.
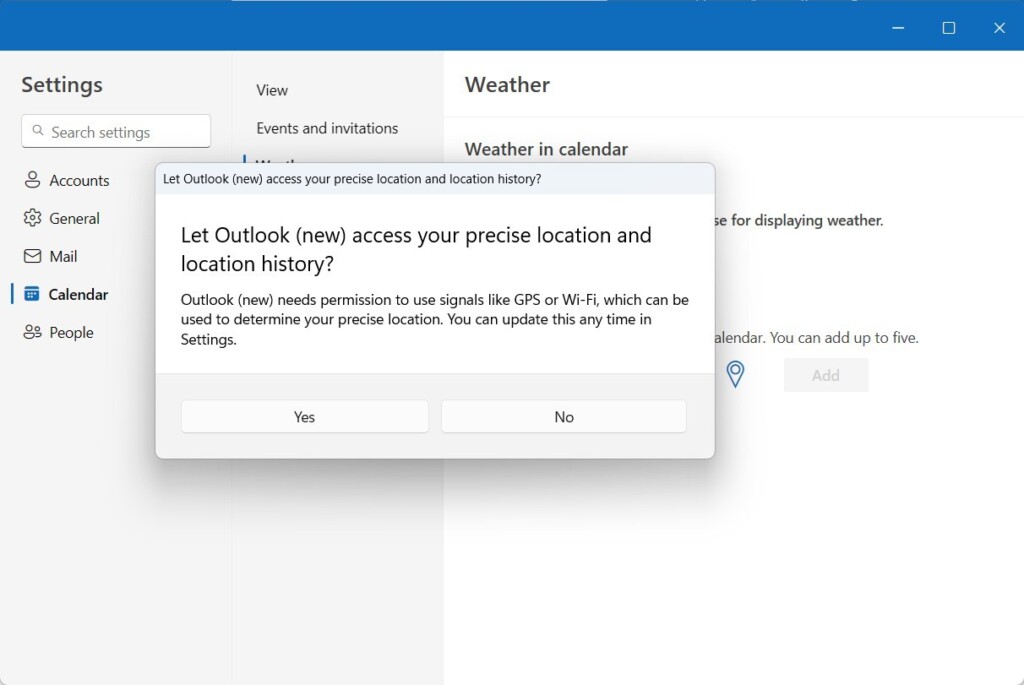
You’ll be prompted to allow location service permission to determine your location. Click Yes to allow it.
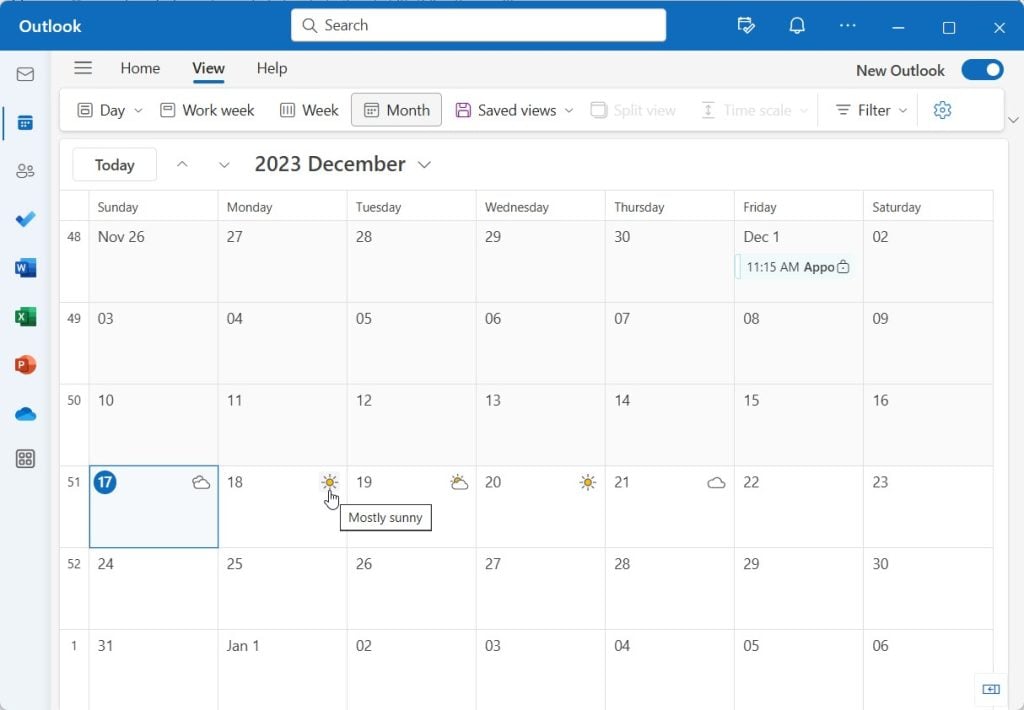
Step 3: View the Weather in Calendar
- Head back to the Calendar view.
- You will now see a weather icon next to the dates with weather information available.
- Hover over the weather icon to see a tooltip displaying detailed weather information for that day.
Note: This tutorial is based on the desktop version of Outlook and may vary slightly depending on your version.
Congratulations! You have successfully set up a weather information display in your Outlook calendar. Now, you can conveniently stay informed about the weather conditions while managing your schedule.
Conclusion:
- The tutorial provides step-by-step instructions for displaying weather forecasts in the Outlook calendar on Windows 11.
- Users can now conveniently stay informed about the weather conditions while managing their schedules.
- In case of errors or additional information to share, readers are encouraged to utilize the comments section.

Leave a Reply