How to Update Printer Drivers Automatically Using Windows Update

Printer drivers are the software files your computer needs to talk to your printer and print documents correctly. In Windows 10 and 11, Windows Update handles much of this on its own. It downloads the right files in the background, so you usually do not have to hunt for downloads on manufacturer websites.
Automatic driver delivery saves time and keeps your hardware working with little effort. This guide covers the standard Windows Update route first. It then covers fallback methods: Device Manager, removing and re-adding the printer, the Print Management console, the manufacturer’s website, and the disc or USB drive that came in the box. The Settings steps below are written for Windows 11. Windows 10 uses similar menus, but the layout and some wording differ.
Open Settings , select Windows Update , click Check for updates, then go to Advanced options Optional updates Driver updates. Tick your printer manufacturer’s software and click Download & install. Windows automatically installs the driver without requiring a restart in most cases.
Option 1. Use Windows Update
To update printer drivers through Windows Update , open Settings , select Windows Update, and click Check for updates. Windows scans Microsoft’s servers and installs the matching printer package alongside your regular system updates. Many printer drivers arrive this way without any action from you. Some are held back as optional updates, and the steps below show where to find them.
- Open Settings. Click the Start button and select the gear icon, or press the Win+I. The Settings window opens.

Windows 11 Start menu with Settings gear icon highlighted. - Select Windows Update from the left sidebar. If you want to run a scan first, click Check for updates and let it finish.
- Click Advanced options to view the extra settings.
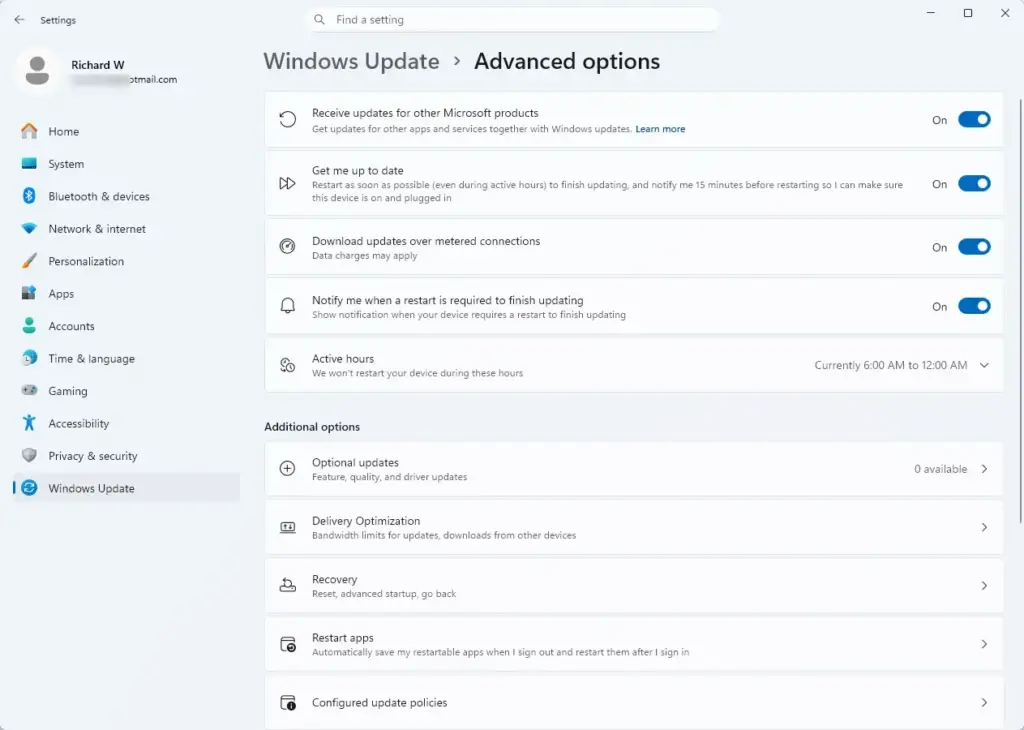
Settings › Windows Update › Advanced options - Scroll down to the Additional options section and click Optional updates.
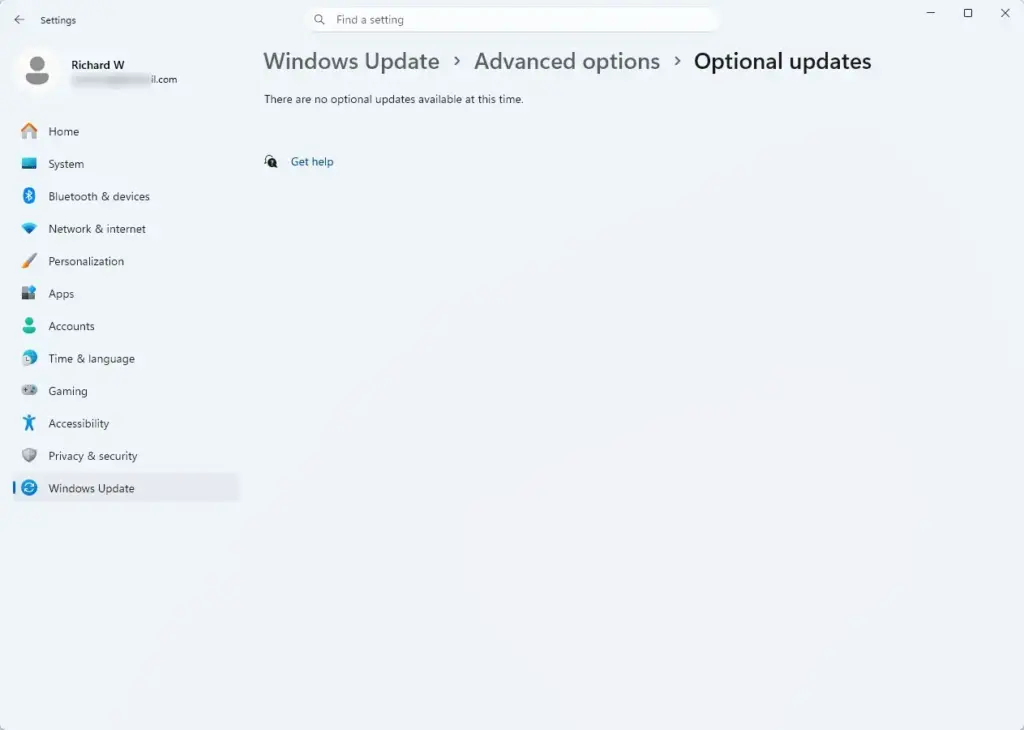
Settings › Windows Update › Advanced options › Optional updates - Expand the Driver updates dropdown to see the available hardware packages.
- Tick the box next to your printer manufacturer’s software and click Download & install. Wait for the download to finish. Windows shows the status next to the item.
If Optional updates is missing, or Driver updates does not appear inside it, Windows has no extra drivers to offer right now. That is normal. It usually means the current driver is already the newest one Microsoft has for your printer. You can also check that the PC is online. If your connection is set as metered, Windows may hold driver downloads back. The Printers & scanners page in Settings has an option to allow downloads over metered connections.
To undo a bad driver, open Device Manager, double-click the printer, go to the Driver tab, and click Roll Back Driver if the button is available.
Option 2. Use Device Manager
To update a printer driver with Device Manager, right-click the Start button , open Device Manager, expand the printer list, and choose Search automatically for drivers. This built-in utility makes Windows check for newer driver software without you visiting a manufacturer’s site. You need a working internet connection for the search to find anything online.
- Right-click the Start button and select Device Manager from the menu. The Device Manager window opens with a list of hardware categories.
- Scroll down and click the arrow next to Print queues or Printers to expand the section. Which one you see depends on how the printer is installed, and some PCs show both.
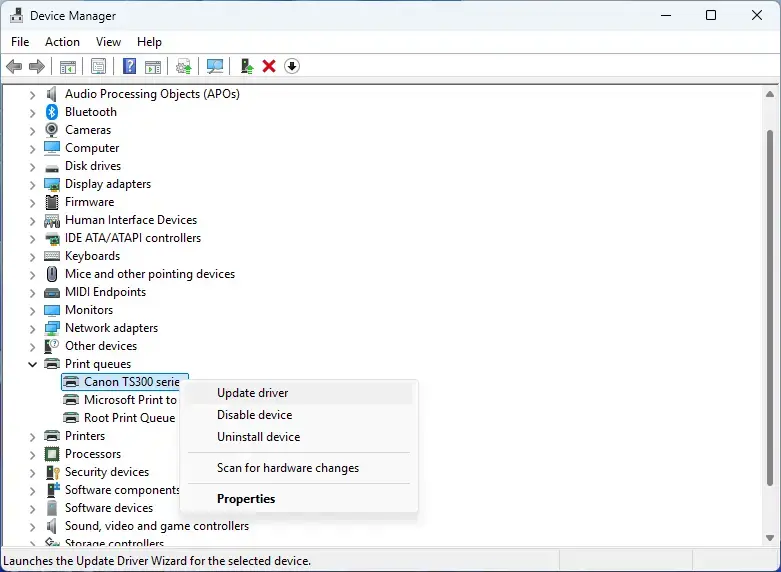
- Right-click your specific printer model and select Update driver. A window asks how you want to search for drivers.
- Click Search automatically for drivers. Windows checks the drivers already on your PC and online sources for a match.
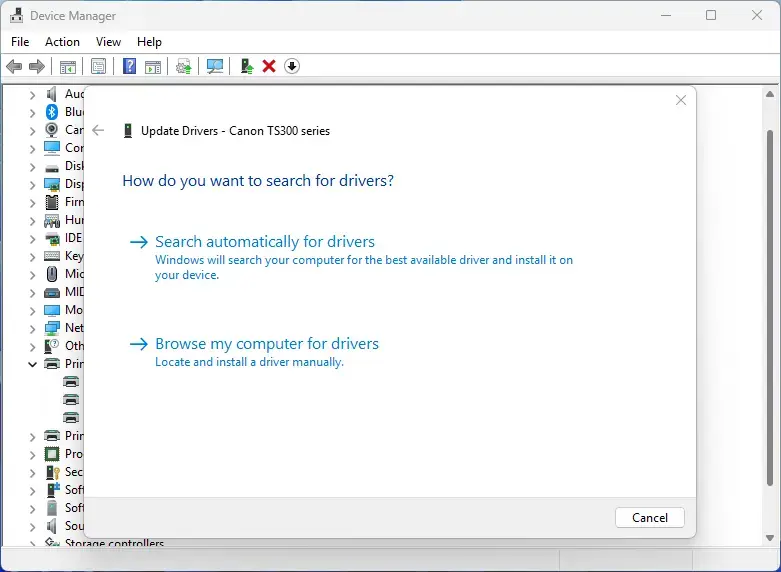
- Follow any prompts if a newer version is found and installed. If you see "The best drivers for your device are already installed", Windows has nothing newer to offer.
That message only reflects what Windows knows about. The manufacturer's website may still have a newer version, which is covered later in this guide. If the printer is not listed at all, check that it is powered on and connected. If the update goes wrong, use Roll Back Driver on the printer's Driver tab to return to the previous version.
Option 3. Reinstall the printer
Removing the device clears out a damaged setup, and Windows then discovers the printer again and installs its driver from scratch. Be aware that Windows can reuse a driver package it has already stored. The reinstall fixes a broken printer entry more often than it delivers a newer driver.
- Open Settings, go to Bluetooth & devices, then select Printers & scanners. Your installed printers are listed.
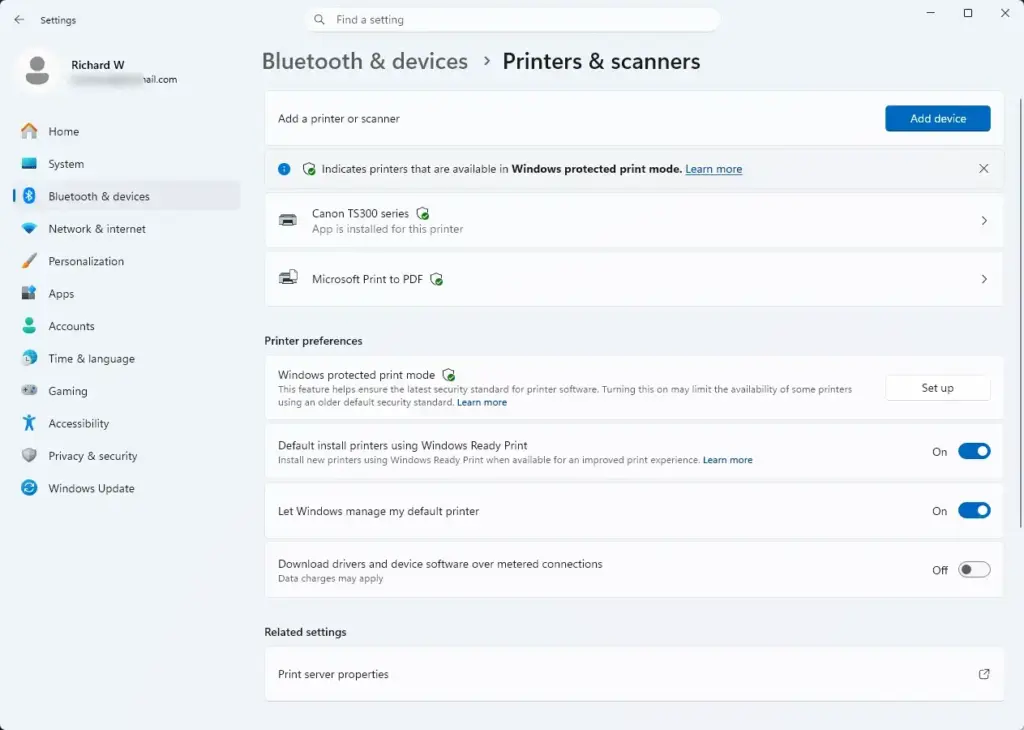
Settings › Bluetooth › Printers - Click your printer's name in the list. Its settings page opens.
- Click the Remove button and confirm if Windows asks. The printer disappears from the list.
- Click Add device near the top of the Printers & scanners page. Windows starts searching.
- Wait for the scan of your network and local ports to finish, then click Add device next to your printer model. Windows installs the driver and the printer returns to the list.
For a USB printer, keep it plugged in and switched on during the scan. For a network printer, make sure it is on the same network as the PC. If your printer never shows up, wait a little. Windows may show a link such as The printer that I want isn't listed, which lets you add it manually.
Option 4. Use Add Printer Driver Wizard
To use the classic driver tools, press the Windows key + R, enter the management console command, and add your printer or driver from the Print Management window. This administrative tool gives you finer control over drivers and ports than the Settings app does. Print Management is not included in Windows 11 Home. It is available in Pro, Enterprise and Education, and on some installs it may need to be added as an optional feature first.
- Press the Windows key + R to open the Run dialog box.
- Type
printmanagement.mscinto the text field and press Enter. The Print Management console opens. If Windows says it cannot find the file, you are probably on Home or the feature is not installed. - Expand Print Servers in the left pane, click your computer name, and select Printers.
- Right-click the empty space, or select Action from the top menu, then choose Add Printer.
- Follow the prompts in the network printer wizard and let the system query hardware databases automatically.
You need administrator rights for this. The same console also has a Drivers node under your computer name. It lists the driver packages already on the PC, and you can add or remove packages there.
Option 5. Download and install printer drivers from the manufacturer's website
To get a driver from the manufacturer, visit the official support site for your printer model, download the driver file, and run the installer. Going straight to HP, Canon, Epson or another brand gives you the newest software they publish. That is useful when Windows Update has nothing or offers only a basic driver.
- Open your web browser and go to the official support site for your printer brand, such as HP, Canon or Epson. Type the address yourself or use a trusted search result, and avoid third-party driver download sites.
- Find the support or downloads section and type your exact printer model number into the search bar. The model is printed on the printer, often on the front or back.
- Check your system architecture. Go to Settings System About and look at the System type property. It reads 64-bit or ARM-based, and you should pick the driver that matches.
- Download the matching installer package to your local drive. Choose the Windows 11 version if the site lists one. Otherwise pick the closest Windows version it offers.
- Double-click the downloaded file and follow the on-screen installation wizard. Restart the PC if the installer asks you to.
Many manufacturers also bundle extra utilities or scanning software in the same download. Read the options during setup if you only want the driver.
Option 6. Install software that came with the printer
To install from the disc or USB flash drive that came with your printer, insert the media, open File Explorer, and run the setup file. This works offline, so it helps when the PC has no internet connection during setup. Keep in mind that the software on the disc is often older than what the manufacturer publishes today.
- Insert the setup CD into your optical drive or plug in the included USB flash drive. Many newer PCs have no optical drive, so you may need an external one.
- Open File Explorer and go to your removable drive. If an AutoPlay prompt appears, you can use it instead.
- Double-click the setup or install executable file.
- Click Yes on any User Account Control prompt that appears. This is Windows asking permission to run the installer.
- Follow the manufacturer's wizard to install both the core software and the updating tools.
Once the printer works and the PC is online, run Windows Update or visit the manufacturer's site to replace the older driver with a current one.
If this didn't work
If the automatic tools do not fix your printing errors, check the physical connections first. Look at the USB or network cable, the power, and the printer's display for error messages. Then restart the Print Spooler, the background service that manages print jobs. A stuck job in the spooler is a common reason printing stops even when the driver is fine.
- Press Ctrl + Shift + Esc to open Task Manager.
- Select Services in the left sidebar. In a compact view, you may need to expand the sidebar first.
- Find Spooler in the list, right-click it, and select Restart. The status should briefly change and then show Running.
- Try printing again.
If the problem remains, download the manual installation package from the manufacturer's website. You can also consult related guides on hardware troubleshooting.
Have a question about this guide?
Answered by AI from this guide. Good questions may be added to this page — please don't include personal details.
Did this guide fix your problem?

About the Author
Richard
Tech Writer, IT Professional
Richard is a writer at Geek Rewind who turns complex IT tasks into clear, step-by-step guides. He draws on years of hands-on experience in system administration and enterprise IT operations, focusing on Windows, Linux and WordPress: the problems people actually run into, and the fixes that work. His server and WordPress guides come from systems he runs himself. Richard builds and maintains the platform behind Geek Rewind, from its Ubuntu servers and Nginx configuration to its custom WordPress plugins. Many new tutorials start with readers' questions, and he's always glad to answer them in the comments.
No comments yet — be the first to share your thoughts!