How to Unlock Accounts in Windows 11


Account locking in Windows 11 blocks access to your desktop after 5 incorrect password tries to stop unauthorized sign-ins. This safety feature protects your files, but it also leaves you locked out if you forget your own sign-in details.
Fixing this lockout takes a trip into the Windows Recovery Environment (a hidden repair screen on your PC) to clear the block using the Command Prompt tool.
Unlock a locked local Windows 11 account by opening lusrmgr.msc, double-clicking the account, unchecking “Account is locked out,” and clicking OK. Alternatively, open Windows Terminal as an administrator and use the command net user “username” /active:yes.
Microsoft Account vs. Local Account
Determining whether your Windows 11 PC uses a Microsoft Account or a Local Account matters. These work differently, and some tools are only compatible with one type.
How to unlock a local account using the Local Users and Groups manager
You can unlock a Windows 11 account using the Local Users and Groups manager if you have Windows 11 Pro, Enterprise, or Education. This built-in tool lets you fix locked user accounts quickly by changing their status. Press the Win, type lusrmgr.msc in the search box, and open the manager to fix your locked sign-in.
- Open the Start menu and type
lusrmgr.msc. - Select the result to open the manager.
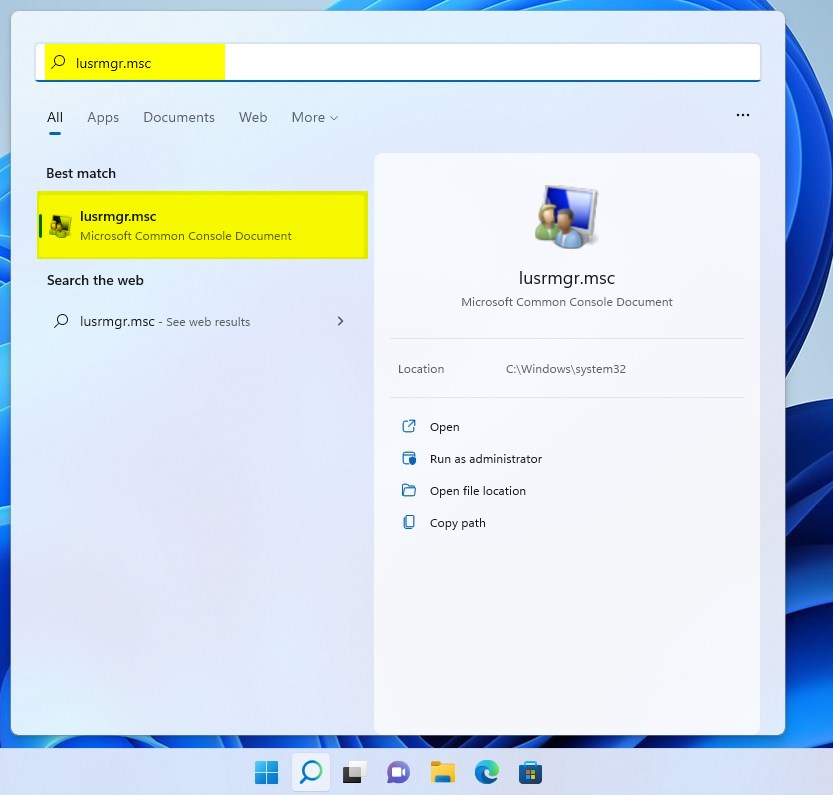
(Admin privileges required)
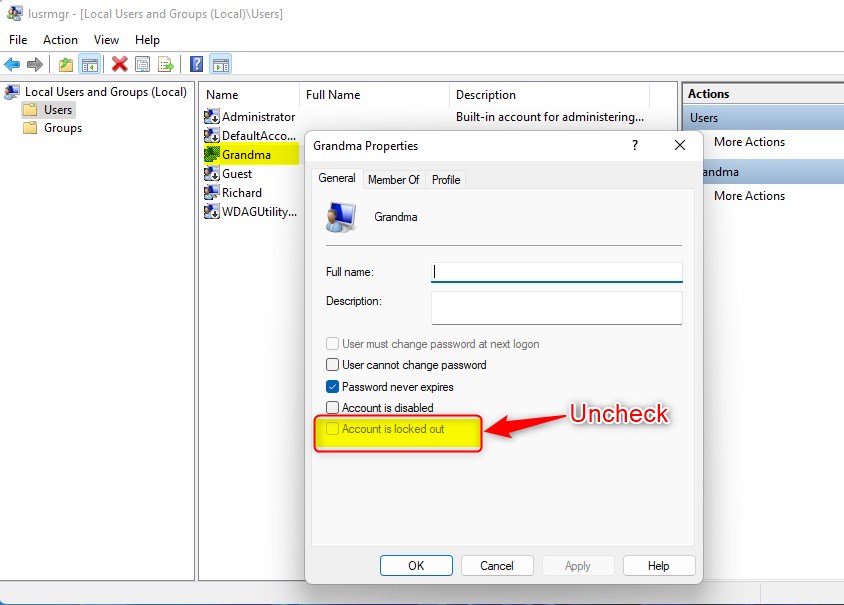
- Click on the Users folder on the left.
- Find the name of the locked account in the list.
- Double-click the account name to open its properties.
- Uncheck the box that says Account is locked out.
- Click OK and close the window.
How to unlock an account using the Terminal
You can unlock a Windows 11 account using the Terminal by running a quick command in PowerShell or Command Prompt. This method works well if you prefer text commands over clicking through menus. Open Windows Terminal with administrator rights, type the activation command with your specific username, and press Enter to restore access.
- Open Windows Terminal as an administrator.
- Choose either Windows PowerShell or Command Prompt.
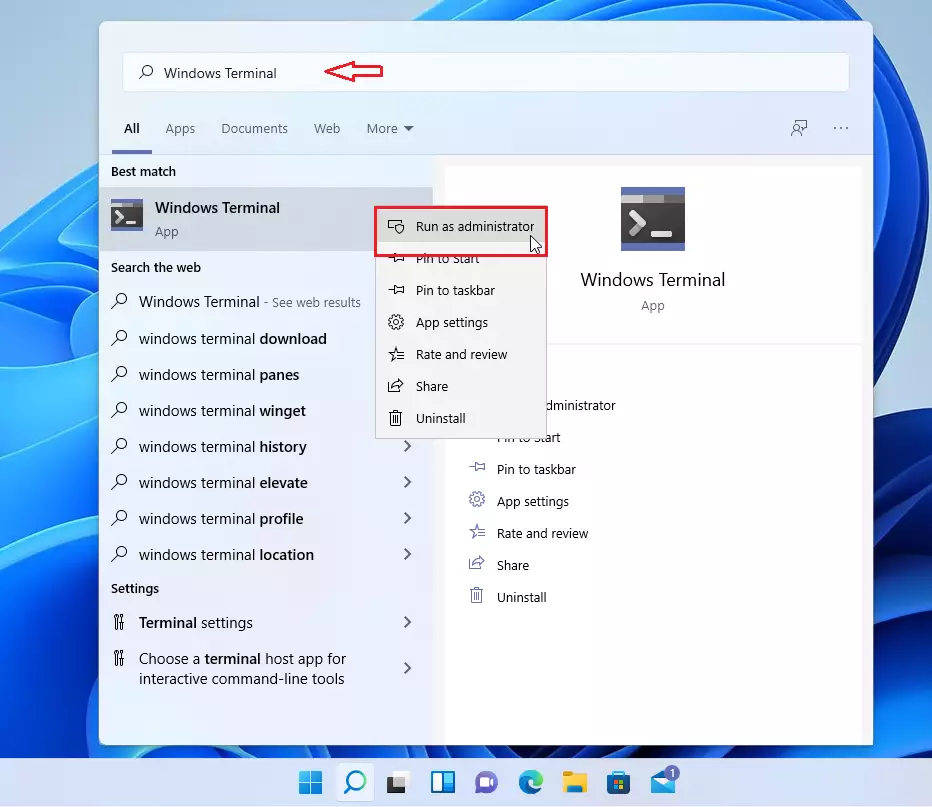
(Admin privileges required)
Type the following command and press Enter:
net user "genericuser" /active:yes
Remember to replace "genericuser" with the actual name of the account you are trying to unlock.
Summary
Windows 11 locks accounts after 10 failed login attempts as a security measure. Local accounts can be unlocked with tools like lusrmgr.msc or the Terminal. Microsoft Accounts, however, require using their recovery form.
Why is my Microsoft account temporarily suspended?
Your Microsoft account might face temporary suspension in Windows 11 if Microsoft detects unusual sign-in activity or a violation of their terms, acting as a security measure to protect your data.
What should I do if I don't receive a security code?
Missing security codes for a Windows 11 account call for checking the spam or junk folder first, verifying contact details, and requesting the code again or through a different method.
Was this guide helpful?

About the Author
Richard
Tech Writer, IT Professional
Richard, a writer for Geek Rewind, is a tech enthusiast who loves breaking down complex IT topics into simple, easy-to-understand ideas. With years of hands-on experience in system administration and enterprise IT operations, he’s developed a knack for offering practical tips and solutions. Richard aims to make technology more accessible and actionable. He's deeply committed to the Geek Rewind community, always ready to answer questions and engage in discussions.


No comments yet — be the first to share your thoughts!