How to Turn On or off Scheduled Night Light in Windows 11

- 12 steps
- Includes a restart or sign-out
Night Light shifts your display colors to warmer tones in the evening, which reduces eye strain and can help you sleep. It is built into Home and Pro editions of a currently supported Windows 11 version (25H2 or 26H2), so there is nothing to install. Changes apply right away and you do not need to restart.
Screens emit short-wave blue light, which looks like daytime sun to your brain. Looking at it late in the evening keeps you alert and disrupts your sleep cycle. Warmer screen colors cut that blue light.
Open Settings with Win+I, then go to System Display Night light and turn on the switch for Schedule night light. Pick Sunset to sunrise, which needs Location turned on under Settings Privacy & security Location, or Set hours to choose your own on and off times. The schedule applies right away with no restart.
What is Scheduled Night Light?
Scheduled Night Light turns the warm screen colors on and off at set times, so you never have to flip the switch yourself. You can set your own hours or let Windows follow your local sunset and sunrise.
- Sunset to sunrise – Night Light turns on when it gets dark outside and off when the sun rises. This option needs Location services (the Windows setting that lets the system know where you are) turned on.
- Set hours – You pick the exact times Night Light turns on and off.
Choose Sunset to sunrise if you want the schedule to follow the seasons. Choose Set hours if you keep a fixed routine or prefer not to share your location.
How to Turn On or Off Scheduled Night Light
To turn the schedule on, follow these steps.
- Open Settings: Press Win+I.
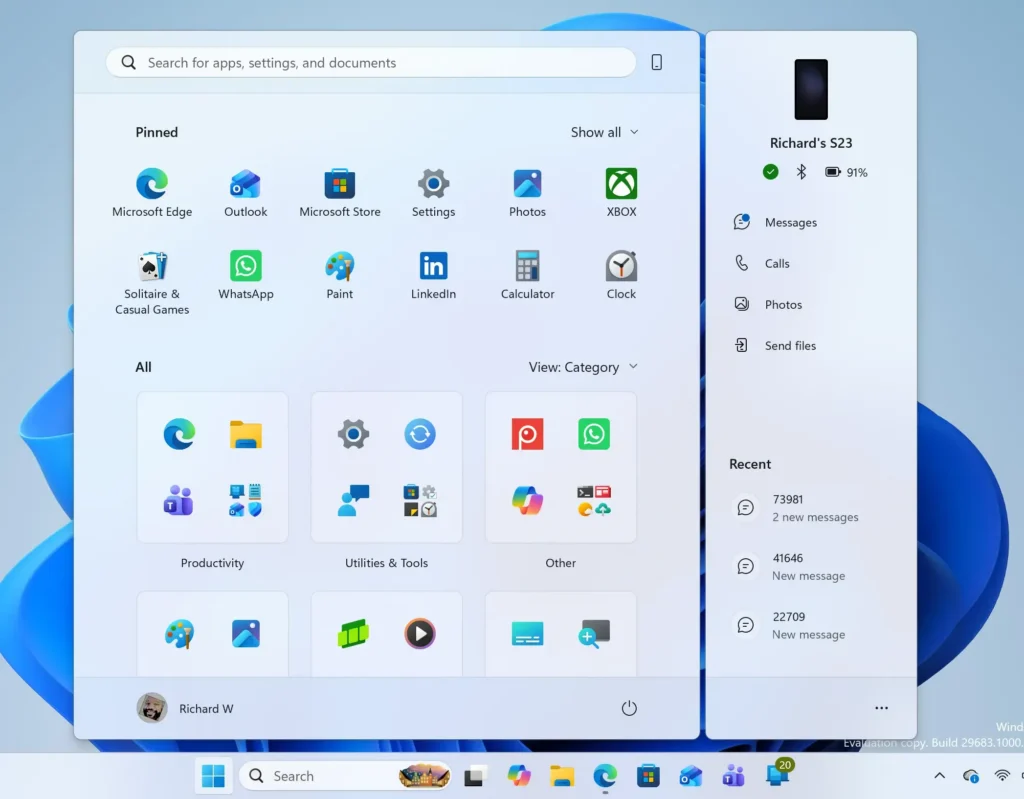
Windows 11 Start menu search panel for opening OpenSSH Client settings - Go to System: Click System in the left menu. The System options appear on the right.
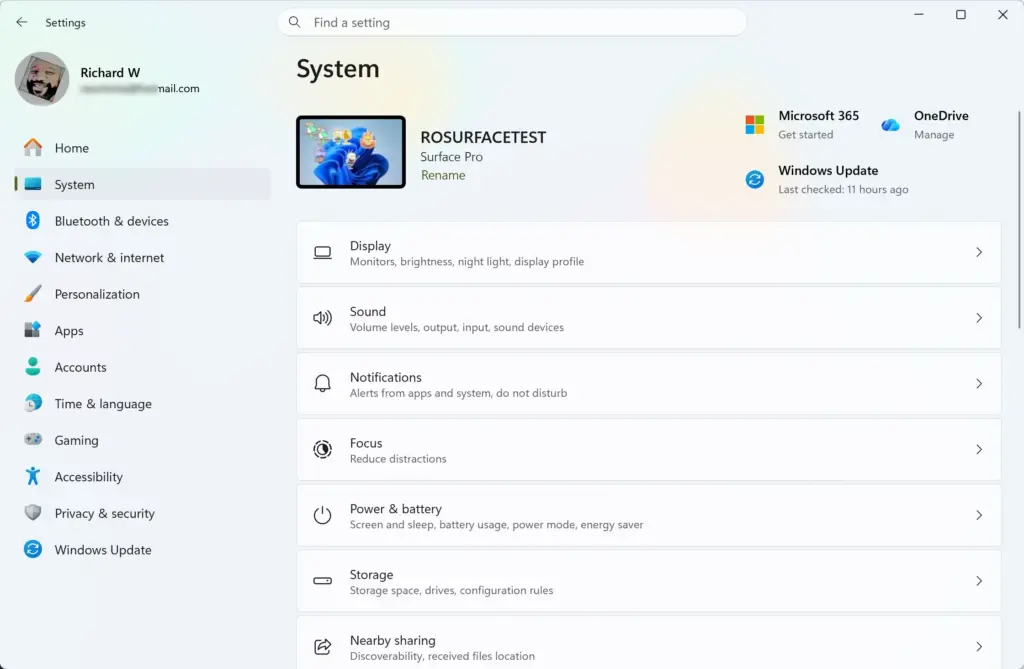
Settings › System - Open Display: Click Display. Your monitor layout, brightness and resolution options appear.
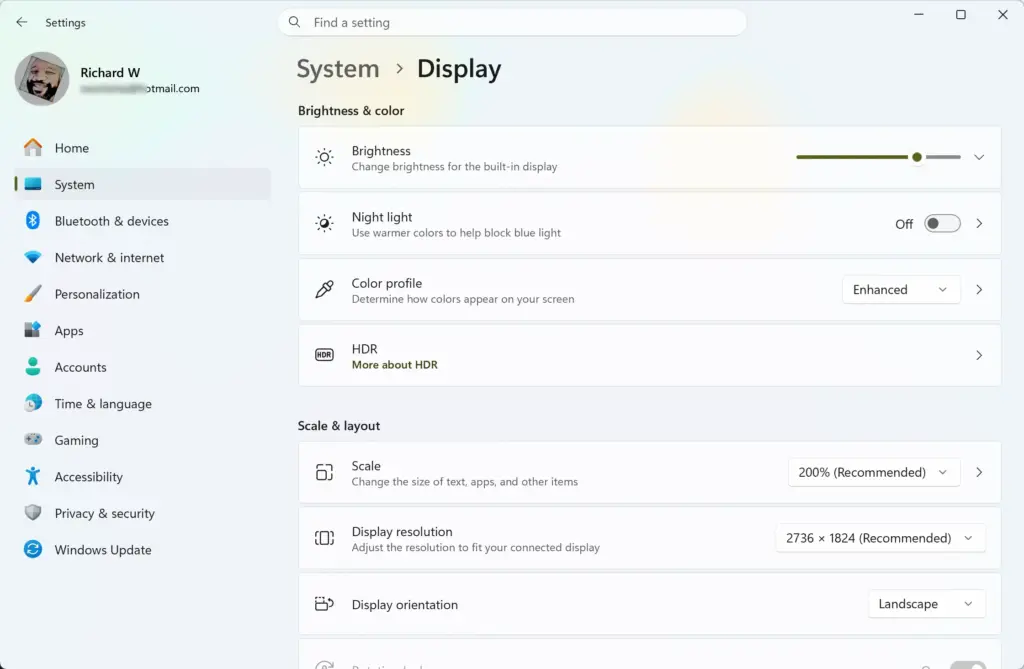
Settings › System › Display - Find Night light: Scroll down to the Brightness & color section and click Night light. The Night light page opens with a Turn on now button, a Strength slider and the schedule options.
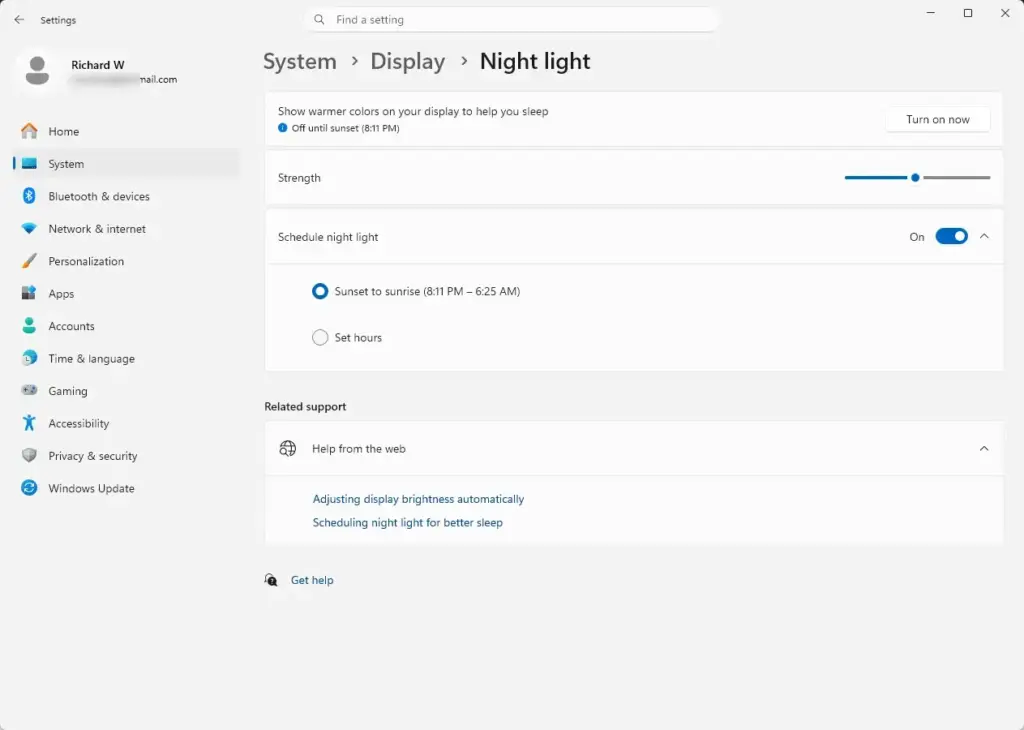
Settings › System › Display › Night light - Switch on the schedule: Turn on the switch for Schedule night light. Two choices appear below it: Sunset to sunrise and Set hours.
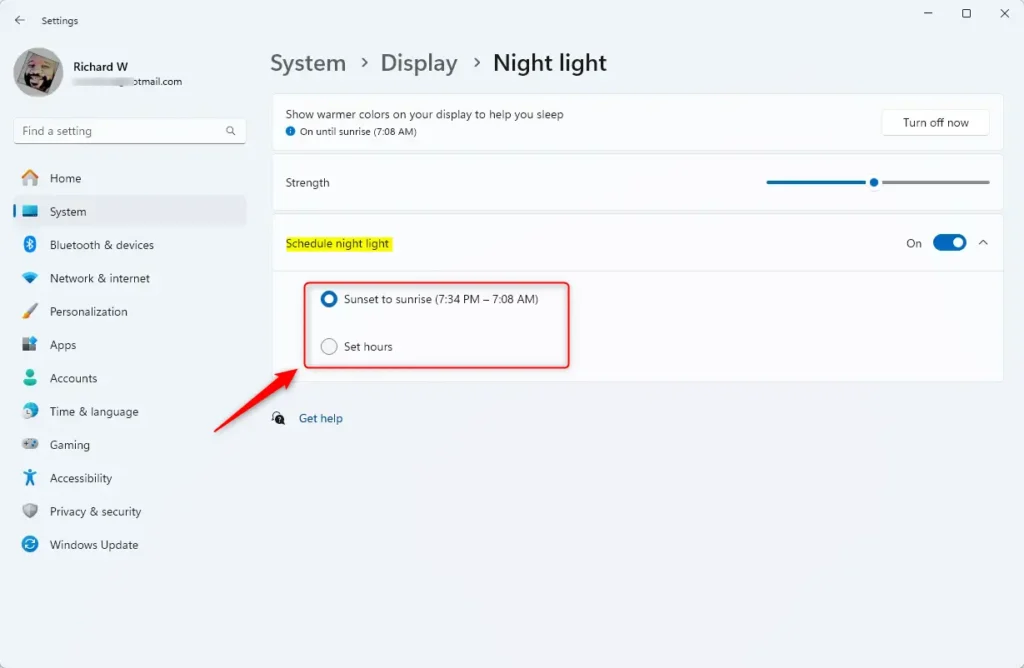
Windows 11 Night Light schedule settings with sunset to sunrise option. - Choose how it runs: Select either Sunset to sunrise or Set hours.
- If you chose Sunset to sunrise: Make sure Location is on under Settings Privacy & security Location. With Location off, Windows cannot work out your local sunset time, and the schedule may not behave as expected.
- If you chose Set hours: Pick the times you want Night Light to turn on and off. The schedule repeats daily at those times.
- Adjust the warmth (optional): Drag the Strength slider until the color feels comfortable. A higher strength gives a warmer, more orange screen. Click Turn on now to preview the effect without waiting for the schedule.
To turn the schedule off, follow these steps.
- Open the Night light page: Go to Settings System Display, then click Night light.
- Turn off the schedule: Switch off Schedule night light. Night Light no longer turns on automatically.
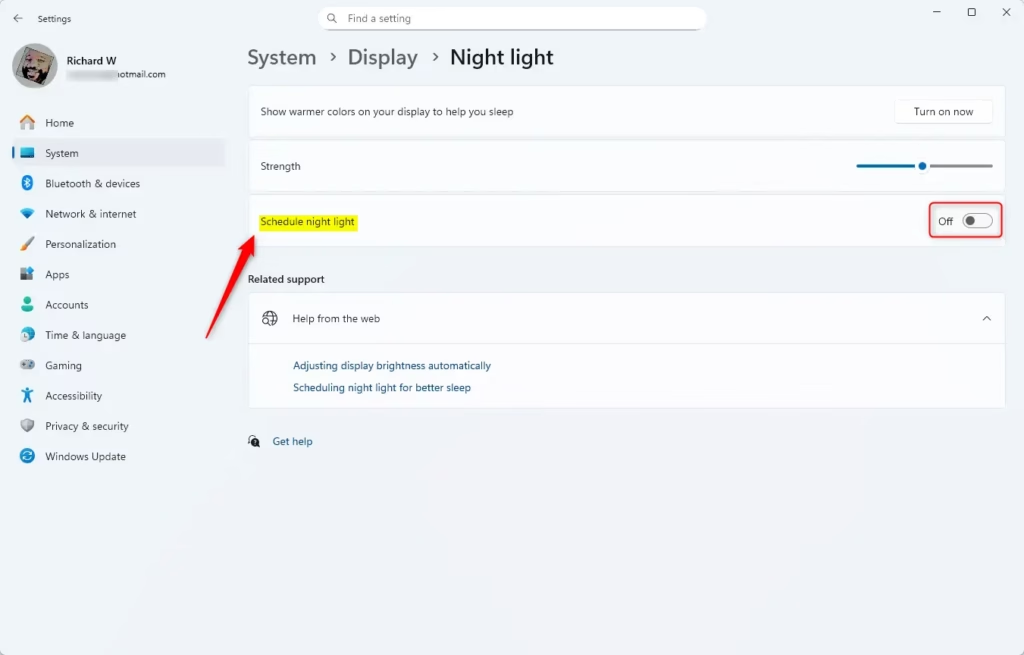
Windows 11 scheduled Night Light settings with custom hours option. - Check the screen: If the screen is still warm, Night Light is already on. Click Turn off now to return to normal colors.
To undo this later, switch Schedule night light back on. Your earlier choice and Strength setting should still be there.
You control the schedule from the main Display settings, using the schedule switch under Night light.
Quick Tips
- Pick times that fit your daily routine.
- Turn on Location services if you want Night Light to follow sunset and sunrise automatically.
- If the warmer colors bother you, lower the Strength slider instead of switching Night Light off.
- Night Light changes only how the screen looks. It does not change your files, apps or saved color profiles, and it does not affect anything else on your computer.
- If the schedule seems off, or warm colors show up during the day, check your Location setting, your time zone, and your date and time first. These are the usual causes of a broken sunset schedule.
What to do next
If you want the warm tint without a schedule, use Turn on now or the Night light tile in Quick Settings when you need it. To bring the schedule back, switch Schedule night light on again and your earlier settings should still be there.
Frequently asked questions
Is there something between night light on and off Windows?
Yes. Night light has a Strength slider that controls how warm the colors look, from mild to strong. You can also use Schedule night light to turn it on and off automatically at set times, such as sunset to sunrise.
How to schedule night light for better sleep with Windows?
Open Settings, then go to System Display Night light. Turn on Schedule night light, choose Set hours, and enter a start time about an hour before bed and an end time when you wake up. Windows applies the schedule every day.
How to turn off night light on 🪟 Windows 11?
Open Settings and go to System Display. Turn off the Night light toggle to stop the warm colors right away. You can also press Win+A and select the Night light tile in quick settings.
How to turn on night shift 🪟 Windows 11?
Windows 11 calls this feature Night light, not Night Shift. Open Settings, go to System Display, and turn on the Night light toggle. You can also press Win+A and select the Night light tile.
How do I turn my nite lite off on computer?
Open Settings and go to System Display Night light. Switch the Night light toggle to Off. The screen returns to normal colors immediately, and you do not need to restart the computer.
How to actibate night shift on 🪟 Windows 11?
Windows 11 uses the name Night light for this feature. Open Settings, go to System Display, and switch the Night light toggle to On. To have it turn on by itself, open Night light and turn on Schedule night light.
Still have a question?
Answered by AI from this guide. Good questions may be added to this page — please don't include personal details.
Did this guide fix your problem?

About the Author
Richard
Tech Writer, IT Professional
Richard is a writer at Geek Rewind who turns complex IT tasks into clear, step-by-step guides. He draws on years of hands-on experience in system administration and enterprise IT operations, focusing on Windows, Linux and WordPress: the problems people actually run into, and the fixes that work. His server and WordPress guides come from systems he runs himself. Richard builds and maintains the platform behind Geek Rewind, from its Ubuntu servers and Nginx configuration to its custom WordPress plugins. Many new tutorials start with readers' questions, and he's always glad to answer them in the comments.
No comments yet — be the first to share your thoughts!