How to Turn On Enhanced Phishing Protection in Windows 11

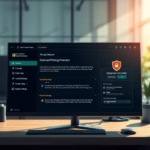
Enhanced Phishing Protection in Windows 11 version 22H2 and newer updates warns you when you type your Microsoft account password into an unsafe website or app. This security feature stops hackers from stealing your login details by flagging risky password uses the moment they happen.
SmartScreen runs quietly in the background alongside Microsoft Defender to keep your private data safe. Reusing the same password across different sites puts all your accounts at risk if one website gets hacked, making this tool essential for protecting your personal information.
- Controlled folder access
- Real-time protection
- Tamper protection
- Ransomware protection
Windows triggers an immediate warning whenever you type your Microsoft account password into an unverified platform.
Microsoft Edge and other Chromium-based browsers like Google Chrome both support this protection natively. Additional safeguards warn users immediately upon entering credentials on web pages flagged as malicious by Microsoft Defender SmartScreen.
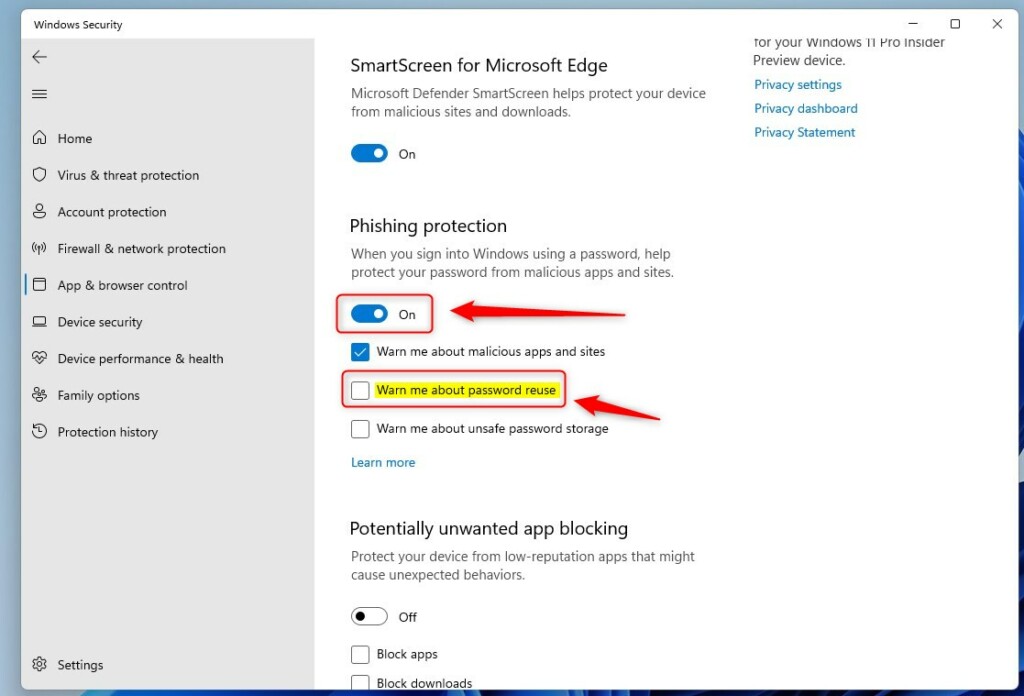
Navigate to Windows Security, then App & browser control, and Reputation-based protection settings. Under Phishing protection, toggle the switch to On or Off to enable or disable Enhanced Phishing Protection.
How to Turn On or Off Password Reuse Warnings in 🪟 Windows 11
You can turn on password reuse warnings in Windows 11 to get an alert whenever you type your Microsoft account password into an unsafe site or app. Open the Windows Security app from your taskbar , go to App & browser control, and open Reputation-based protection settings to turn this feature on or off.
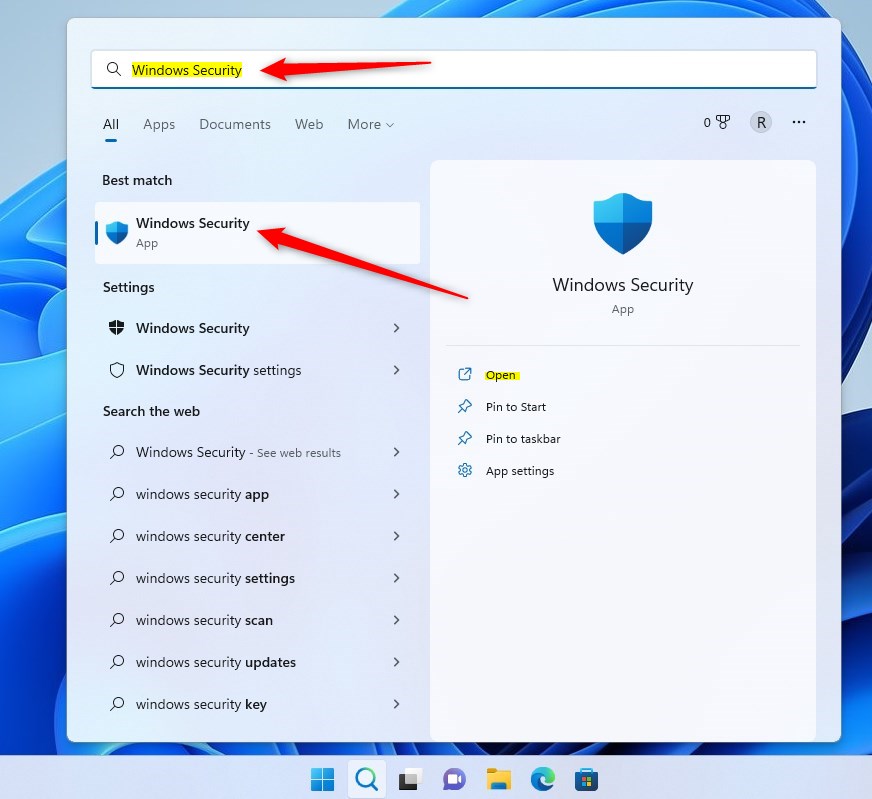
- Click the Search box on your taskbar (bottom-left corner).
- Type Windows Security and click the Windows Security app in the search results.
Next:
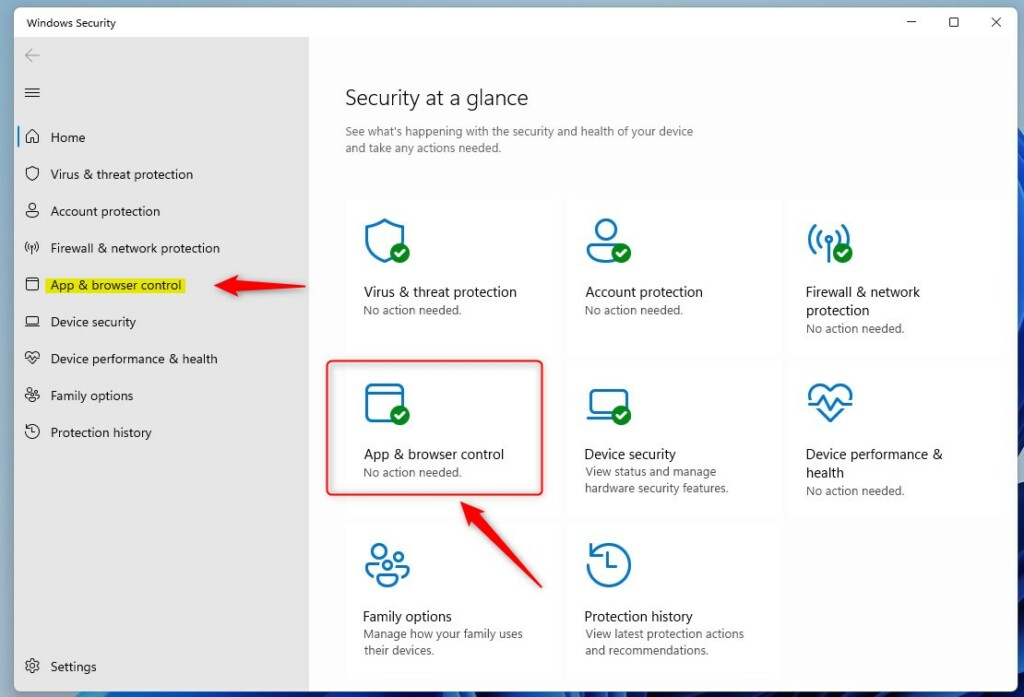
- In Windows Security, click on App & browser control.
- Scroll down and click Reputation-based protection settings.
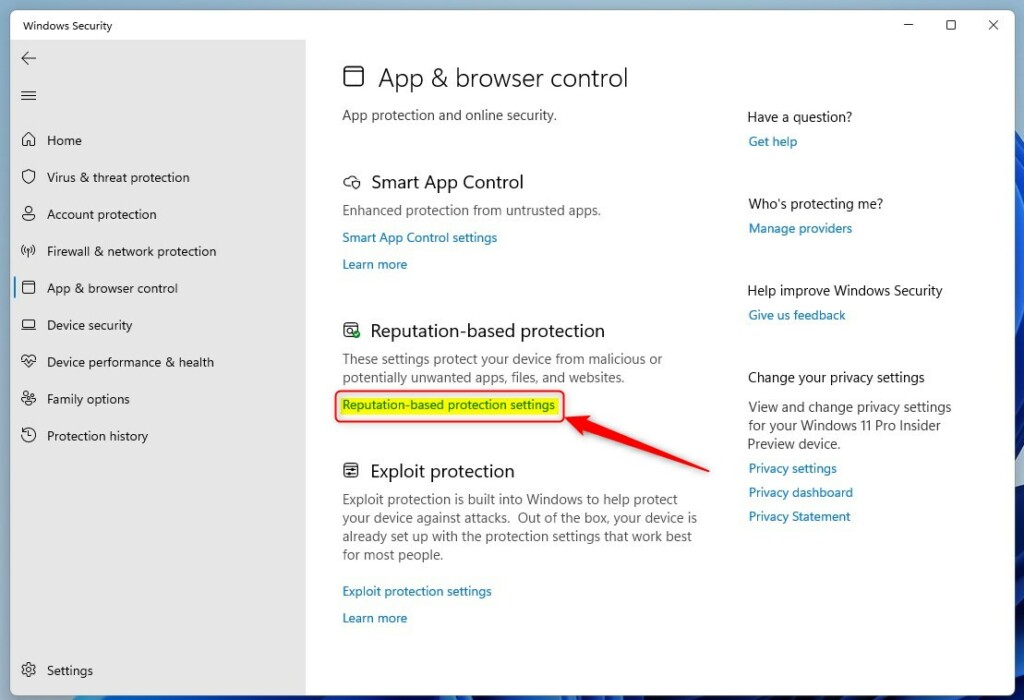
- Under Phishing protection, toggle the switch to On or Off to enable or disable Enhanced Phishing Protection.
Activation unlocks additional notification parameters covering specific security scenarios:
- Malicious apps and websites
- Password reuse
- Unsafe password storage
Advanced Option: Using Local Group Policy Editor
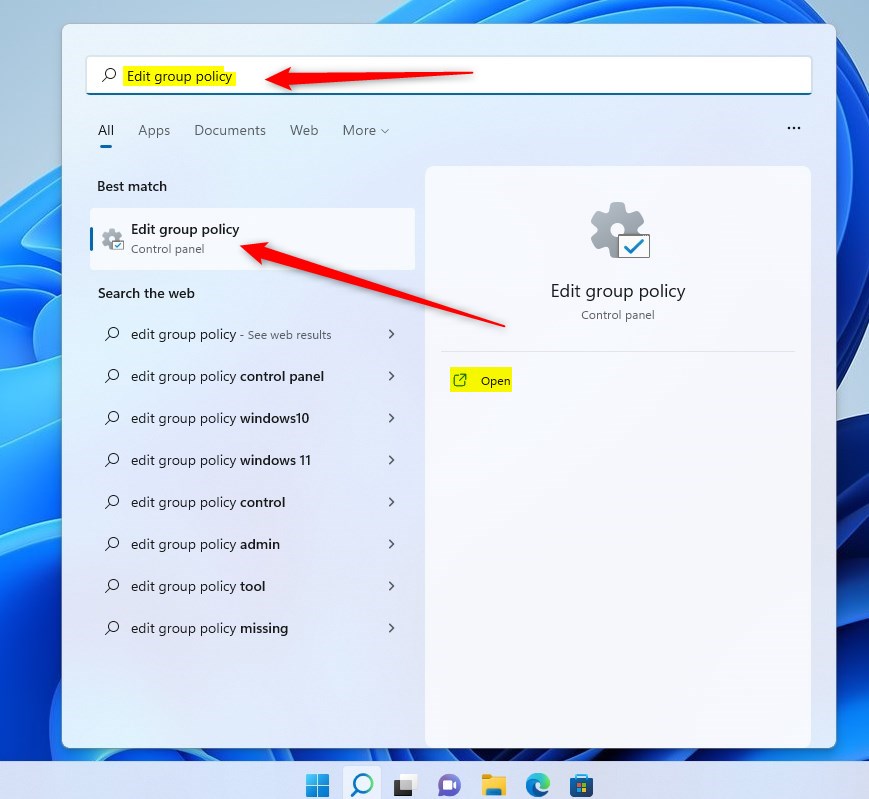
You can use the Local Group Policy Editor to turn on enhanced phishing protection across multiple computers if you manage a network. Open the Start Menu, search for Edit group policy, and follow the folder path to Windows Defender SmartScreen to configure these settings.
- Click the Start Menu button and type Edit group policy.
- Click Edit group policy from the search results.
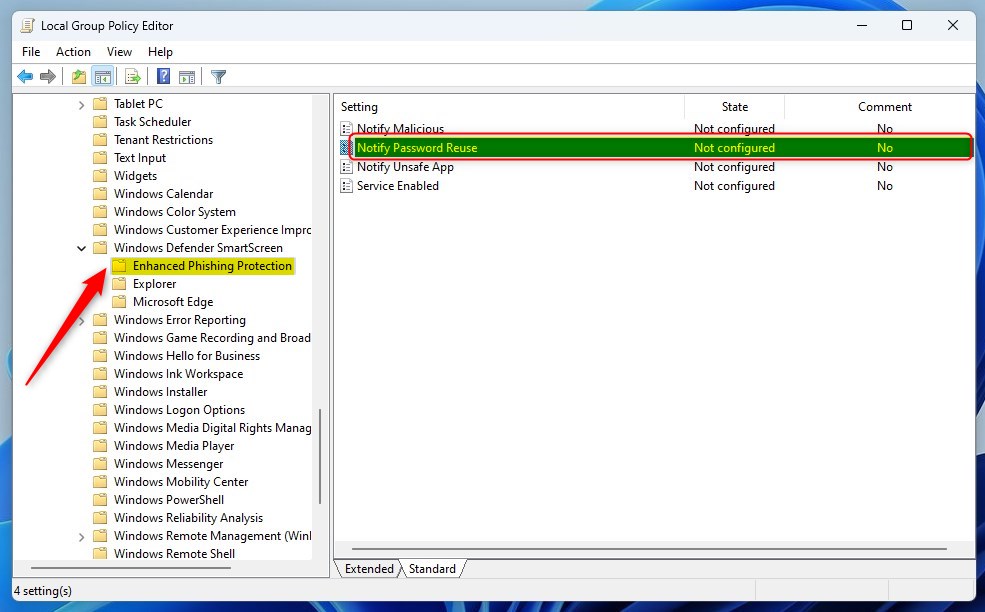
In the Local Group Policy Editor window:
Computer Configuration > Administrative Templates > Windows Components > Windows Defender SmartScreen > Enhanced Phishing Protection
Then:
- Find and double-click Notify Password Reuse in the right pane.
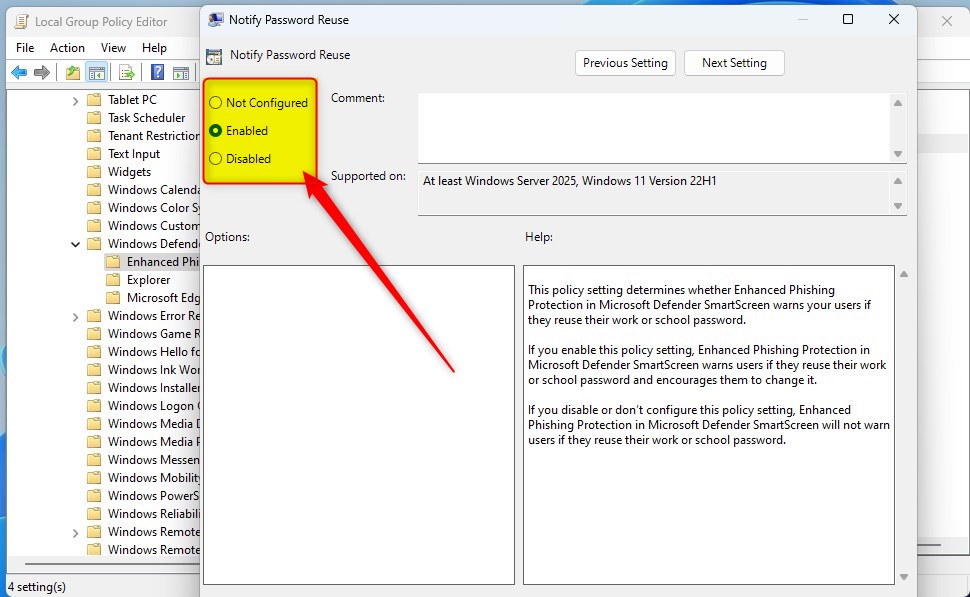
Choose one of the following options:
- Not Configured (default setting)
- Enabled (turns on password reuse warnings)
- Disabled (turns off password reuse warnings)
Click OK to save changes before closing the Local Group Policy Editor.
Summary
- Enhanced Phishing Protection helps keep your passwords safer by warning you if you reuse your Microsoft account password on other sites or apps.
- This feature works with Microsoft Defender for better security on your device and in the cloud.
- You can turn it on or off easily through Windows Security or use the Local Group Policy Editor for advanced settings.
- Following these steps helps you stay safer while browsing and using apps on Windows 11.
Enhanced phishing protection in Windows 11 helps keep your personal info safe by warning you if you reuse your Microsoft account password on unverified websites or apps. This built-in security feature works alongside Microsoft Defender to protect your device, and you can easily turn it on through Windows Security.
Was this guide helpful?

About the Author
Richard
Tech Writer, IT Professional
Richard, a writer for Geek Rewind, is a tech enthusiast who loves breaking down complex IT topics into simple, easy-to-understand ideas. With years of hands-on experience in system administration and enterprise IT operations, he’s developed a knack for offering practical tips and solutions. Richard aims to make technology more accessible and actionable. He's deeply committed to the Geek Rewind community, always ready to answer questions and engage in discussions.


No comments yet — be the first to share your thoughts!