How to Automate Do Not Disturb in Windows 11
You can also set Do Not Disturb to turn on and off automatically at certain times or during specific activities. This way, you won’t have to remember to turn it on or off yourself.
Automate Do Not Disturb by going to Settings > System > Notifications. Click “Turn on Do Not Disturb automatically” and set your desired times. You can also enable it for specific activities like gaming or presentations.
How to Set Do Not Disturb to Turn On Automatically in 🪟 Windows 11
Follow these simple steps to make Do Not Disturb start and stop automatically:
- Open Settings: Click the Start menu button (Windows icon) at the bottom-left of your screen, then select Settings. Or press
Windows key + Ion your keyboard to open Settings quickly. - Go to System Settings: In the Settings window, click on System from the left side menu.
- Open Notifications: On the right side, find and click the Notifications section.
- Find Do Not Disturb Automation: Scroll down and click on Turn on Do Not Disturb automatically to see more options.
- Set Your Schedule: Check the box next to During these times. Then choose the time you want Do Not Disturb to start and end. You can also select how often it repeats (daily, weekdays, weekends).
- Choose Extra Options (Optional): You can also check boxes to turn on Do Not Disturb automatically when:
- You are duplicating your display (like during presentations)
- You are playing a game
- You are using an app in full-screen mode
- For the first hour after a Windows update
- Once done, you can close the Settings app. Your Do Not Disturb will now work automatically based on your chosen times and activities!
Visual Guide
Step 2: Open System in Settings
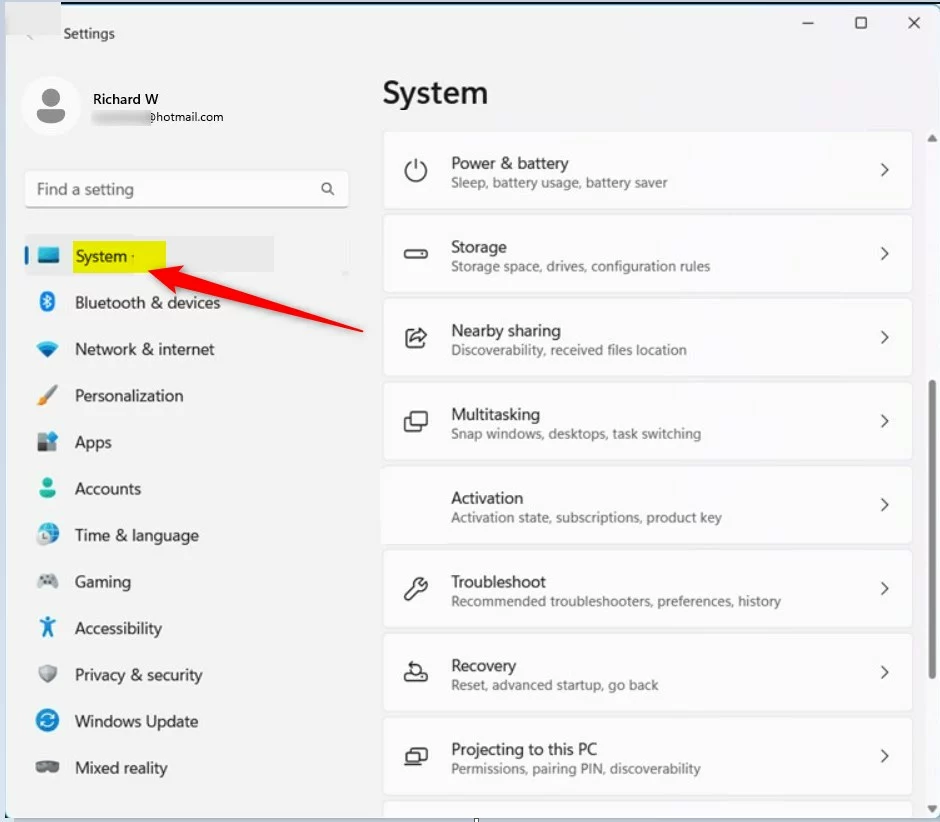
Windows 11 System in Settings app
Step 3: Click Notifications
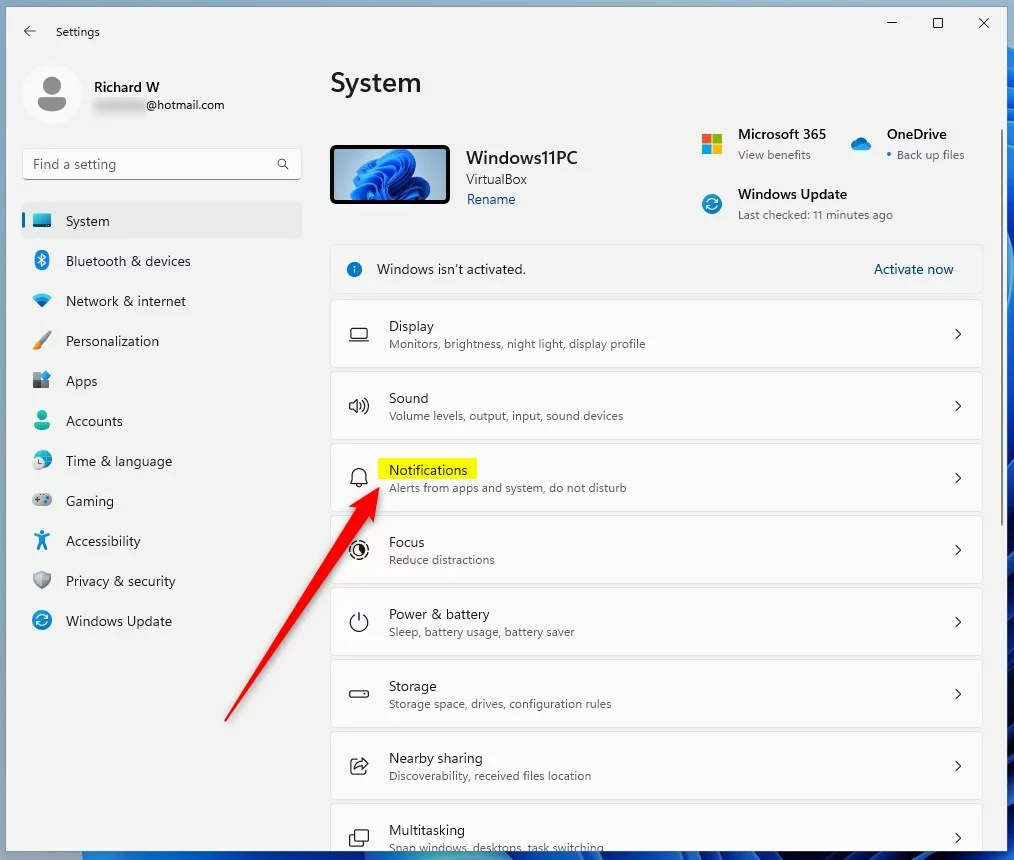
Windows 11 Notifications tile in System settings
Step 4 & 5: Turn on Do Not Disturb Automatically and set times
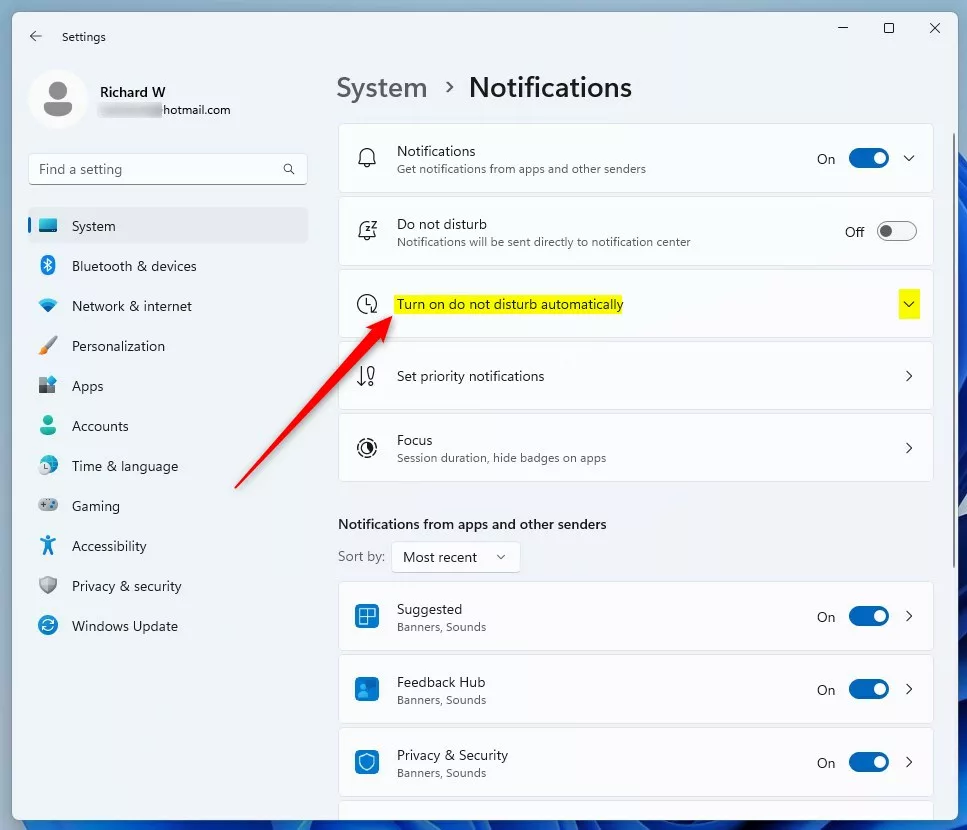
Turn on Do Not Disturb Automatically options
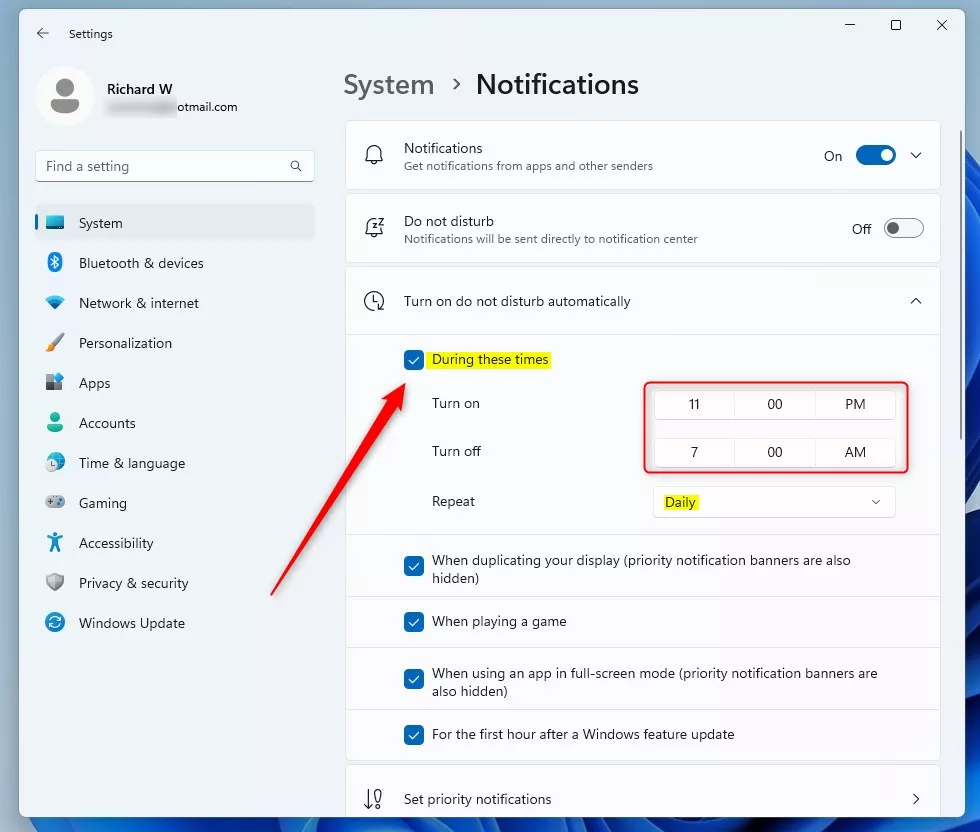
Set the time range for Do Not Disturb to turn on/off
Summary
- Windows 11 notifications keep you informed but can sometimes distract you.
- The Do Not Disturb feature helps reduce distractions by hiding notifications when you need to focus.
- You can set Do Not Disturb to turn on automatically at certain times or during activities like gaming or presentations.
- Follow the simple steps above to set it up and enjoy fewer interruptions during your busy times.
For more tips on managing notifications, you can visit this helpful guide.
Was this guide helpful?

About the Author
Richard
Tech Writer, IT Professional
Richard, a writer for Geek Rewind, is a tech enthusiast who loves breaking down complex IT topics into simple, easy-to-understand ideas. With years of hands-on experience in system administration and enterprise IT operations, he’s developed a knack for offering practical tips and solutions. Richard aims to make technology more accessible and actionable. He's deeply committed to the Geek Rewind community, always ready to answer questions and engage in discussions.


No comments yet — be the first to share your thoughts!