How to Turn On or Off Print Screen Key to open Screen Capture in Windows 11
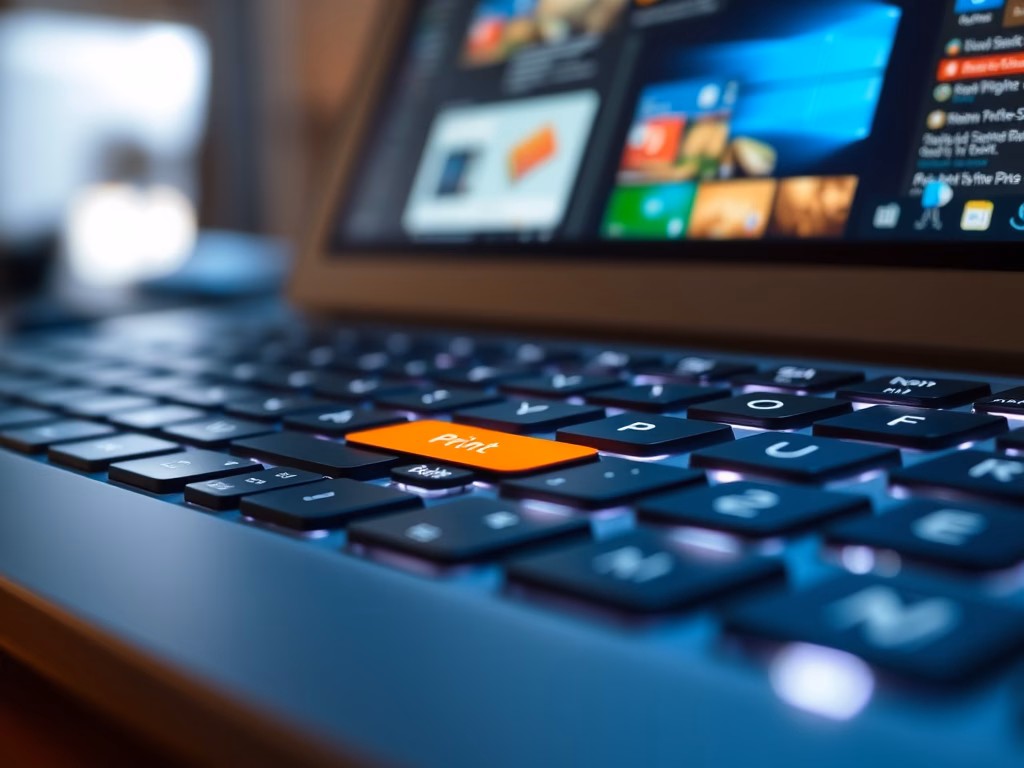
The Print Screen key in Windows 11 can be set to either take a screenshot directly or open the Screen Capture tool.
This tool lets you capture specific parts of your screen with more options than a simple screenshot.
Starting with Windows 11 version 22H2, this feature might not turn on automatically.
You can easily change this setting to make your Print Screen key work the way you prefer.
Open Settings, go to Accessibility, then Keyboard, and toggle “Use the Print Screen button to open screen snipping” to On. Restart your computer to apply the change.
How to enable the Print Screen shortcut
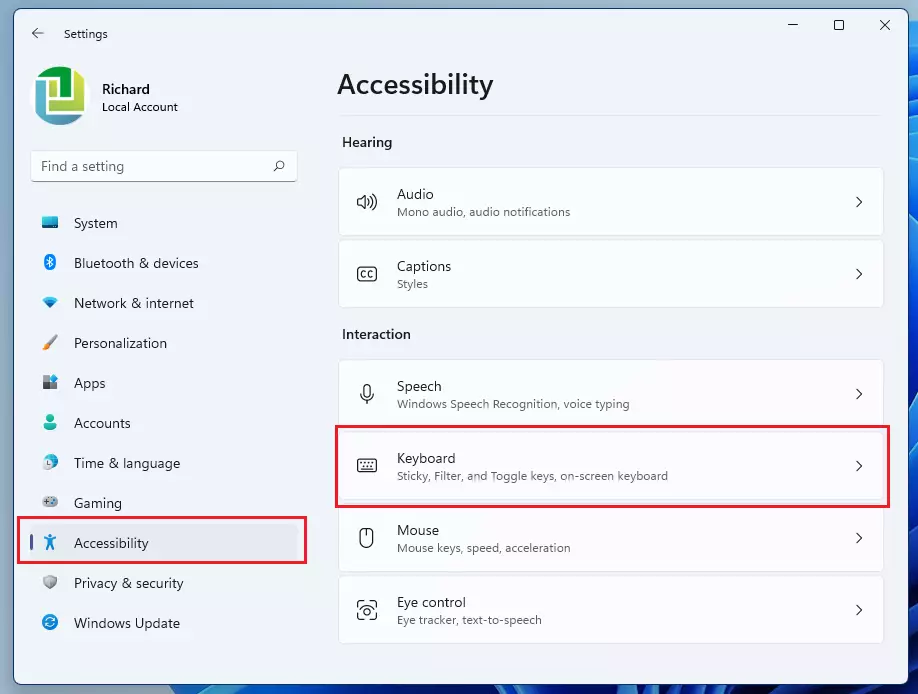
You can make your Print Screen key launch the Snipping Tool in Windows 11. This lets you take screenshots quickly without needing to press multiple keys. To enable this handy shortcut, go to Settings, then Accessibility, and find the Keyboard options.
1. Open Settings by pressing Windows key + I or clicking Start then Settings.

2. Click Accessibility on the left, then select Keyboard on the right.
3. Toggle the switch for Use the Print Screen button to open screen snipping to On.
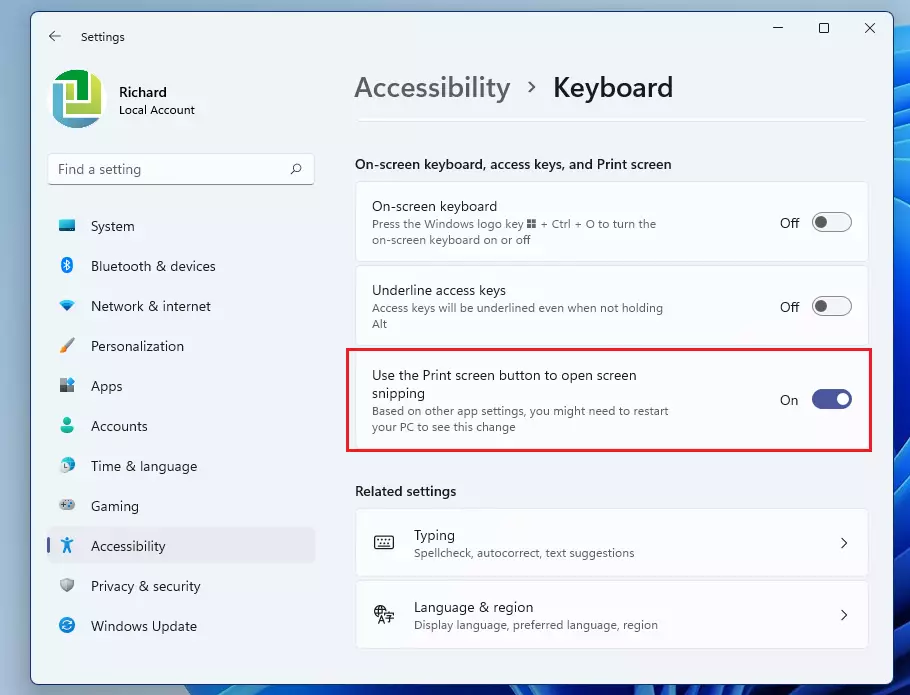
4. Restart your computer to apply the change.

Essential Snipping Tool Features
The Windows 11 Snipping Tool is more than just a camera for your screen. It includes a color picker for grabbing hex codes (which are codes that represent specific colors), a redact tool to hide sensitive information, and a delay timer for capturing tricky drop-down menus.
How to use the delay timer
Screen Recording and Editing
Yes, the Snipping Tool supports screen recording! Select the video camera icon in the app, draw your area, and click Start. You can also edit your images by adding arrows, highlighting text, or cropping the edges.
Frequently Asked Questions
Summary
Making your Print Screen key open the Snipping Tool offers a quicker way to capture screenshots in Windows 11. If you don’t want to change settings, you can still use Windows key + Shift+S. The Snipping Tool also offers features like video recording and editing.- The Print Screen key can be mapped to open the Snipping Tool for faster access.
- Use Windows key + Shift+S if you prefer not to change settings.
- The Snipping Tool includes video recording, editing, and redaction features.
- Screenshots are stored in the Pictures folder by default.
- Always restart your PC after changing keyboard settings for the best results.
Where are my screenshots saved?
Your screenshots automatically go to C:\Users\Username\Pictures\Screenshots. You can also paste copied snips directly into apps like Word or Paint. The Snipping Tool also keeps a history of recent captures.
How do I take a screenshot without the Print Screen key?
You can always use the keyboard shortcut Windows key + Shift+S to trigger the capture tool. Alternatively, search for Snipping Tool in the Start menu and click New to start a capture manually without needing any specific keys.
Was this guide helpful?

About the Author
Richard
Tech Writer, IT Professional
Richard, a writer for Geek Rewind, is a tech enthusiast who loves breaking down complex IT topics into simple, easy-to-understand ideas. With years of hands-on experience in system administration and enterprise IT operations, he’s developed a knack for offering practical tips and solutions. Richard aims to make technology more accessible and actionable. He's deeply committed to the Geek Rewind community, always ready to answer questions and engage in discussions.


[…] 11 comes with a new Snipping Tool app which replaces the classic Snip & Sketch app in previous versions for taking screenshots. The classic Snip & Sketch and the new Snipping […]
[…] 11 has a new Snipping Tool app that replaces the classic Snip & Sketch app in previous versions for taking screenshots. The classic Snip & […]
[…] of devices under nearby Share when sharing a local file from the desktop, File Explorer, Photos, Snipping Tool, Xbox, and other apps that use the built-in Windows share window has been enhanced by using UDP […]
[…] of devices under nearby Share when sharing a local file from the desktop, File Explorer, Photos, Snipping Tool, Xbox, and other apps that use the built-in Windows share window has been enhanced by using UDP […]