How to Enable Print Screen for Snipping Tool in Windows 11
Windows 11 lets you make the Print Screen (PrtSc) key open the Snipping Tool directly, making screenshots much faster.
This means you can press PrtSc and instantly get the Snipping Tool’s capture window ready, instead of having to press ⊞ Win+Shift+S.
Before this change, pressing PrtSc usually just copied your whole screen to the clipboard. By changing this setting, you get a quick way to capture exactly what you need on your screen with just one key press.
Enable the Print Screen key for Snipping Tool by going to Settings > Accessibility > Keyboard and turning on “Use the Print Screen button to open screen snipping”. This allows a single press of the PrtSc key to launch the snipping overlay.
How to enable Print Screen for Snipping Tool
You can make your Print Screen button open the Snipping Tool in Windows 11 by changing a simple setting. This lets you quickly capture parts of your screen without needing to open the app first, making screenshots much faster.
- Open the Settings app by pressing Windows key + I.
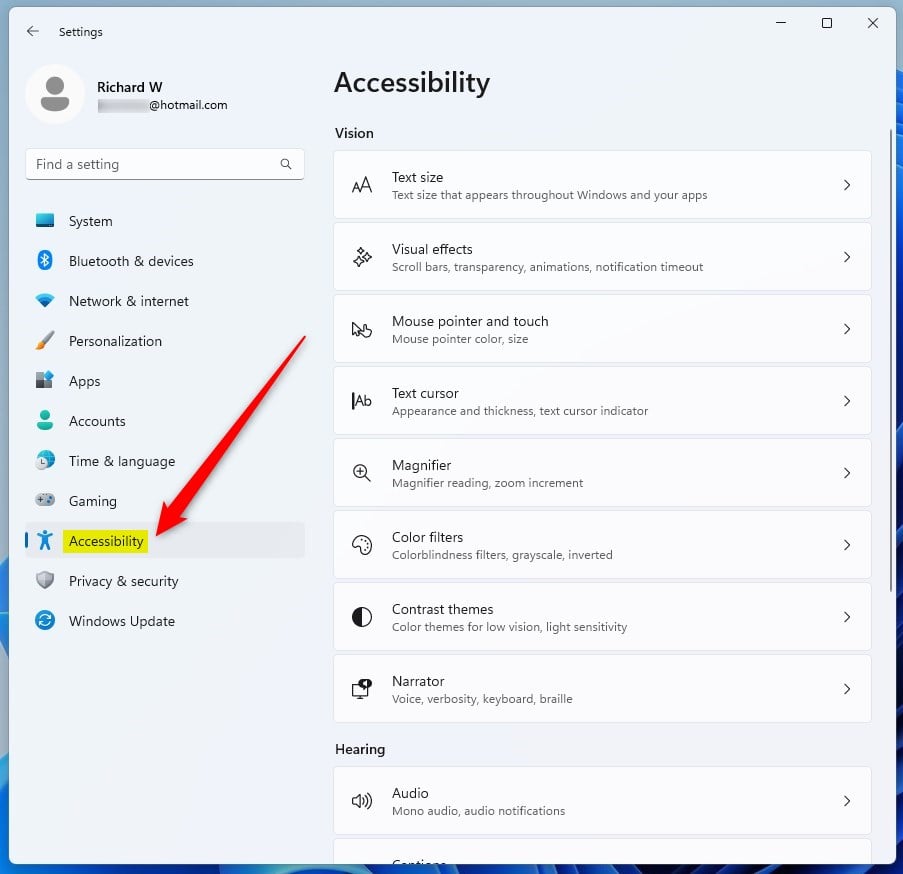
- Click on Accessibility in the left sidebar.

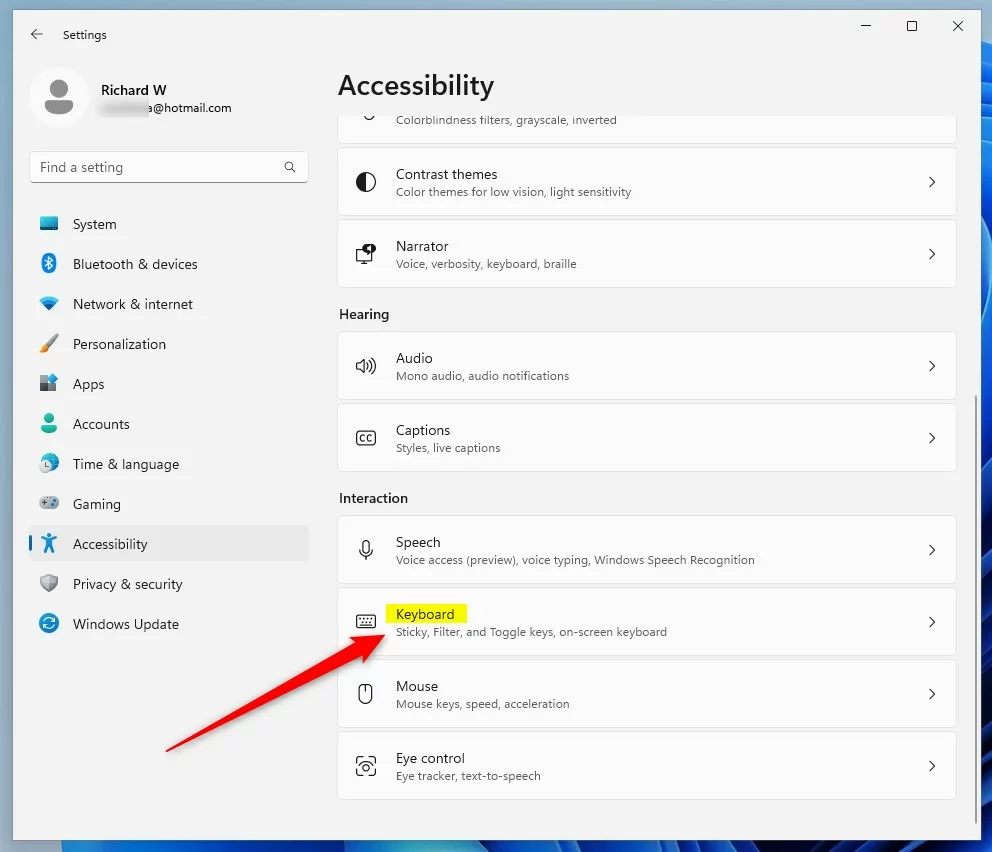
windows 11 new settings button - Select the Keyboard tile.
windows 11 accessibility tile - Find the toggle labeled “Use the Print Screen button to open screen snipping”.
windows 11 accessibility keyboard tile - Switch the toggle to On.
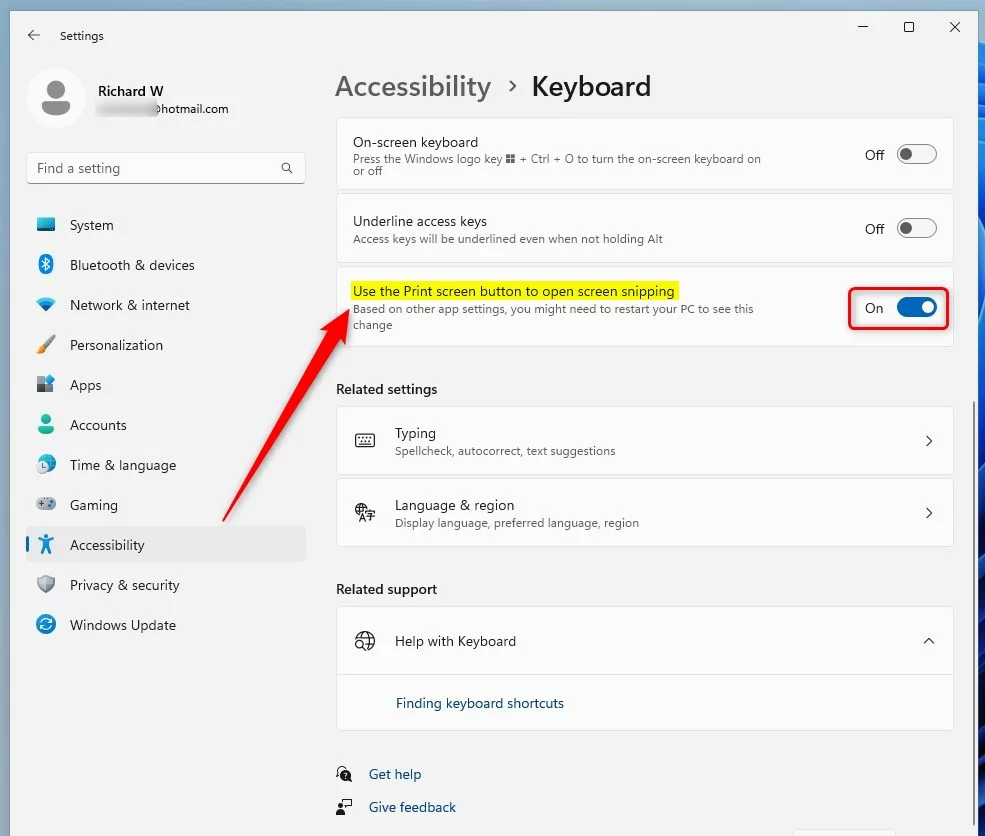
windows 11 keyboard use the print screen button to open screen snipping
Troubleshooting: Print Screen not working
If your Print Screen key isn’t opening the Snipping Tool on Windows 11, there are a few common things to check. We’ll look at updating your keyboard drivers and making sure your Snipping Tool app is the latest version, as these often fix the problem.
- Keyboard Drivers: Right-click the Start button and select Device Manager. Expand Keyboards, right-click your keyboard, and select Update driver.
- Background Apps: Ensure the Snipping Tool is updated via the Microsoft Store.
- Admin Check: If the key is mapped to a third-party app, you may need Administrator privileges to disable the conflicting software in the Task Manager.
Reverting to legacy behavior
How to auto-save screenshots
Summary
Making your Print Screen key launch the Snipping Tool in Windows 11 is a quick way to make taking screenshots easier.
Why does my Print Screen key open Snipping Tool instead of copying to clipboard?
This happens because the Windows 11 accessibility setting for the Print Screen key is enabled. This feature overrides the legacy behavior to provide a more modern, interactive screenshot experience. You can revert this by disabling the toggle in Settings under Accessibility > Keyboard if you prefer the old clipboard-only method.
Does the Print Screen key work with multiple monitors?
Yes, the Snipping Tool is fully compatible with multi-monitor setups. When you trigger the tool using the Print Screen key, your screens will dim, and you can select which monitor or specific area you wish to capture. It handles high-resolution and varied display scaling across multiple screens automatically.
Was this guide helpful?

About the Author
Richard
Tech Writer, IT Professional
Richard, a writer for Geek Rewind, is a tech enthusiast who loves breaking down complex IT topics into simple, easy-to-understand ideas. With years of hands-on experience in system administration and enterprise IT operations, he’s developed a knack for offering practical tips and solutions. Richard aims to make technology more accessible and actionable. He's deeply committed to the Geek Rewind community, always ready to answer questions and engage in discussions.


[…] To start recording your screen, open the Snipping Tool app. […]