How to Use Snipping Tool’s New Text Extractor Feature
Snipping Tool’s Text Actions lets you copy text directly from screenshots in Windows 11. This feature uses AI to find and grab text from any image you capture, so you don’t have to type it all out again.
Think of it like this: you take a picture of something with text, like a flyer or a sign, and the Snipping Tool can read that text for you. The current version, 11.2310.35.0, lets you easily copy this text to your clipboard or edit it.
It’s a really fast way to get information from images into a digital format. Just capture your screen, and the Snipping Tool’s smart AI does the heavy lifting.
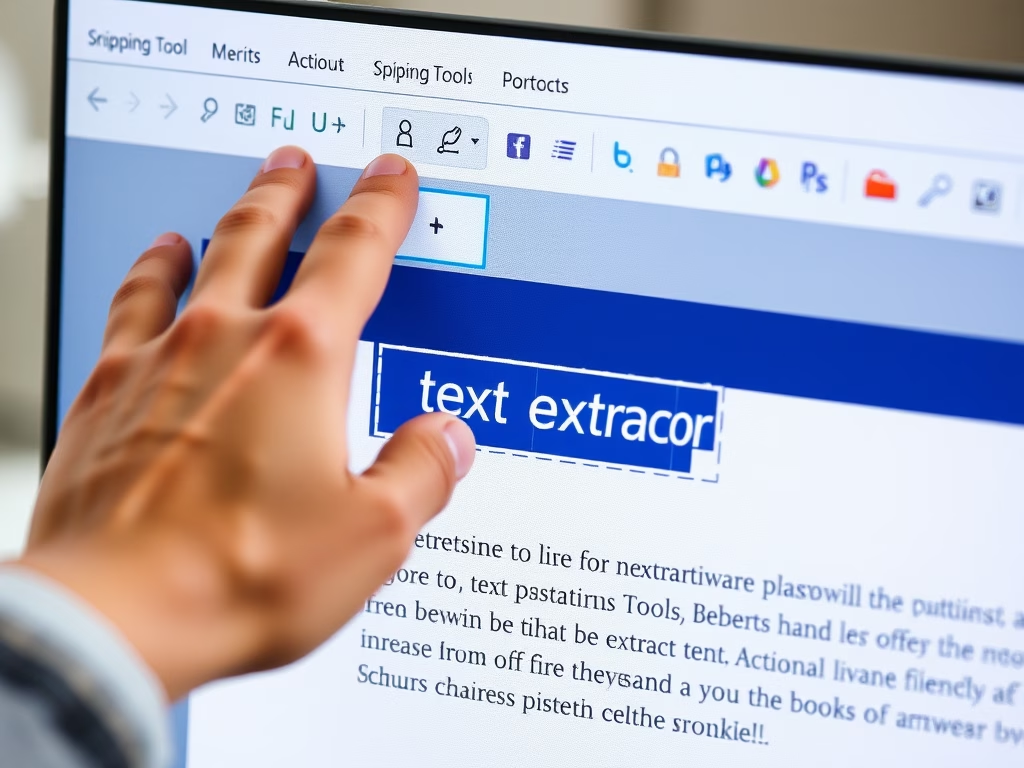
Extract text from screenshots using the Snipping Tool’s Text Actions. Capture an image, then click the Text Actions icon in the editor window to copy or edit the detected text. You can also use Quick Redact to hide sensitive information.
Use the Text Actions feature in Snipping Tools
Using the Snipping Tool’s Text Actions
The Snipping Tool’s Text Actions feature lets you pull text from any screenshot you take, making it a useful text extractor. To use it, first capture your screen using the ⊞ Win+Shift+S shortcut or by opening the app. Once your image shows up in the editor, click the Text Actions icon, which looks like a document or text symbol on the toolbar.
Here is how to do it:
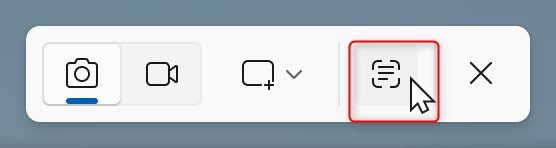
- First, capture a snip using the ⊞ Win+Shift+S shortcut or by opening the app.
- Once the image opens in the editor window, click the Text Actions icon. This looks like a document or text symbol in the toolbar.
The app scans your image for text. You can select specific words to copy or click “Copy all text” to grab everything at once. If you need to protect your privacy, look for the Quick Redact option. This masks sensitive items like phone numbers or emails before sharing.

And that’s it!
Reference: Microsoft blog
Conclusion
The Text Actions feature speeds up your workflow by transforming images into editable text. Accessing it involves capturing your snip and clicking the Text Actions icon in the editor window. With added tools like Quick Redact, you can manage your digital information safely and efficiently.
Can a Snipping Tool extract text?
Yes, the Snipping Tool can extract text directly from your images using its new features.
How to extract text from a snippet?
Open the Start menu in Windows and select Snipping Tool. Then, click ‘New’ and drag the square to create your snip. For example, you might capture this text.
Was this guide helpful?

About the Author
Richard
Tech Writer, IT Professional
Richard, a writer for Geek Rewind, is a tech enthusiast who loves breaking down complex IT topics into simple, easy-to-understand ideas. With years of hands-on experience in system administration and enterprise IT operations, he’s developed a knack for offering practical tips and solutions. Richard aims to make technology more accessible and actionable. He's deeply committed to the Geek Rewind community, always ready to answer questions and engage in discussions.


No comments yet — be the first to share your thoughts!