How to Automate Do Not Disturb in Windows 11

Do Not Disturb in Windows 11 silences pop-up alerts and hides taskbar badges automatically, so you can work or play without interruptions. It stops notifications during set hours or when you run full-screen apps, so you no longer have to switch it on by hand. Missed notifications are not lost. They wait in the notification center until you open it.
Windows 11 version 22H2 and later includes schedule rules and display triggers. They turn on Do Not Disturb when you start a game, duplicate your screen, or reach your evening hours. The steps below apply to Home and Pro alike. On early 21H2 builds the same idea was called Focus assist and the menus look different, so update Windows first if you don’t see the options described here.
Open Settings System Notifications, scroll to Turn on do not disturb automatically, and tick During these times, then set your start and end hours. You can also enable it when duplicating your display, playing games, or using full-screen apps. Changes take effect immediately without restart.
How to Set Do Not Disturb to Turn On Automatically in 🪟 Windows 11
Do Not Disturb can turn on automatically during set times, while you play games, or when you duplicate your display. The rules all live in one place: Settings System Notifications. Set them once and your PC goes quiet on its own. No restart or sign-out is needed. The change takes effect as soon as you tick a box.
- Open Settings . Click the Start button (the Windows icon), then select Settings. You can also press
Windows key + Ion your keyboard to open it faster. The Settings window should open with a list of categories on the left. - Go to System. Click System in the left-hand menu. The right pane shows the system options, such as Display, Sound and Notifications.
- Open Notifications. In the right pane, click Notifications. You should see the master Do not disturb switch near the top, followed by a list of apps that can send notifications.
- Find the automation options. Scroll down and click Turn on do not disturb automatically to expand it. A list of checkboxes appears.
- Set your schedule. Tick During these times. Choose the start and end times, then pick how often the schedule repeats: daily, on weekdays, or on weekends. The schedule works across midnight, so a 10:00 PM to 7:00 AM window is fine.
- Choose extra triggers (optional). Tick any of these that suit how you use the PC:
- When duplicating my display (useful for presentations on a projector or second screen)
- When playing a game
- When using an app in full-screen mode
- For the first hour after a Windows feature update
- Close the Settings app when you are done. Do Not Disturb now runs on its own, based on the times and activities you chose.
On a work or school PC, an administrator may also have locked these settings, and you will need to ask them. To undo any rule, come back to the same list and clear its checkbox. To turn Do Not Disturb off right now, use the Do not disturb switch at the top of the Notifications page.
Visual Guide
Step 2: Open System in Settings
After Settings opens, the left pane lists the categories. System is normally the first one and is selected by default.
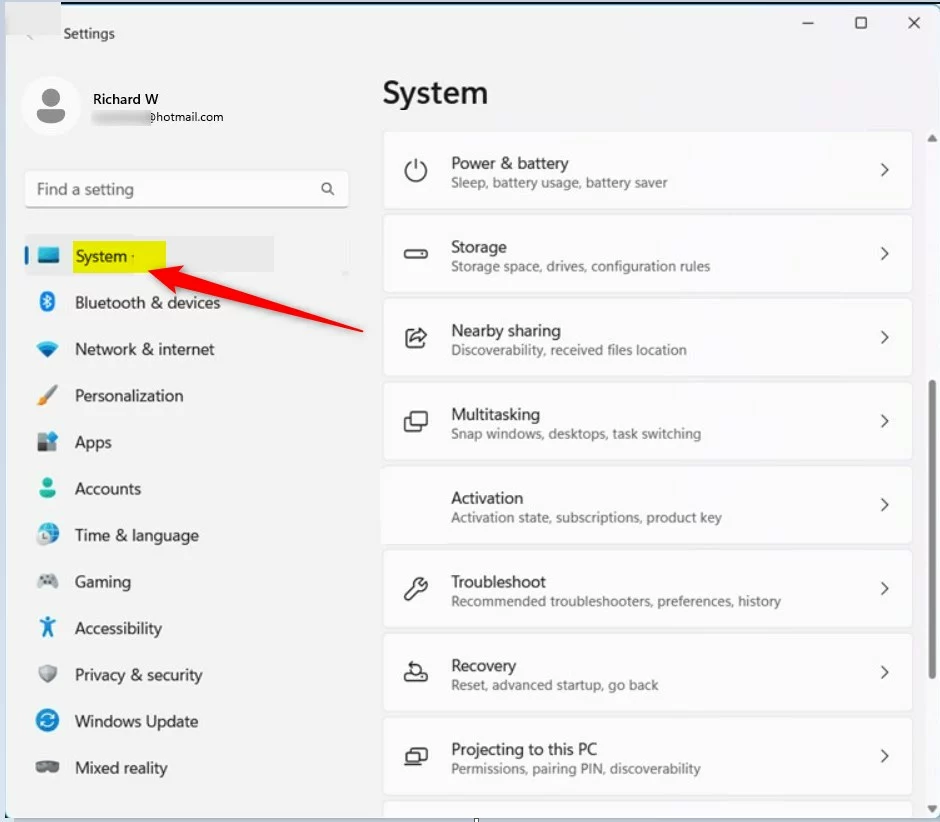
Windows 11 System in Settings app
Step 3: Click Notifications
In the System page, Notifications is one of the larger tiles below Display and Sound. Click it to open the notification controls.
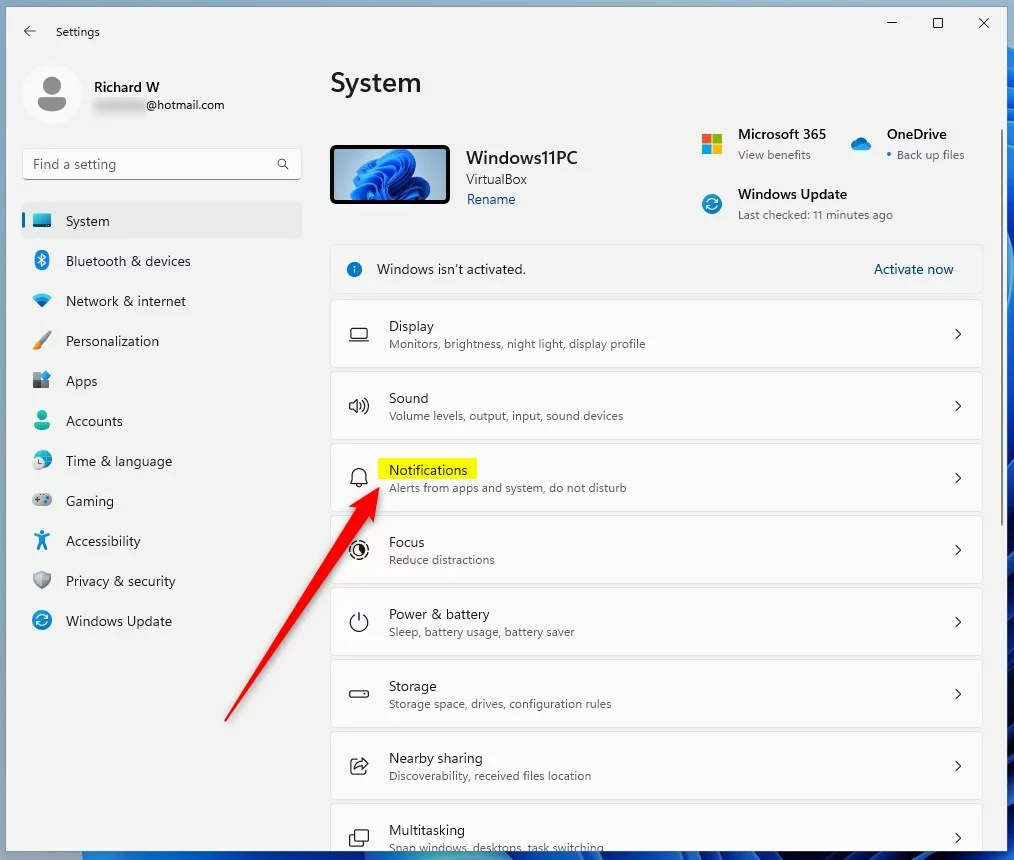
Windows 11 Notifications tile in System settings
Step 4 & 5: Turn on Do Not Disturb automatically and set times
Expand Turn on do not disturb automatically to see the checkboxes, then tick the ones you want.
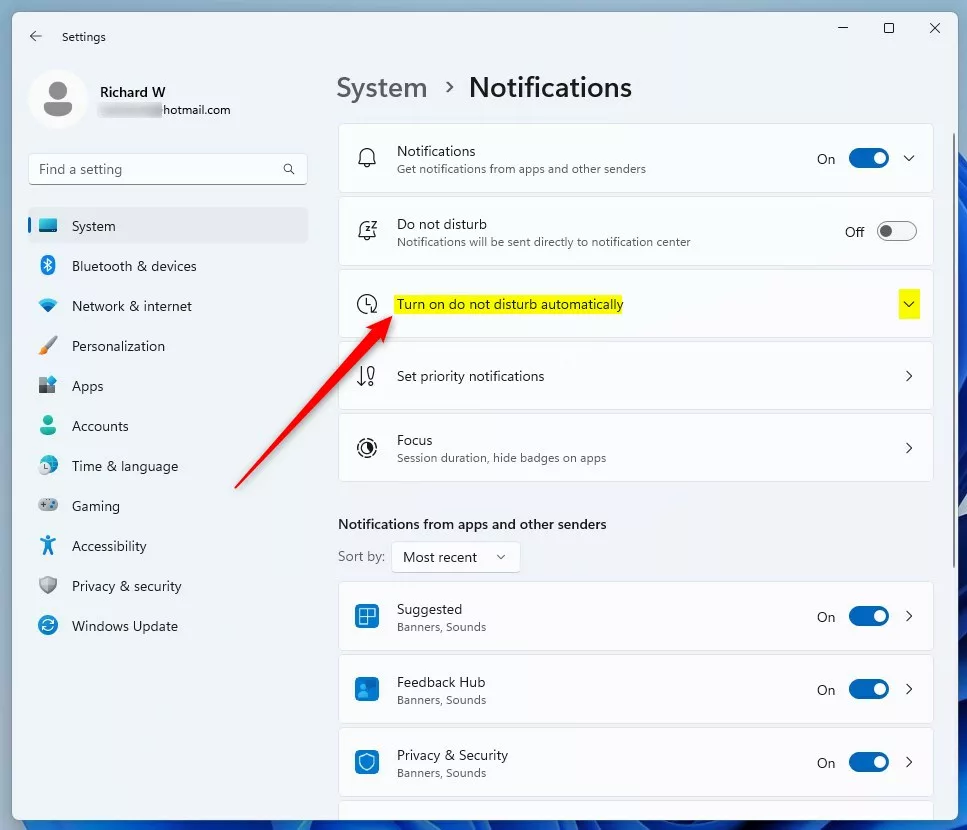
Turn on Do Not Disturb automatically options
Set them to match your working or sleeping hours.
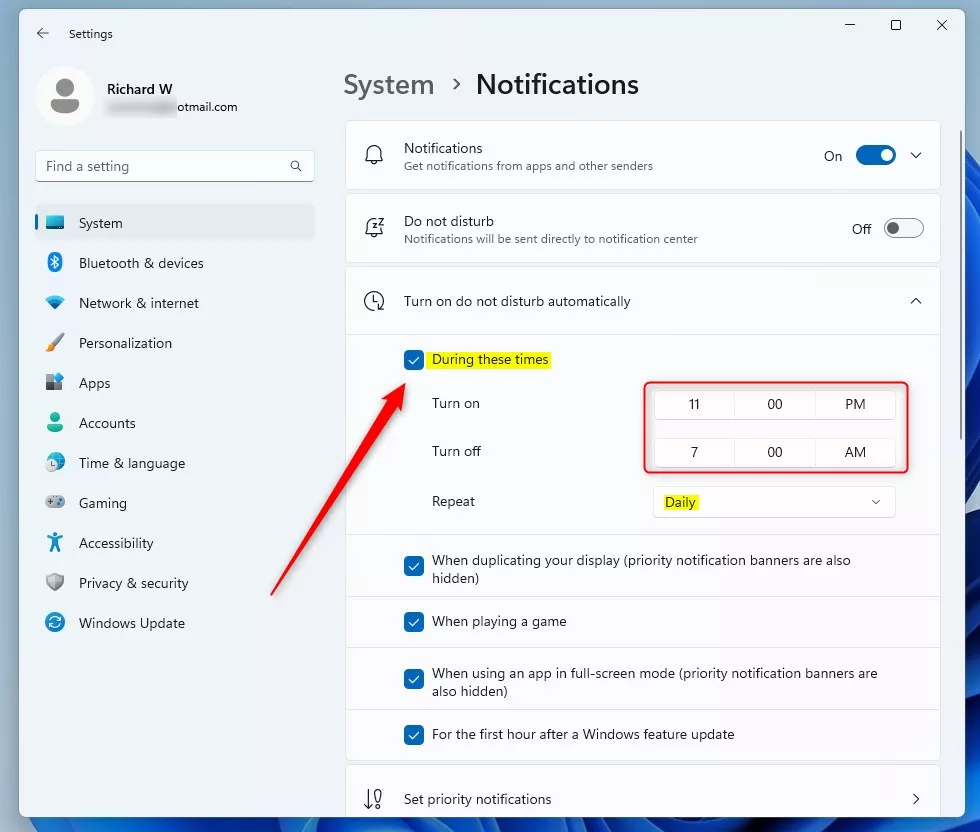
Set the time range for Do Not Disturb to turn on/off
Summary
- Windows 11 notifications keep you informed but can easily distract you.
- Do Not Disturb reduces distractions by hiding banners and sounds while you focus. Missed alerts stay in the notification center.
- You can set it to turn on at certain times, or during activities like gaming, presentations and full-screen apps.
- Follow the steps above to set it up. To change or remove a rule later, return to Settings System Notifications
With automatic rules in place, Do Not Disturb stops pop-up alerts and sound interruptions while you work, play games or present your screen. You set it once, your screen stays clean when you need to focus, and you can still read anything you missed later.
Have a question about this guide?
Answered by AI from this guide. Good questions may be added to this page — please don't include personal details.
Did this guide fix your problem?

About the Author
Richard
Tech Writer, IT Professional
Richard is a writer at Geek Rewind who turns complex IT tasks into clear, step-by-step guides. He draws on years of hands-on experience in system administration and enterprise IT operations, focusing on Windows, Linux and WordPress: the problems people actually run into, and the fixes that work. His server and WordPress guides come from systems he runs himself. Richard builds and maintains the platform behind Geek Rewind, from its Ubuntu servers and Nginx configuration to its custom WordPress plugins. Many new tutorials start with readers' questions, and he's always glad to answer them in the comments.
No comments yet — be the first to share your thoughts!