This post describes steps you can take to set active hours for Windows Update in Windows 11.
Windows Update helps you get the latest fixes and security improvements, keeping your device running smoothly and staying protected. But, in most cases, you don’t do anything to get updates for your computer.
Once updates are installed, you must restart your computer to complete the update process.
You can schedule a restart or set active hours if you can’t restart your PC immediately after updating.
Active hours let Windows know when you’re typically at your PC. Windows will use that info to schedule updates and restarts when you’re not using the PC.
There are multiple ways to set active hours in Windows 11. Below, we’ll show two ways to set active hours in Windows 11.
How to select active hours for Windows Update in Windows 11
As mentioned above, once Windows has finished installing updates, in most cases, you will have to restart your computer for the process to complete.
You can schedule a restart or set active hours if you can’t restart your computer immediately.
There are ways to do it: You can have Windows automatically adjust active hours based on your device’s activity or manually select your active hours.
Have Windows automatically adjust active hours based on your device’s activity
Based on your device’s usage, Windows can determine when it is active and when it is not. Windows will then choose a good time when you will not use your device to update and restart.
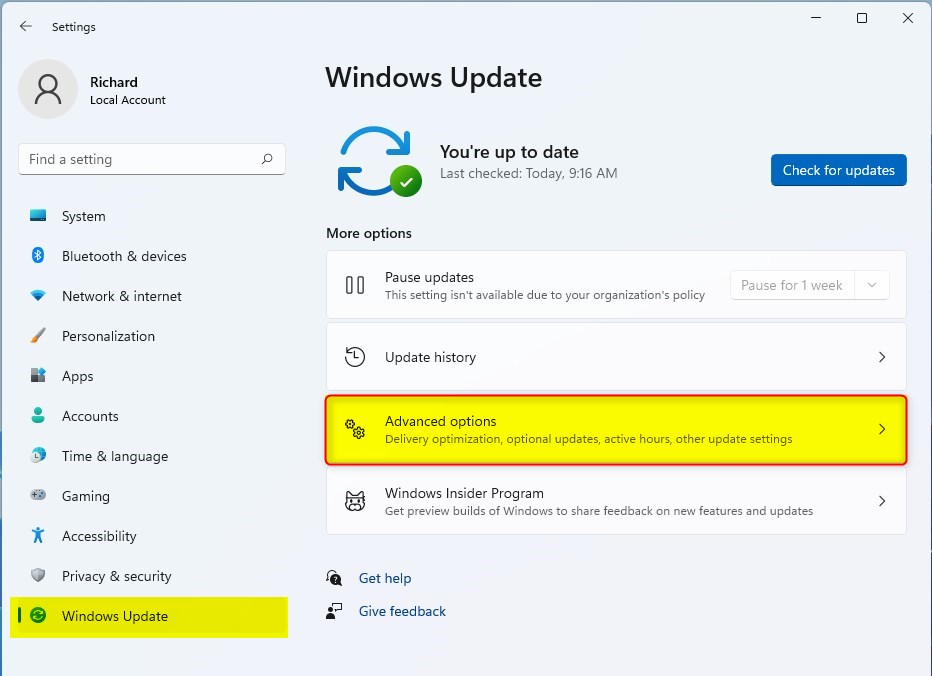
Select Start -> Settings -> Windows Update -> Advanced options > Active hours to do that.

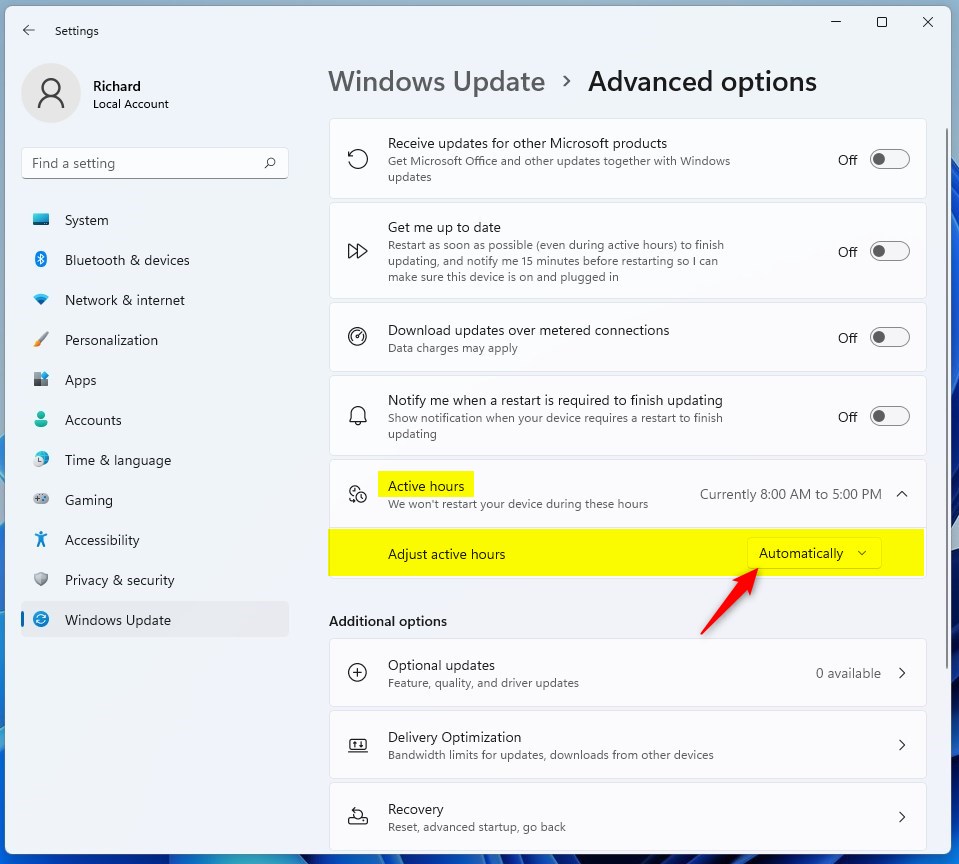
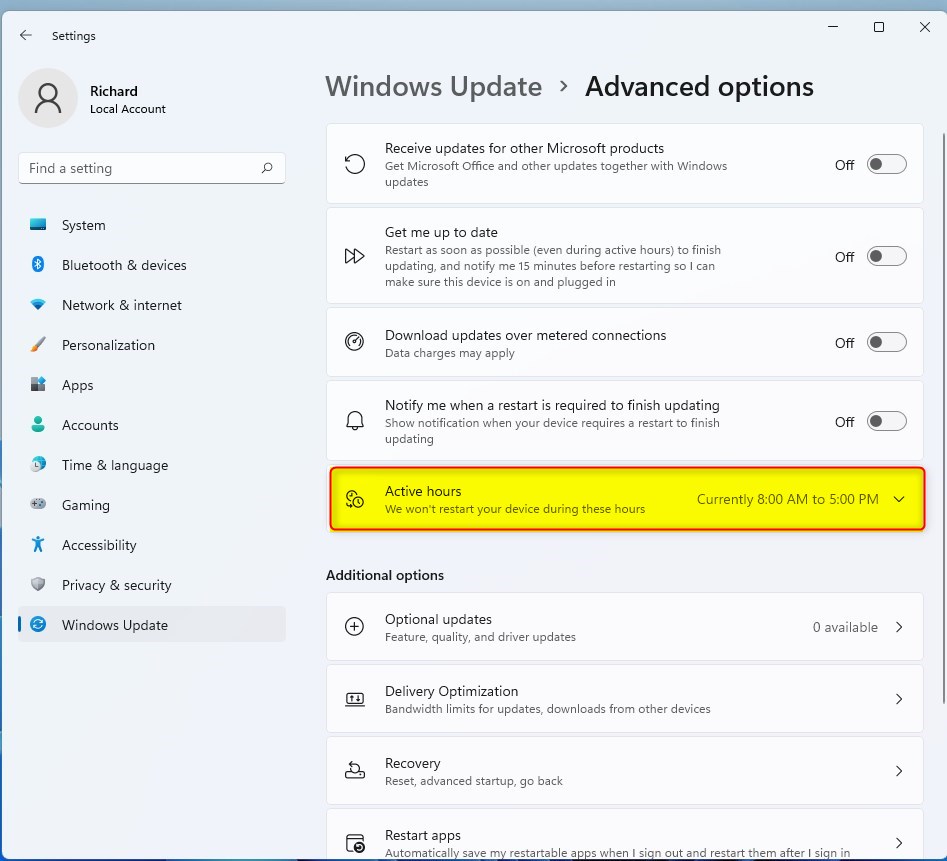
Select the Active hour tile on the Windows Update -> Advanced options settings pane to expand. Then, adjust active hours, and select Automatically.

After that, Windows will learn when to schedule an update and restart.
Select your active hours
If you do not want Windows to set active hours for you automatically, you can select your own.
Select Start -> Settings -> Windows Update -> Advanced options > Active hours to do that.

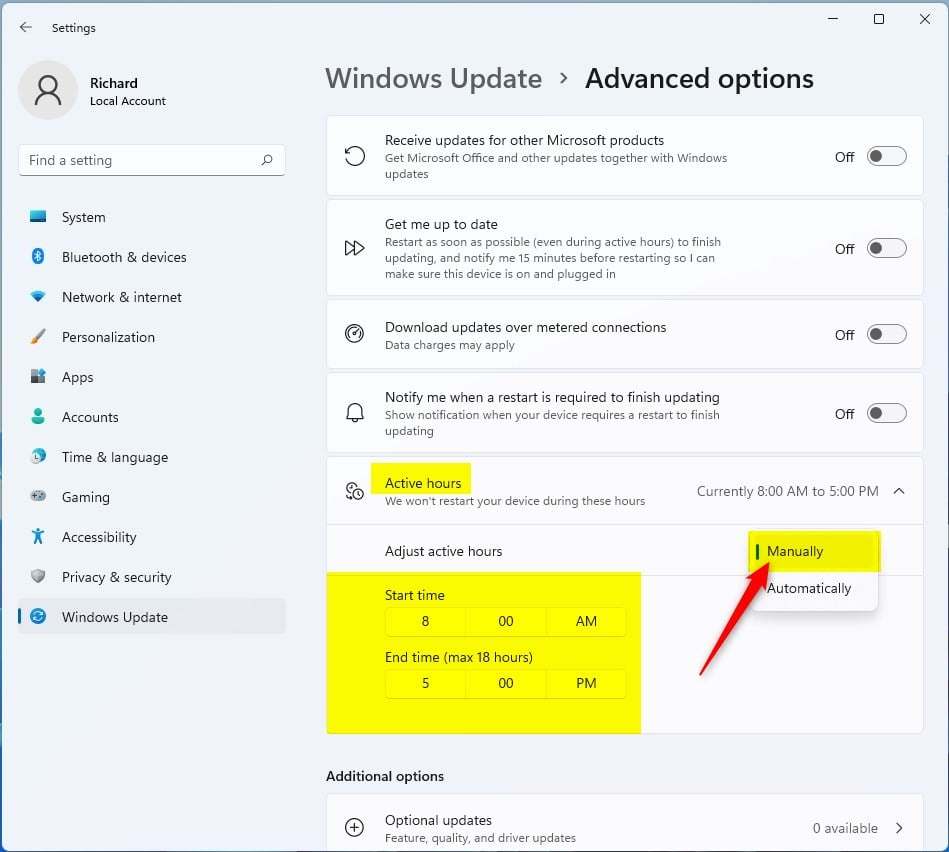
Select the Active hour tile on the Windows Update -> Advanced options settings pane to expand. Then Adjust active hours, and select Manually.

Choose the start time and end time for your active hours.
That should do it!
Conclusion:
- Setting active hours for Windows Update in Windows 11 is crucial for managing updates and restarts effectively.
- Whether you opt for automatic adjustments based on device activity or manually select active hours, Windows offers flexibility to suit your preferences.
- Following the outlined steps, you can ensure that updates and restarts occur conveniently, minimizing disruptions to your workflow and PC usage.

Leave a Reply