How to Sign In and out of Microsoft Sticky Notes

Signing in to Microsoft Sticky Notes (a built-in Windows app for quick to-do lists and ideas) backs up your notes automatically starting with version 3.0. You need a Microsoft account to sync these notes across different PCs, the web, and your phone.
You can still type notes offline without signing in, but connecting your account keeps your notes safe and accessible on all your devices.
Open Sticky Notes, click the three dots, then Settings. Click Sign in and enter your Microsoft account details to sync notes. To sign out, return to Settings and select the Sign-out link.
How to sign in and out of Microsoft Sticky Notes in 🪟 Windows 11
Microsoft Sticky Notes sign in lets you sync your notes across multiple Windows devices and the web using your Microsoft account. You can connect your account or sign out at any time through the app settings without losing your local notes, keeping your reminders accessible wherever you go.
Below is how to sign in and out of Sticky Notes in Windows 11.
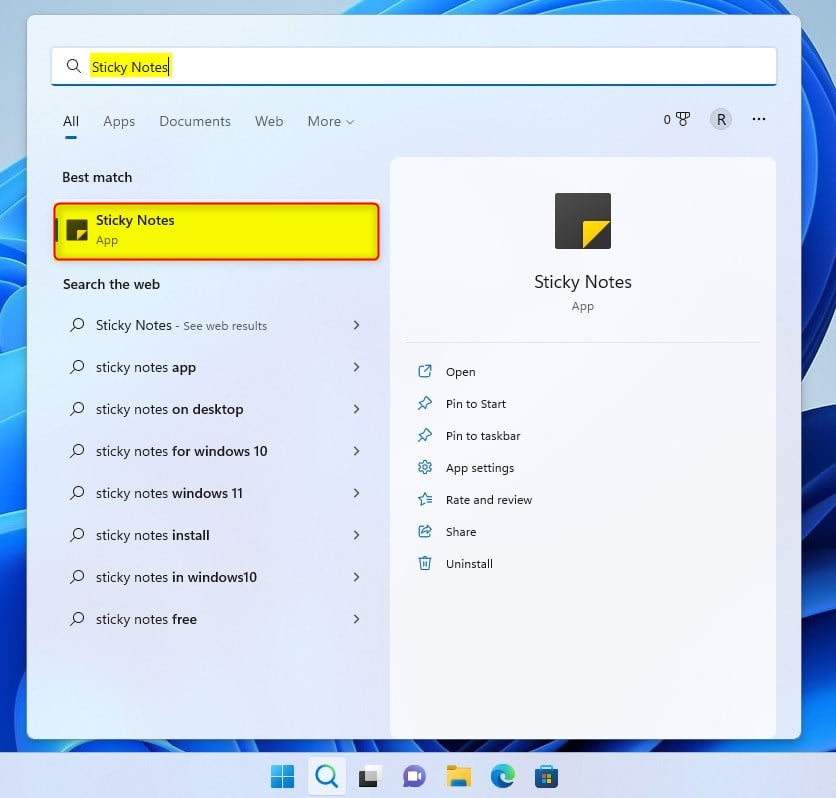
Open the Sticky Notes app. Click Start, then search for Sticky Notes. Under Best match, select the Sticky Notes App.
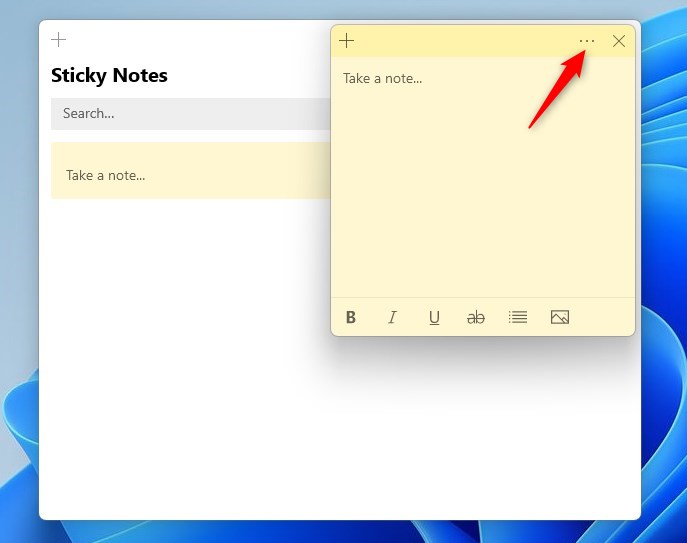
If only one note appears on screen, click the ellipsis icon ( … ) in the upper-right corner and select ‘Notes list‘.
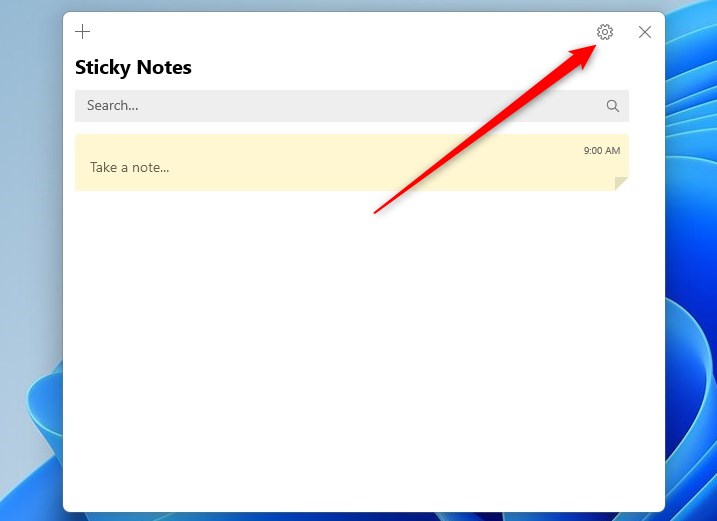
Next, click the settings icon in the upper right of the notes list.
Tap or click Sign in and enter Microsoft Account credentials. The app prompts you to create a new profile if you are not already logged in.

Tap or click Continue.
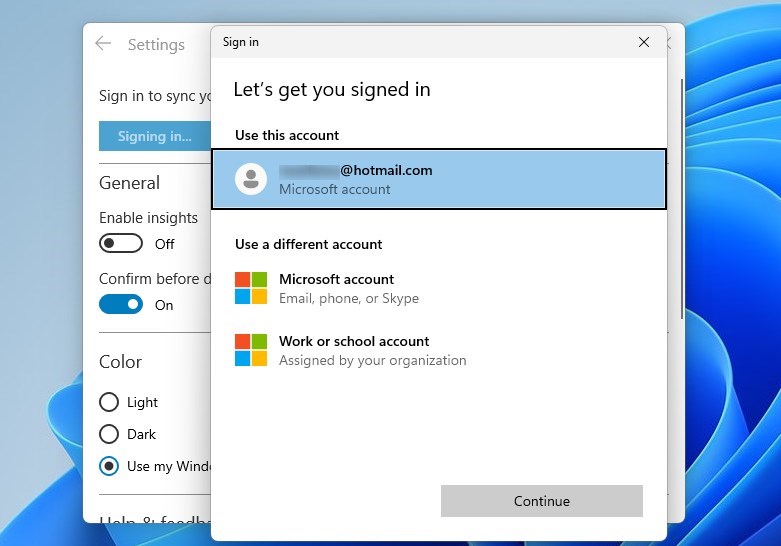
Once you sign in, you can create and sync notes immediately. Content syncs to the Microsoft cloud account shared across linked devices.
To sign out, reverse the previous steps to reach the settings gear. Click the Sign-out link shown below.
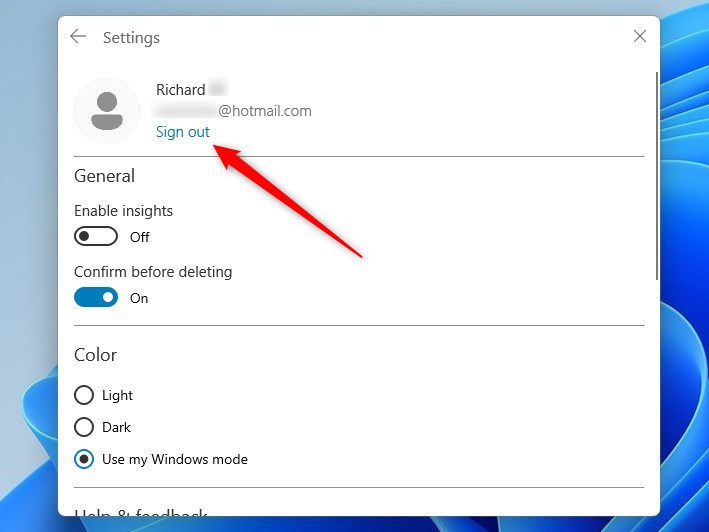
That completes the process.
Conclusion:
- Signing in to Microsoft Sticky Notes in Windows 11 allows you to sync notes across devices and the web securely
- By using the same Microsoft account, you can easily access your notes on multiple devices
- Sign out by reversing the sign-in steps and clicking the "Sign-out" link in the settings menu
- Enjoy the convenience of creating and accessing notes hassle-free across platforms and devices
Was this guide helpful?

About the Author
Richard
Tech Writer, IT Professional
Richard is a writer at Geek Rewind who turns complex IT tasks into clear, step-by-step guides. He draws on years of hands-on experience in system administration and enterprise IT operations, focusing on Windows, Linux and WordPress: the problems people actually run into, and the fixes that work. His server and WordPress guides come from systems he runs himself. Richard builds and maintains the platform behind Geek Rewind, from its Ubuntu servers and Nginx configuration to its custom WordPress plugins. Many new tutorials start with readers' questions, and he's always glad to answer them in the comments.



[…] when you use your Microsoft account to sign into Sticky Notes, you can sync your notes across apps and other devices. Deleting a note from one device will also […]
[…] when you use your Microsoft account to sign into Sticky Notes, you can sync your notes across apps and other […]