Enable Delete Confirmation in Microsoft Sticky Notes

Sticky Notes delete confirmation is a setting that warns you before you permanently remove a digital note in Microsoft Sticky Notes.
Microsoft Sticky Notes lets you jot down quick reminders and stick them to your desktop. It’s easy to accidentally delete a note forever, especially if you have many open.
This warning prompt, which is available in Windows 11, acts as a safety net. It ensures you mean to delete a note before it vanishes for good.
Turning on delete confirmation is a simple step that can save you from losing important information.
Open Sticky Notes settings and toggle the “Confirm before deleting” option to on. This will prompt a confirmation dialog box whenever you attempt to delete a note, preventing accidental data loss.
How to enable or disable delete confirmation for sticky notes in 🪟 Windows 11
Remember, deleting a note is permanent and cannot be undone. To help avoid accidental deletions, you can turn on the note deletion warning.
Below is how to enable or disable delete confirmation for Notes.
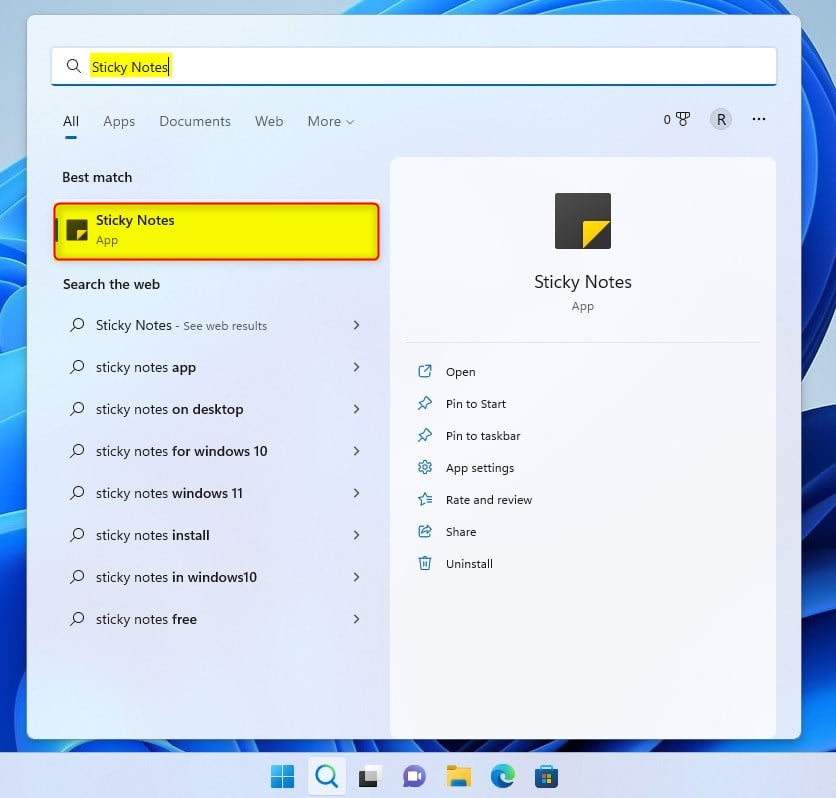
Open the Sticky Notes app and view your list of notes. Click Start => Search for Sticky Notes, then under Best match, select Sticky Notes App as highlighted below,
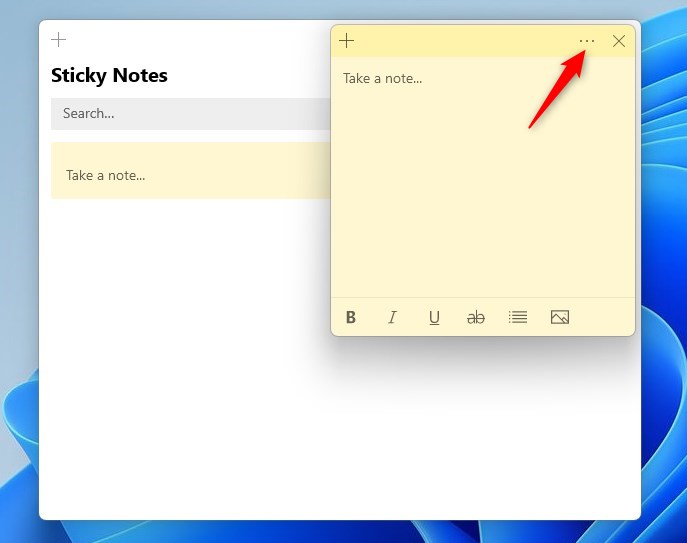
If only a single note is displayed, click or tap the ellipsis icon ( … ) in the upper-right of the note and then click or tap Notes list.
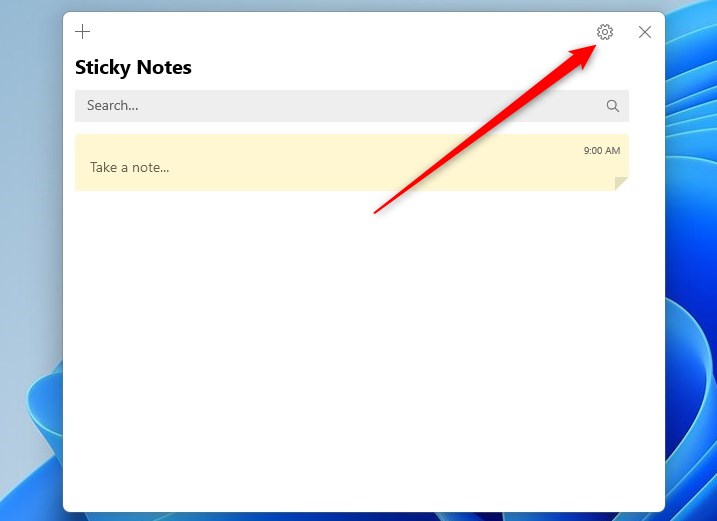
Next, click the settings icon in the upper right of the notes list.
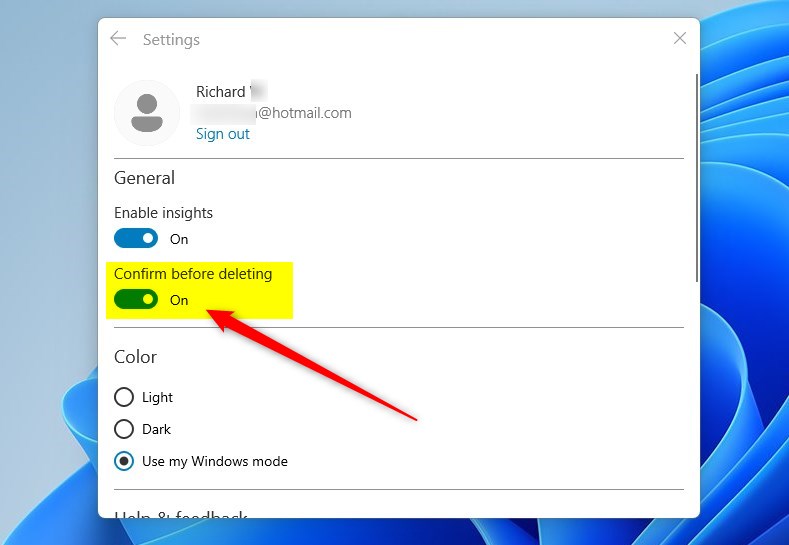
In the settings window, find the ‘Enable Confirm before deleting’ toggle and switch it to On or Off to enable or disable delete confirmation for your notes in Windows 11.
Click the close icon ( X ) in the upper right to close the note. Your note will be automatically saved.
That should do it!
Conclusion:
- Enabling delete confirmation for Microsoft Sticky Notes can prevent accidental deletion of important notes.
- By syncing Sticky Notes with a Microsoft account, note deletions are reflected across devices, ensuring consistency.
- It’s important to weigh the benefits of delete confirmation against the potential inconvenience of the extra step.
Was this guide helpful?

About the Author
Richard
Tech Writer, IT Professional
Richard, a writer for Geek Rewind, is a tech enthusiast who loves breaking down complex IT topics into simple, easy-to-understand ideas. With years of hands-on experience in system administration and enterprise IT operations, he’s developed a knack for offering practical tips and solutions. Richard aims to make technology more accessible and actionable. He's deeply committed to the Geek Rewind community, always ready to answer questions and engage in discussions.


No comments yet — be the first to share your thoughts!