How to Extend Windows 11 Notification Duration


Notification duration in Windows 11 controls how long pop-up banners stay on your screen before they disappear. By default, Windows shows these alerts for 5 seconds. You can raise that to as long as 5 minutes, so you don’t miss an important update while you are looking at something else.
Open Settings (Win+I), go to Accessibility Visual effects, and set Dismiss notifications after this amount of time to a value from 5 seconds up to 5 minutes. The change applies to your next notification straight away, with no restart needed. For an exact number of seconds, use the Registry Editor method instead.
What happens when done?
After you make the change, Windows keeps notification banners on screen for the time you chose. That gives you more time to read them and makes it less likely you will miss a system or app alert, such as a security warning or a calendar reminder.
The Settings app offers a fixed list of durations rather than a free-form box. The Registry Editor method lets you type your own number of seconds. Both methods are covered below.
Prerequisites
Before you begin, make sure you are signed in to your own account. A standard user account is enough for the Settings method, and you don’t need any special permissions for it.
If you plan to use the Registry Editor method, you need an administrator account, because the editor asks for permission before it opens. The steps below work on both Windows 11 Home and Pro.
Method 1Using Accessibility Settings
This is the quickest way to keep pop-up messages on screen longer. The option sits in the Accessibility settings, under the visual display options, and the change takes effect straight away. You don’t need to restart.
- Open the Windows Settings app on your computer. You can also press Win + I. The Settings window should open with a list of categories on the left.
- Select Accessibility from the list on the left side of the window. The accessibility options should appear on the right.
- Click on the Visual effects tile on the right side. A page with options such as scroll bars, transparency and animation effects should open.
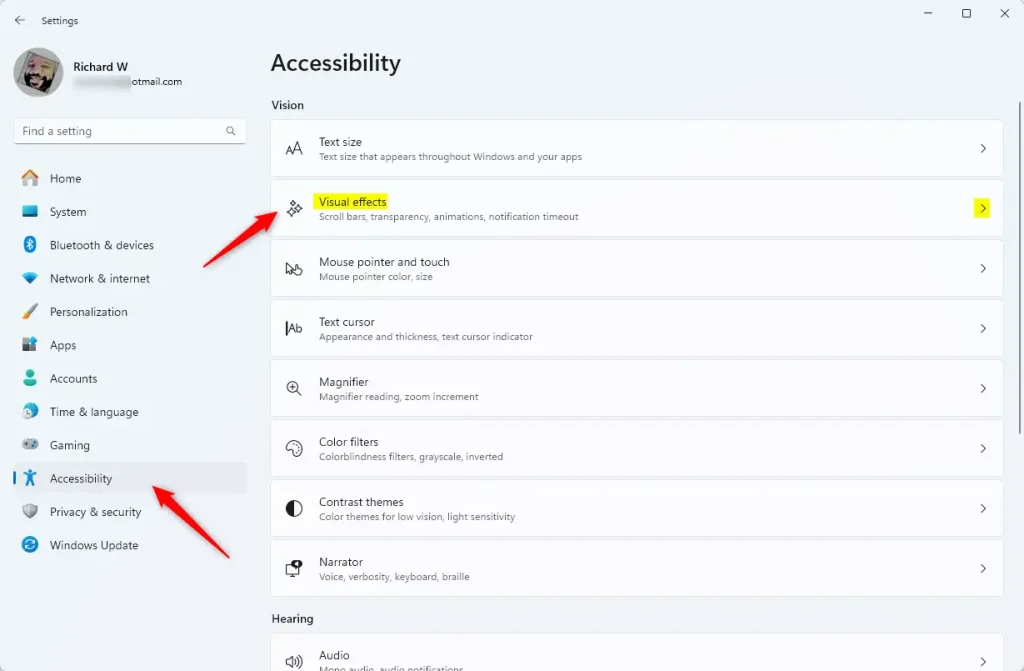
- Find the option labeled Dismiss notifications after this amount of time. It is near the bottom of the Visual effects page, so scroll down if you don't see it. The menu next to it shows your current setting, which is 5 seconds unless you changed it before.
- Click the menu to pick a new duration. You can choose anywhere from 5 seconds up to 5 minutes. The list contains set values, so pick the longest one that suits you. 30 seconds or 1 minute is enough for most people. The menu should now show your new choice.
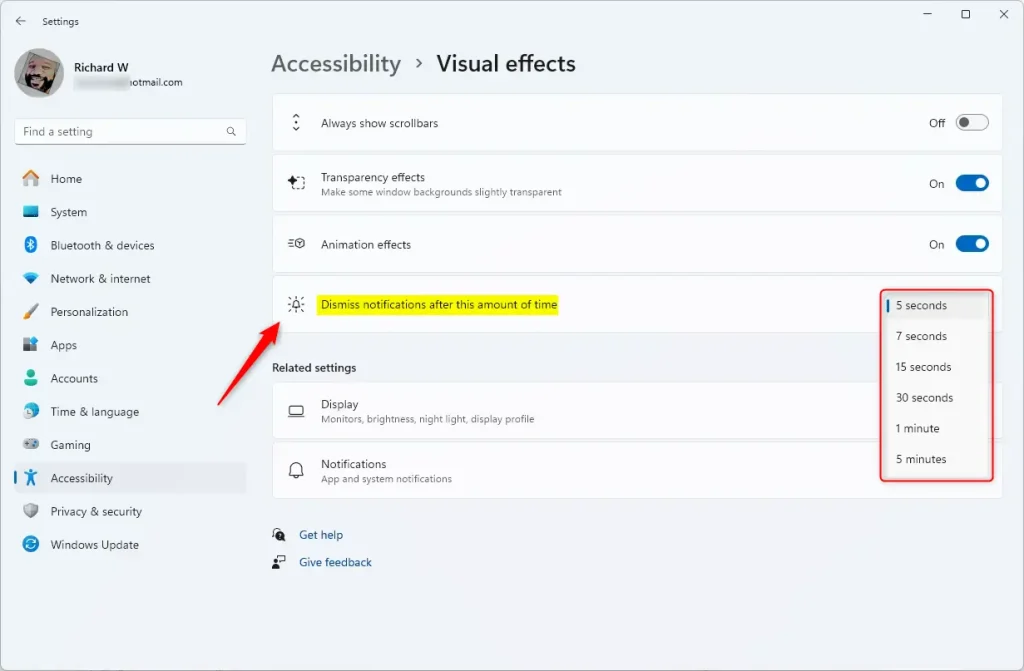
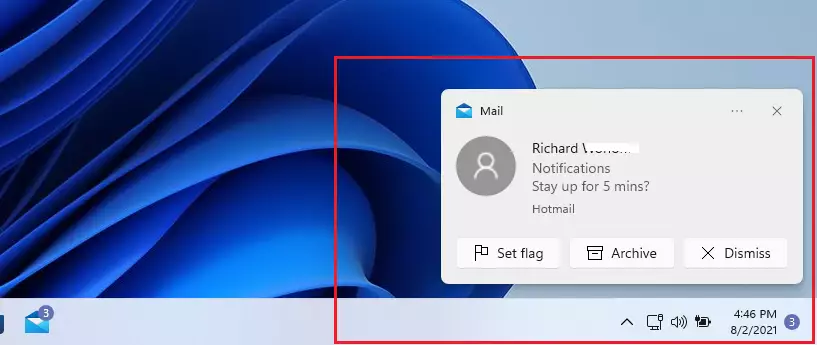
Close the Settings app once you have made your choice. Your next notification will stay on your screen for the new amount of time you selected.
To undo the change, go back to the same page and set the menu to 5 seconds, the Windows default.
Method 2Using the Registry Editor (Advanced)
Using it to change the notification duration gives you more control, because you can enter an exact number of seconds instead of picking from a list. This method needs administrator privileges, and a wrong edit can cause problems, so follow the steps closely.
In the Registry Editor, choose File Export and save a copy of the registry to a safe place. If something goes wrong, you can restore it by double-clicking the saved file.
- Press Win + R, type regedit, and hit Enter. If Windows asks whether you want to allow the app to make changes, click Yes. The Registry Editor window should open.
- Navigate to
HKEY_CURRENT_USER\Control Panel\Accessibility. You can expand the folders in the left pane one by one, or paste the path into the address bar at the top of the editor and press Enter. The key's values should appear in the right pane. - Look for the DWORD value named MessageDuration. If it does not exist, right-click an empty area in the right pane, choose New DWORD (32-bit) Value, and name it MessageDuration. Check the spelling, because Windows ignores a value with the wrong name.
- Double-click MessageDuration and set the value to your desired time in seconds. Select Decimal under Base first, so that a number like 30 means 30 seconds, then type your number in the Value data box and click OK.
Understanding Notification Center and Do Not Disturb
Close the Registry Editor when you are done. If your next notification still disappears after the old time, sign out and back in, or restart the PC, so Windows reads the new value.
To undo the change, set MessageDuration back to 5, or delete the value. If you added it yourself, deleting it returns Windows to its default behavior.
Changing the notification duration does not affect the Notification Center. All alerts are still saved there for later viewing, and you can open it by clicking the date and time on the taskbar or pressing Win + N. Additionally, if you have Do Not Disturb mode enabled, notifications will be silenced and sent directly to the Notification Center regardless of your duration settings.
Have a question about this guide?
Answered by AI from this guide. Good questions may be added to this page — please don't include personal details.
Did this guide fix your problem?

About the Author
Richard
Tech Writer, IT Professional
Richard is a writer at Geek Rewind who turns complex IT tasks into clear, step-by-step guides. He draws on years of hands-on experience in system administration and enterprise IT operations, focusing on Windows, Linux and WordPress: the problems people actually run into, and the fixes that work. His server and WordPress guides come from systems he runs himself. Richard builds and maintains the platform behind Geek Rewind, from its Ubuntu servers and Nginx configuration to its custom WordPress plugins. Many new tutorials start with readers' questions, and he's always glad to answer them in the comments.
[…] you can be notified whenever others share files with you. In addition, you will also receive notifications whenever others edit to make changes to your shared OneDrive […]