How to Clear Automatic Speech Recognition Data in Time and Language Settings

Automatic Speech Recognition data in Windows 11 and Windows 10 includes voice recordings and text dictionaries that the operating system saves to learn your voice commands and improve dictation accuracy. Clearing this stored speech data deletes your past voice interactions and stops the feature from using old recordings to build future speech models.
You can do most of this from the Time & language and Privacy & security pages in Settings. Deleting these files protects your privacy without breaking voice typing. Windows just starts learning again from scratch. The copy stored with your Microsoft account is cleared separately, in the last section of this tutorial.
Open Settings Time & language Speech, scroll to Related settings, and click the button to clear speech recognition data stored on your device. Then go to Privacy & security Speech and turn off Online speech recognition to stop future collection.
Navigating to Time & Language Settings
The Time & language page holds the built-in speech controls. It is also where you find the link to the speech privacy settings. The menu is the same in Windows 11 and Windows 10, but the layout and wording shift a little between builds.
- Press Win+I to open Settings.

Windows 11 Start menu with Settings gear icon highlighted. - Select Time & language from the left-hand navigation menu. On Windows 10 it is in the main grid of options instead.

Settings › Time & language - Click Speech. You should now see the configuration panel with your microphone settings, text-to-speech options, and a link to the speech privacy controls.
If Speech is missing from the list, update Windows first. Very old builds of Windows 10 label this page differently.
Locating and Clearing Speech Data
This section removes the voice clips and speech models Windows has saved over time. The exact labels depend on your Windows build, so read the options on your screen before you click anything.
- Scroll down the Speech settings page until you find the section labeled Related settings or Privacy.

- Look for the option tied to speech data collection or your online speech services profile. Voice access replaced Windows Speech Recognition (WSR) for Windows 11 22H2 and later versions in September 2024. Because of that, some legacy toggles look different or are missing on newer builds.
- Click the button to stop collecting voice clips, or the one to clear existing speech recognition data stored on your device and Microsoft account. If you see only a link to speech privacy settings, follow it. It leads to the same page described in the next section.
- Confirm your choice if a prompt asks you to verify the deletion of your personal speech dictionary and audio samples. The deletion usually cannot be reversed, so be sure you want it gone.
No restart is needed. If you later want voice typing to learn from your voice again, turn the collection setting back on from the same page.
Managing Privacy Settings for Voice Input
If you do not want Windows to gather and upload new speech samples, turn off online speech recognition as well. Voice typing and similar features that depend on cloud processing may stop working or become less accurate afterwards. Voice features that run entirely on the device are unaffected.
- Open Settings and go to Privacy & security.
- Under Windows permissions, click Speech.
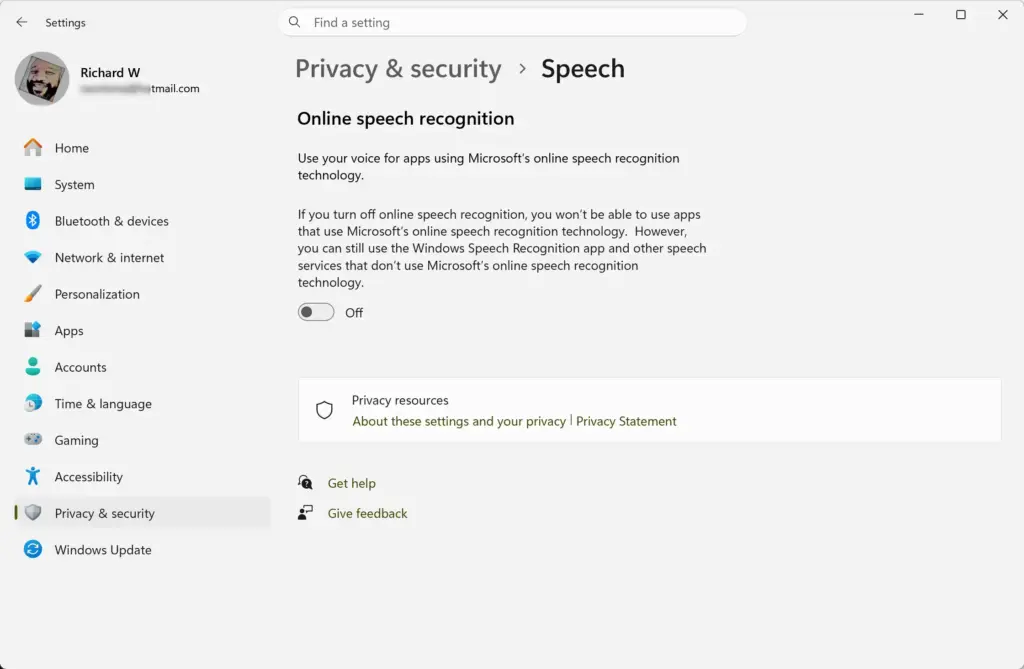
Settings › Privacy & security › Speech - Turn off the Online speech recognition toggle. The toggle should now read Off, and cloud-based processing and data collection for speech stops.
- Go back to Privacy & security and open Diagnostics & feedback if you want to review optional diagnostic data that might include voice, inking, and typing input.
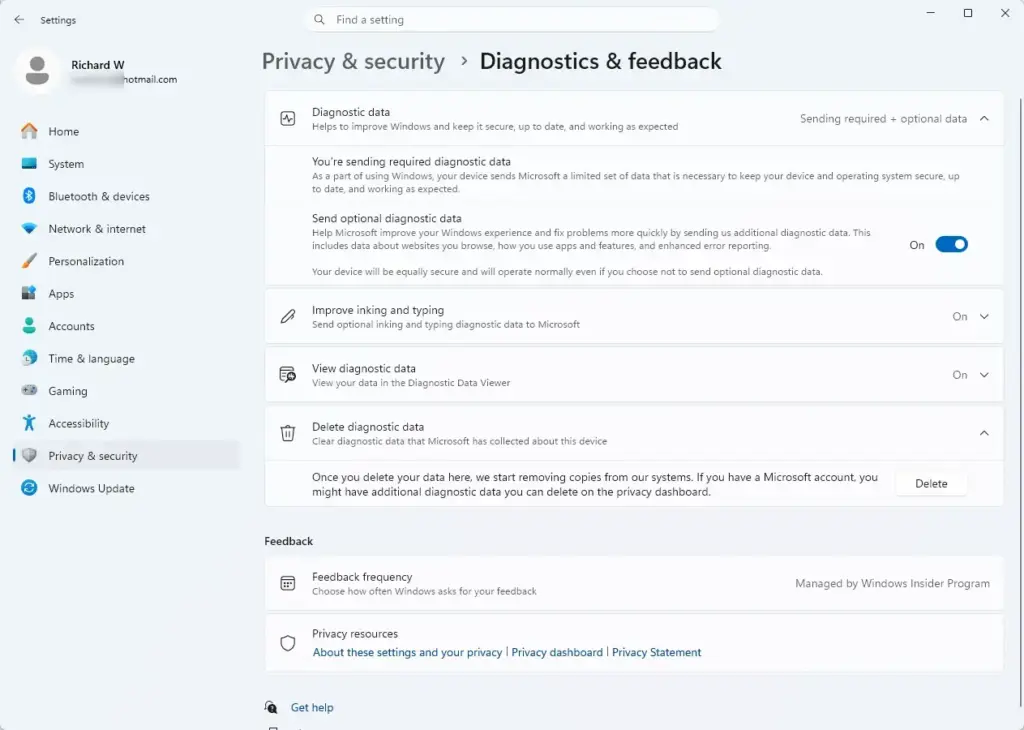
To undo this, return to the same page and switch the toggle back to On.
Troubleshooting Missing Speech Options
If the deletion buttons or toggles are greyed out, an organization policy or a work account is usually responsible. The same applies if a message says some settings are managed by your organization. The steps below check for that. They only read policy settings, so do not change anything on a work PC unless your IT team agrees.
- Open the Start menu, type
cmd, right-click Command Prompt, and select Run as administrator. This requires administrator privileges. Click Yes if User Account Control asks for permission. - Type
gpedit.mscand press Enter to open the Local Group Policy Editor. It is available only on Windows Pro and Enterprise editions. Windows Home does not include it, so skip this step and the next one if the command fails. - Navigate to Computer Configuration Administrative Templates Control Panel Regional and Language Options. Check whether any speech data collection policy is set to Enabled or Disabled instead of Not Configured. That means it is being enforced. If you own the PC and set the policy yourself, switch it back to Not Configured to undo it.
- Go to Settings Accounts Access work or school and disconnect any secondary work or school account if your personal privacy settings are still blocked. Reopen Settings afterwards to see whether the options are now available.
If the options stay greyed out after this, sign in with a local administrator account and try again. On a PC managed by your employer, the policy may be pushed from a central server. In that case only your IT department can change it.
Additional Steps for Comprehensive Voice Data Removal
That history has to be removed manually in a web browser through the Microsoft Privacy Dashboard.
- Open your web browser and go to the Microsoft Privacy Dashboard website.
- Sign in with the same Microsoft account you use on your Windows installation. If you have more than one account, check which one is signed in under Settings Accounts Your info.
- Locate the voice data section or the activity history page. Microsoft rearranges this site from time to time, so the section may sit under a slightly different heading.
- Click the button to clear your voice activity data. Once the list is empty, no remote copies of your speech recordings should remain on Microsoft servers.
This deletion cannot be undone. It does not stop new data from being collected, so keep Online speech recognition turned off if you want to prevent that.
Was this guide helpful?

About the Author
Richard
Tech Writer, IT Professional
Richard is a writer at Geek Rewind who turns complex IT tasks into clear, step-by-step guides. He draws on years of hands-on experience in system administration and enterprise IT operations, focusing on Windows, Linux and WordPress: the problems people actually run into, and the fixes that work. His server and WordPress guides come from systems he runs himself. Richard builds and maintains the platform behind Geek Rewind, from its Ubuntu servers and Nginx configuration to its custom WordPress plugins. Many new tutorials start with readers' questions, and he's always glad to answer them in the comments.


No comments yet — be the first to share your thoughts!