How to Add Custom Text-to-Speech Voices in Windows 11 Time and Language Settings

Custom text-to-speech voices in Windows 11 let you add languages and natural-sounding reading voices for tools like Narrator. Windows delivers them as language and speech packs, which contain the audio models needed to read text out loud.
Older versions of Windows relied on SAPI 5 (an older tool for voice software). Windows 11 uses a unified platform that supports both the traditional robotic voices and newer neural voices, which have a more natural cadence and emotion. The steps below work the same on Home and Pro. Menu layout shifts a little between Windows 11 builds, so where it differs I say so.
Open Settings Time & language Language & region, click your language’s three-dot menu and select Language options. Scroll to Speech, click Add a voice, check the voices you want, and click Add. Windows downloads and installs them in the background with no restart needed.
Opening Time and Language Settings
Everything starts in the language and region settings. You need to get to the page that lists your installed languages first.
- Press Win+I, or open the Start menu and click Settings (the gear icon). The Settings app opens.

Windows 11 Start menu with Settings gear icon highlighted. - Select Time & language from the left-hand navigation menu.

Settings › Time & language - Click Language & region. You should now see your display languages and your regional formatting options.
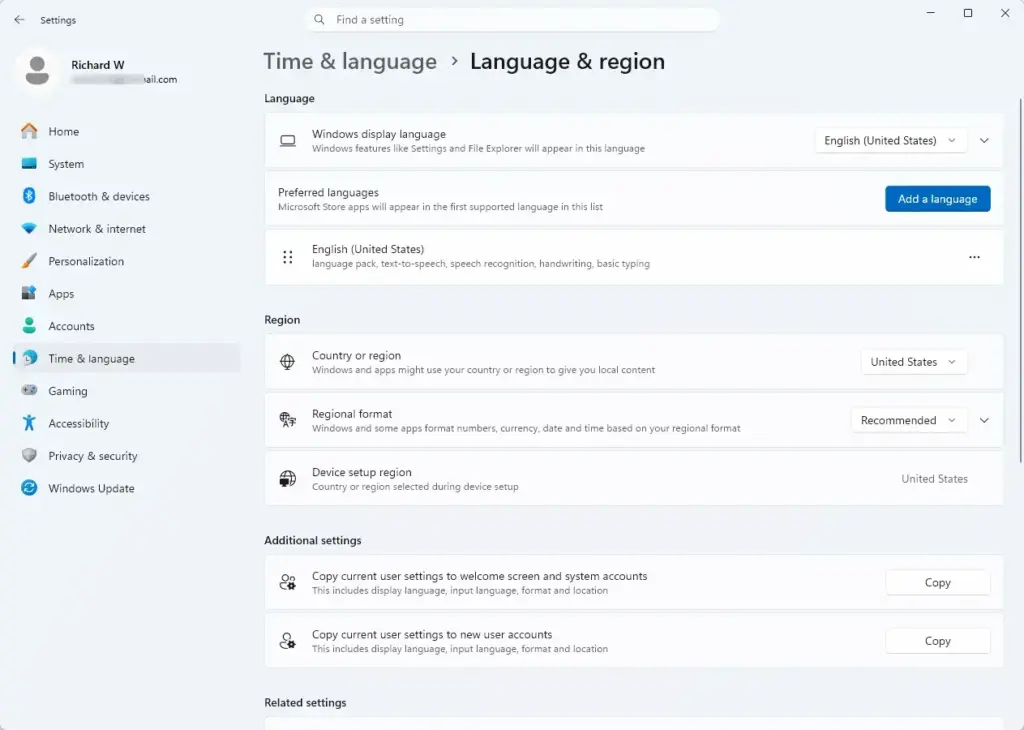
Settings › Time & language › Language & region
Navigating to Speech Settings
Decide which language you want the voice for before you go in. A voice for English will not read French text properly, for example.
- Scroll down the Language & region page until you reach the Preferred languages section.
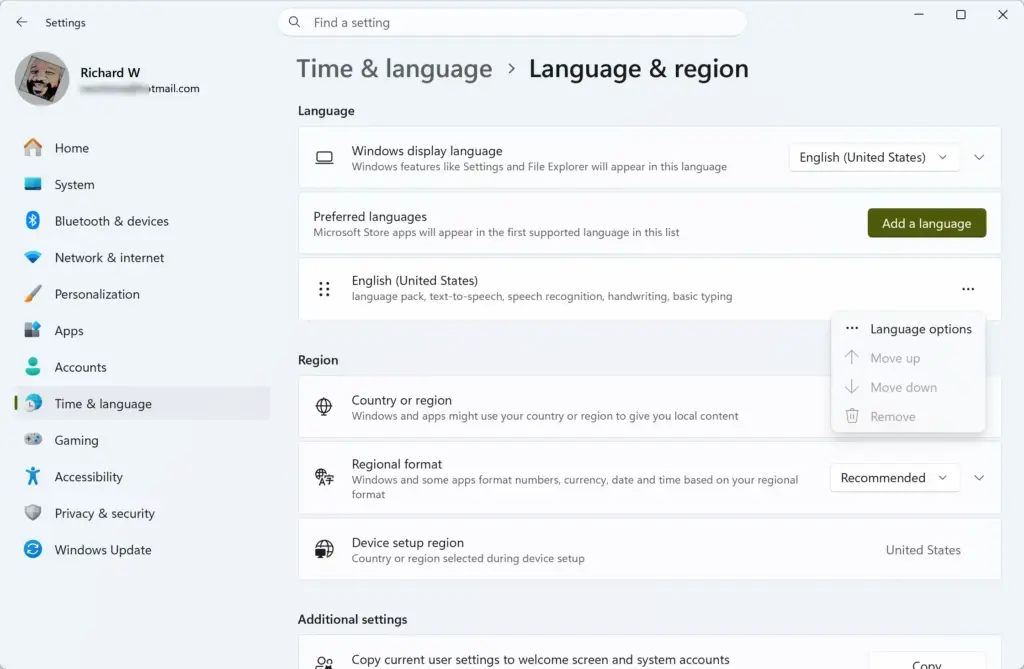
Settings › Time & language › Language & region › Preferred languages - Click the three-dot menu button next to your primary language, or the language you want to add a voice for, and select Language options. The options page for that language opens.
- Scroll down through the language feature settings until you find the Speech or text-to-speech entry.
If the language you want is not in the list, use Add a language at the top of the Preferred languages section first. If you only need a voice and do not want to change your display language, clear the display language option during setup.
Adding a New Text-to-Speech Voice Package
Installing a voice needs an active internet connection, because Windows downloads the language data from Microsoft servers. This step requires administrator privileges. If you are signed in with a standard account, Windows will ask for an administrator password.
- On the language options page for your chosen language, find the Speech section and click Add a voice.
- Wait for the flyout window. It lists the voices and dialects available for that language pack.
- Check the box next to each voice you want to install. If there are regional variants, such as United States, United Kingdom or Australian English, pick the accent you prefer.
- Click Add at the bottom of the window. Windows downloads and installs the files in the background, and no restart is needed.
Download size depends on the voice. Natural voices are noticeably larger than the older ones, so give them a few minutes on a slow connection. If you cannot find Add a voice on your build, look under Time & language Speech for a voice management option instead.
Verifying and Testing Installed Voices
Once the install finishes, check that Windows sees the new voice and that it actually plays audio. Make sure your speakers or headphones are on and the volume is up before you test.
- Go back to Settings Time & language Speech. This page shows the speech engines installed on your computer.
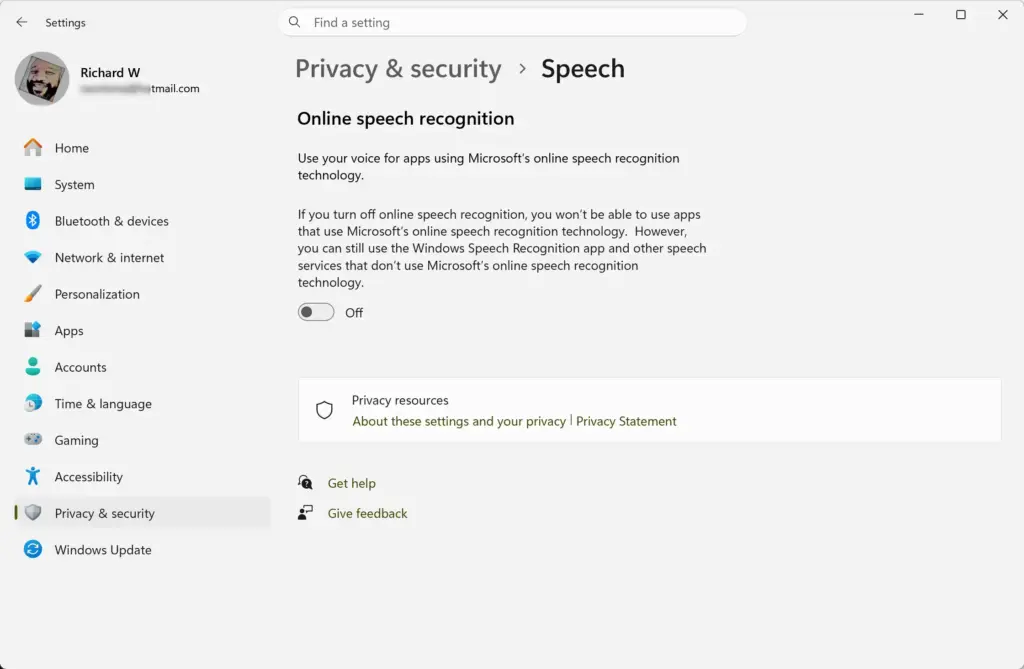
Settings › Privacy & security › Speech - Find the Voices dropdown menu in the speech settings.
- Click the dropdown and select your newly installed voice.
- Type a test sentence into the text preview box.
- Click Preview. The engine should read your sentence out loud in the selected voice.
If the voice is missing from the list, give it a minute and reopen the Settings app. If it still does not show up, see the troubleshooting section below.
Managing Existing Voices and Removing Unused Packs
If disk space is tight, or you no longer need a regional speech engine, you can remove the voice package. Removing a voice is reversible. You can add it again from the same place at any time.
- Open Settings and go to Time & language Language & region.
Settings › Time & language › Language & region - Click the three-dot menu next to the language that holds the voice you want to remove and select Language options.
- Scroll down to the Speech or optional features list, find the voice package, and click Remove. The package disappears from the list.
Pick the one you want again on the Speech page afterwards.
Advanced Voice Customization via Control Panel
The modern Settings app handles adding and removing voices. The legacy Control Panel still gives you finer control over voice speed and the audio output device. Keep in mind that this older window uses the SAPI 5 engine, so it may not list the newer Natural voices.
- Open the Start menu, type Control Panel, and press Enter.
- Set the View by filter in the top right corner to Large icons or Small icons. The full list of Control Panel items appears.
- Click Speech Recognition to open the legacy speech utility.
- Click the Text to Speech link in the left-hand column. The speech properties window opens.
- Use the Voice selection dropdown to choose your active voice. Adjust the Voice speed slider to make the speech faster or slower, then click Preview Voice to test your changes.
- Click OK to keep the settings.
Troubleshooting Missing Voices and Installation Errors
If a voice fails to download or never appears in the dropdown, the cause is usually a connection problem or a stuck Windows Update component. Work through these steps in order and test after each one.
- Check your internet connection. Also make sure a metered connection is not blocking large optional downloads. You can find that toggle in the properties of your network under Network & internet.
- Open the Start menu, type Services, and press Enter. Scroll down to Windows Update, right-click it, and select Restart to clear any stuck queue.
- Open an elevated prompt to repair damaged system image files that can interfere with optional feature installs. Right-click the Start button and select Terminal (Admin) or Command Prompt (Admin). Type
DISM.exe /Online /Cleanup-image /Restorehealthand press Enter. When that finishes, typesfc /scannowand press Enter. Both can take several minutes, so let them run to the end. 
Command Prompt - Restart your computer, then try installing the voice package again from the Settings app.
Adding Natural Voices for Enhanced Read-Aloud Quality
Microsoft keeps adding "Natural" voices to Windows 11. They use neural text-to-speech and sound far more human than the traditional SAPI voices. They suit long reading sessions, proofreading and users with visual impairments. They download once and then work offline.
- Open Settings Time & language Language & region.
- Click the three-dot menu next to your primary language and select Language options.
- Click Add a voice and look for entries with "Natural" in the description, for example Microsoft Jenny Natural or Microsoft Ryan Natural.
- Install the natural voice pack. When the download finishes, you can select the voice in apps that use Windows system speech, such as Microsoft Edge read-aloud and Narrator.
Not every app reads from the same voice list. If an app does not show the new voice, check its own settings. For Narrator specifically, the voice picker in the Narrator settings page is the place to choose it.
How to Undo This
To undo your text-to-speech changes, go back to Settings Time & language Language & region, open the language options for the installed pack, and remove the speech features you no longer want. You can also set the default voice back to the original system default in the legacy Control Panel text-to-speech properties window.
Was this guide helpful?

About the Author
Richard
Tech Writer, IT Professional
Richard is a writer at Geek Rewind who turns complex IT tasks into clear, step-by-step guides. He draws on years of hands-on experience in system administration and enterprise IT operations, focusing on Windows, Linux and WordPress: the problems people actually run into, and the fixes that work. His server and WordPress guides come from systems he runs himself. Richard builds and maintains the platform behind Geek Rewind, from its Ubuntu servers and Nginx configuration to its custom WordPress plugins. Many new tutorials start with readers' questions, and he's always glad to answer them in the comments.


No comments yet — be the first to share your thoughts!