How to Change Speech Recognition Output Devices in Windows 11 Accessibility Speech Settings

Speech recognition output devices in Windows 11 are the speakers, headphones, or headsets that play audio feedback, error alerts, and spoken confirmations when you control your PC by voice. Windows 11 has no separate “speech output” picker. Spoken feedback follows the playback device you choose in the Sound settings, and the Accessibility menu in Settings is where you find the voice tools themselves.
Picking the right playback device means you won’t miss voice feedback or spoken instructions. You can switch between headphones, a headset, and desktop speakers whenever you like, and the change takes a few clicks. This guide covers checking your audio hardware, finding the speech settings, changing the default output device, testing your microphone, and reviewing the privacy options for speech.
Open Settings System Sound, scroll to More sound settings, click the Playback tab, right-click your preferred speakers or headphones, and select Set as Default Device. Windows routes all speech recognition audio feedback through this device.
Checking Your Current Audio Setup
This shows you every connected speaker, headphone set, and microphone, so you know the exact name of the device you want. If a device is missing from the list, you’ll find out now rather than halfway through the change.
Start by opening the Settings app.
- Click the Start button on your taskbar .
- Select Settings, the gear icon. The Settings window opens.

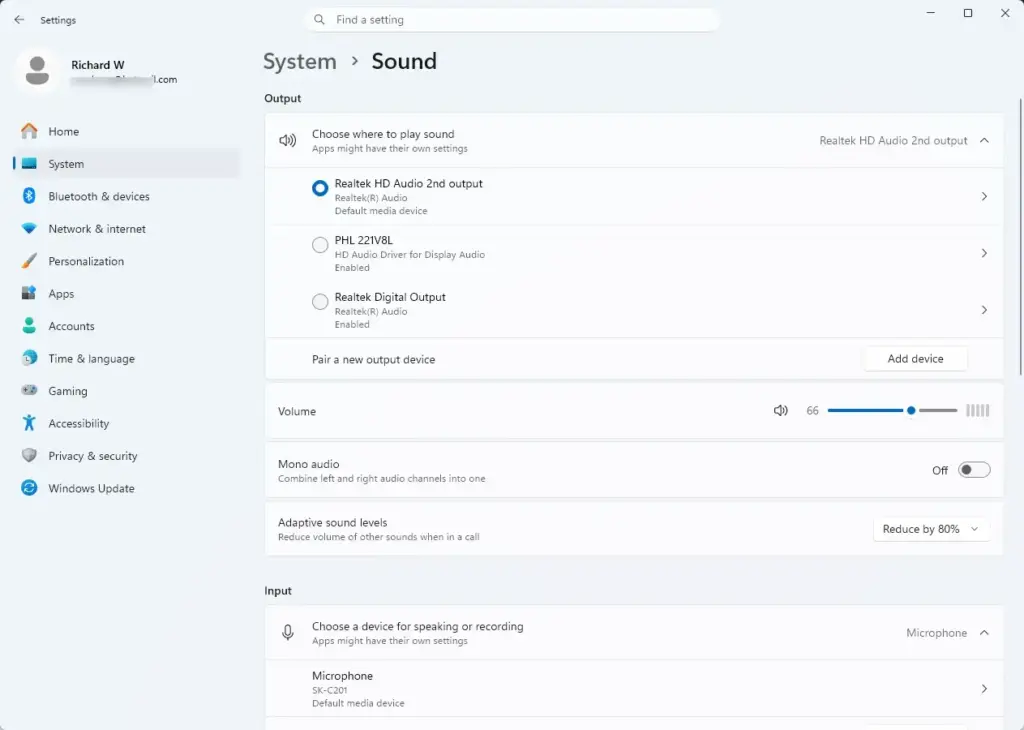
- In the Settings window, click System in the list on the left.
- Click Sound to open your audio controls. You should see separate Output and Input sections.
- Look under Output. It lists every speaker and headphone set currently connected to your computer.
- Write down the exact name of the device you want to use for speech and system audio. You’ll need it later, because several devices can have similar names (for example, a monitor’s built-in speakers and a USB headset).
If your headset or Bluetooth device isn’t listed, check that it is switched on, paired, and plugged in properly. A device that isn’t connected won’t show up as an option.
Navigating to 🪟 Windows 11 Accessibility and Speech Settings
The Accessibility section of Settings holds the tools built for hearing, vision, and voice control. It’s where you find Voice access and the other speech options. The steps below open it.
- Open the Start menu.
- Click Settings.
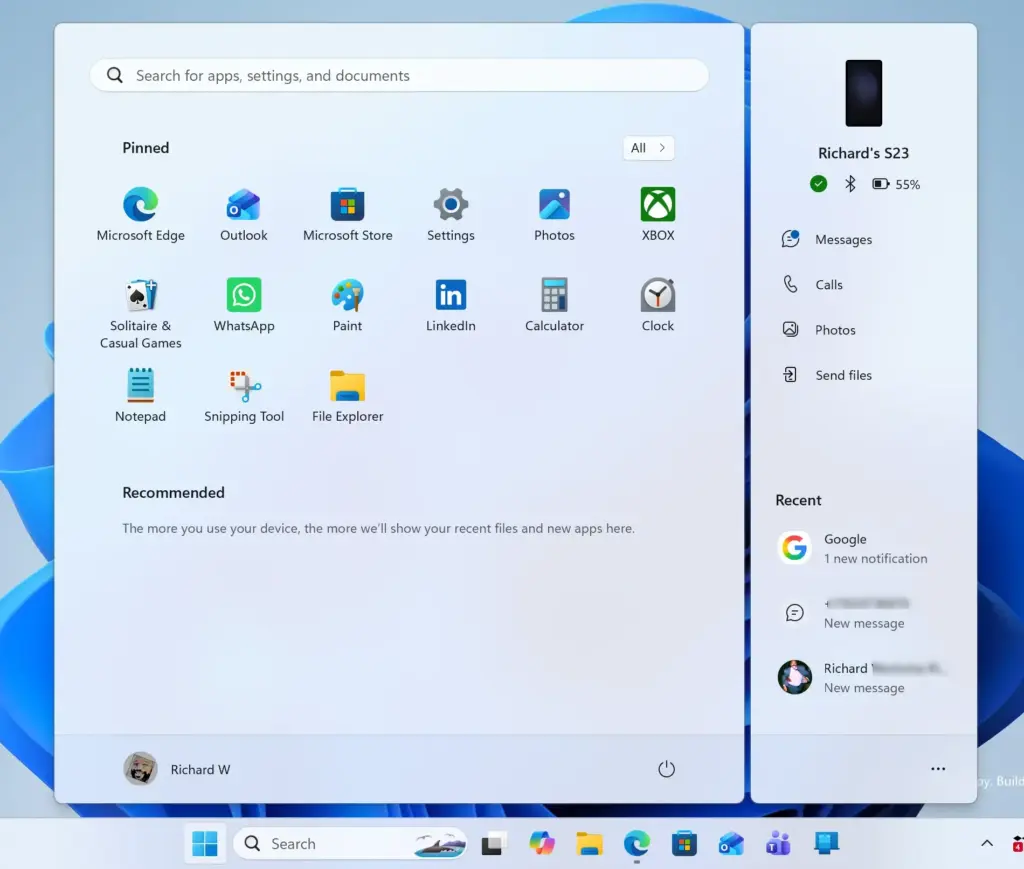
To work with speech settings, open the main Settings window and click Accessibility in the left-hand menu. This section gathers the tools that make your computer easier to use for people with different physical needs, including vision, hearing, and speech features.
- Click Accessibility in the left-hand menu.
- Scroll down the list of options until you find the area for speech or interaction. Depending on your version of Windows 11, you may see Voice access or general Speech settings. Menu names and positions vary slightly between Windows 11 releases, so look for the closest match.
There is also an older route through the classic Control Panel:
- Press Windows Key + R to open the Run dialog box.
- Type control and press Enter. The classic Control Panel opens.
- Select Ease of Access, then Speech Recognition.
The Control Panel route is useful if you prefer the older layout or can't find the option in Settings.

How to Change Speech Recognition Output Devices
Changing the speech output device is simple once you know where to look. You set your preferred playback hardware in Sound settings, and Windows then plays spoken feedback through it.
- Open the Start menu and choose Settings.
- Click System on the left side, then click Sound.
- Scroll down and click More sound settings to open the classic Sound window. You may also see advanced audio options on this page. The More sound settings link sits near the bottom, under the advanced options, and its position can differ between Windows 11 versions.
- In the Sound window, click the Playback tab. It lists all available audio output devices.
- Find your preferred headset, speakers, or headphones in the list.
- Right-click your chosen device and select Set as Default Device. If you want your voice tools to prioritize it for calls and voice features, also select Set as Default Communication Device.
- Click Apply, then click OK to save your changes.
If a prompt appears asking for permission, click Yes or enter your administrator password.
The chosen device should now show a green check mark in the Playback list. If a device is greyed out or marked as disconnected, it isn't currently available. Plug it in or reconnect it, and it will become active again. To undo the change, repeat the steps and set your previous device as the default. You normally don't need to restart, though an app that was already open may need to be closed and reopened before it switches to the new device.
Setting Up and Testing Your Microphone
Voice commands only work if Windows can hear you clearly. Testing your microphone shows whether your input level is high enough. Do this after you've set up a new headset, because the microphone and speakers on a headset are separate devices in Windows.
- Open the Start menu and click Settings.
- Select System from the left menu, then click Sound.
- Look under the Input section to see your connected microphones.
- Click your microphone to open its properties.
- Click the Start test button under the input settings. Speak normally for a few seconds, then click Stop test.
- Check the result. Windows shows a percentage score. If the score is too low, move closer to your microphone or drag the input volume slider upward, then test again.
If the microphone doesn't appear at all, check that it is plugged in and not blocked in your privacy settings (see the next section).
Protecting Your Privacy with Speech and Voice Settings
Voice features involve your spoken words, so it's worth knowing how Windows handles them. The Privacy & security settings let you decide what is sent to Microsoft and which apps can listen.
- Open the Start menu and click Settings.
- Click Privacy & security in the left-hand menu.
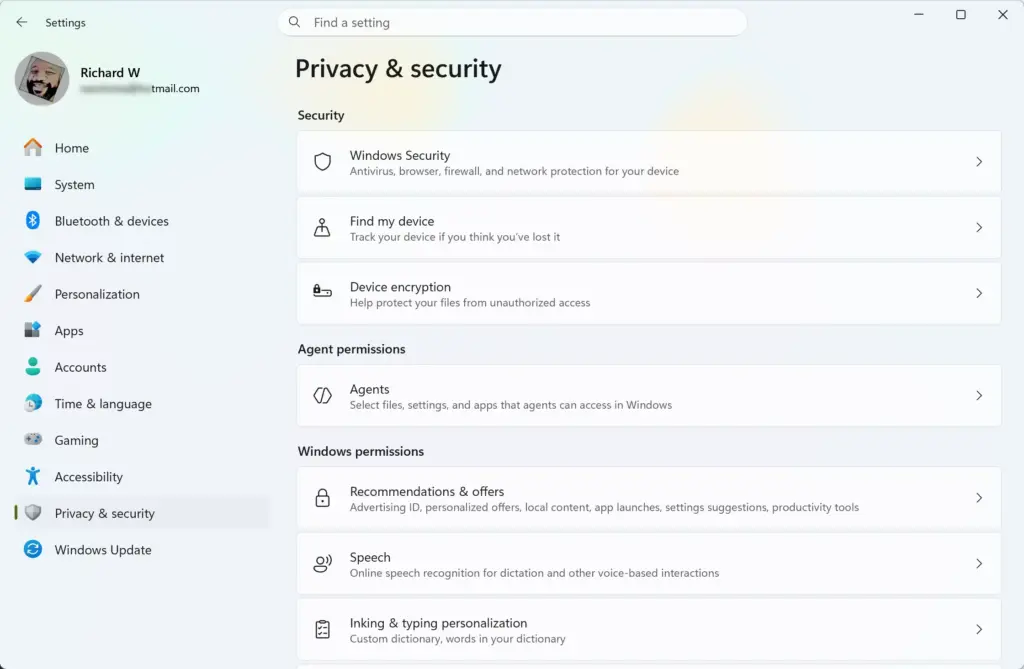
- Scroll down to the Windows permissions section.
- Click Speech.
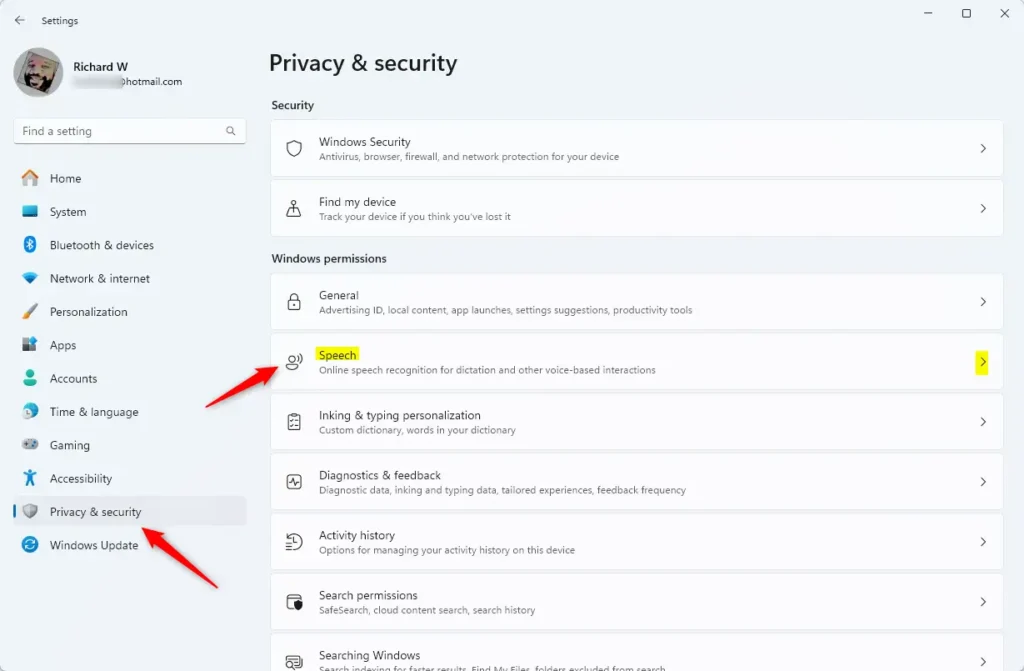
The Speech page lets you turn the Online speech recognition switch on or off. When you turn it off, Microsoft's cloud-based speech services won't use your voice data for processing. Some features that rely on the cloud may work less well or stop working, and you can flip the switch back on at any time.
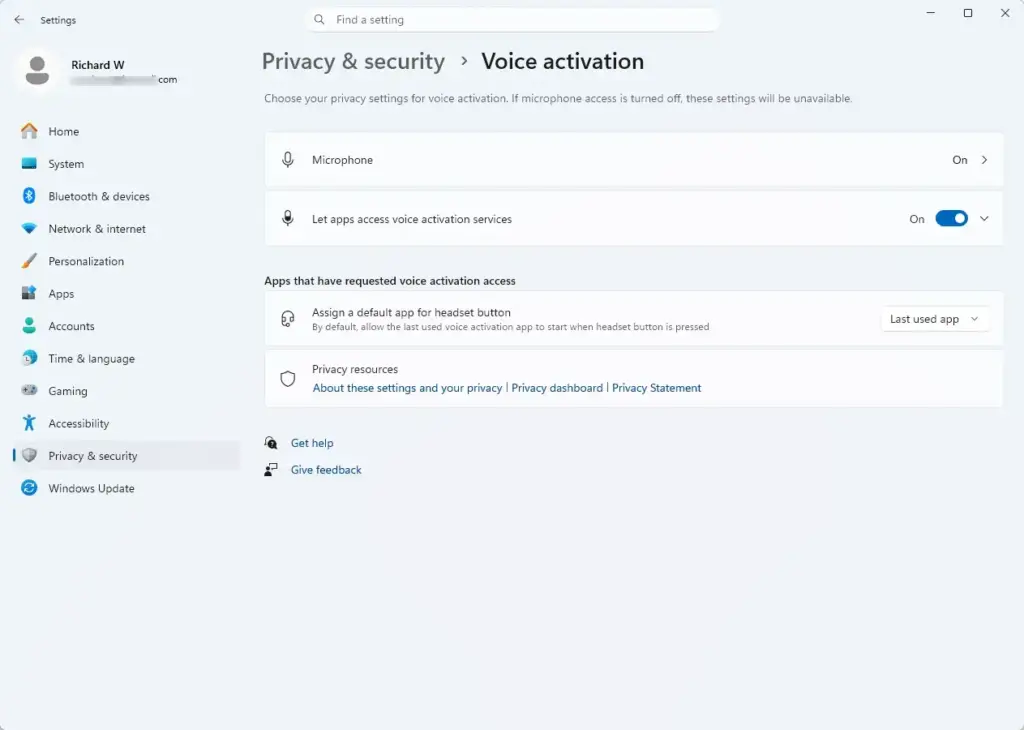
You can also click Voice activation under Privacy & security to control which apps are allowed to listen for voice keywords, even when your device is locked. Turn it off for any app you don't want listening in the background.
Summary
Changing your speech recognition output device in Windows 11 controls where you hear audio feedback, system prompts, and accessibility alerts. Pick your preferred speakers or headset through the System and Sound menus, confirm it as the default on the Playback tab, and test your microphone so your voice tools work correctly.
Have a question about this guide?
Answered by AI from this guide. Good questions may be added to this page — please don't include personal details.
Did this guide fix your problem?

About the Author
Richard
Tech Writer, IT Professional
Richard is a writer at Geek Rewind who turns complex IT tasks into clear, step-by-step guides. He draws on years of hands-on experience in system administration and enterprise IT operations, focusing on Windows, Linux and WordPress: the problems people actually run into, and the fixes that work. His server and WordPress guides come from systems he runs himself. Richard builds and maintains the platform behind Geek Rewind, from its Ubuntu servers and Nginx configuration to its custom WordPress plugins. Many new tutorials start with readers' questions, and he's always glad to answer them in the comments.
No comments yet — be the first to share your thoughts!