How to Change Default Sound Output Device Automatically in Windows 11

Changing your default sound output device automatically in Windows 11 stops sound from playing through the wrong speakers or headphones when you plug in new audio gear. Without it, Windows 11 keeps sending audio to your last active device until you open the sound settings and switch it by hand.
Switching by hand gets old fast when you move between desk speakers, a monitor, and a wireless headset all day. This guide covers the built-in ways to pick a device, set sensible defaults, and use a script or utility when you want the switching to happen on its own.
Windows 11 has no setting that switches the default output device on its own when you plug something in, so choose a permanent default in Settings System Sound Output and select your main speaker or headset. Your choice applies whenever that device is connected. For a one-click switch, press Win+A and pick the device from the Quick Settings panel.
Key Points About 🪟 Windows 11 Audio Management
Windows 11 splits your sound into two groups. Playback devices handle media and system alerts. Communication devices handle phone calls and video chats. Each group has its own default, and the two can point at different hardware. That is how you keep games and music apart from calls.
Windows also remembers the last device you used or manually selected. When that device is unplugged or turned off, Windows looks for a fallback. Whether it jumps to a newly connected device depends partly on the device type and its driver, so the result can differ between a USB headset, a Bluetooth headset, and a monitor. Setting your preferred defaults yourself means Windows is not guessing which speaker to use.
Ways to Change the Default Sound Device in 🪟 Windows 11
Windows 11 gives you several ways to manage your output device. Pick the one that matches how fast you need to switch:
- The Quick Settings panel, for a one-click switch.
- The Settings app, for setting a lasting default.
- The classic Control Panel , for hidden or disabled devices and separate playback and communication defaults.
- Scripts or utility apps, for switching on a shortcut or an event.
Method 1Change the Default Sound Device Using the Quick Settings Panel
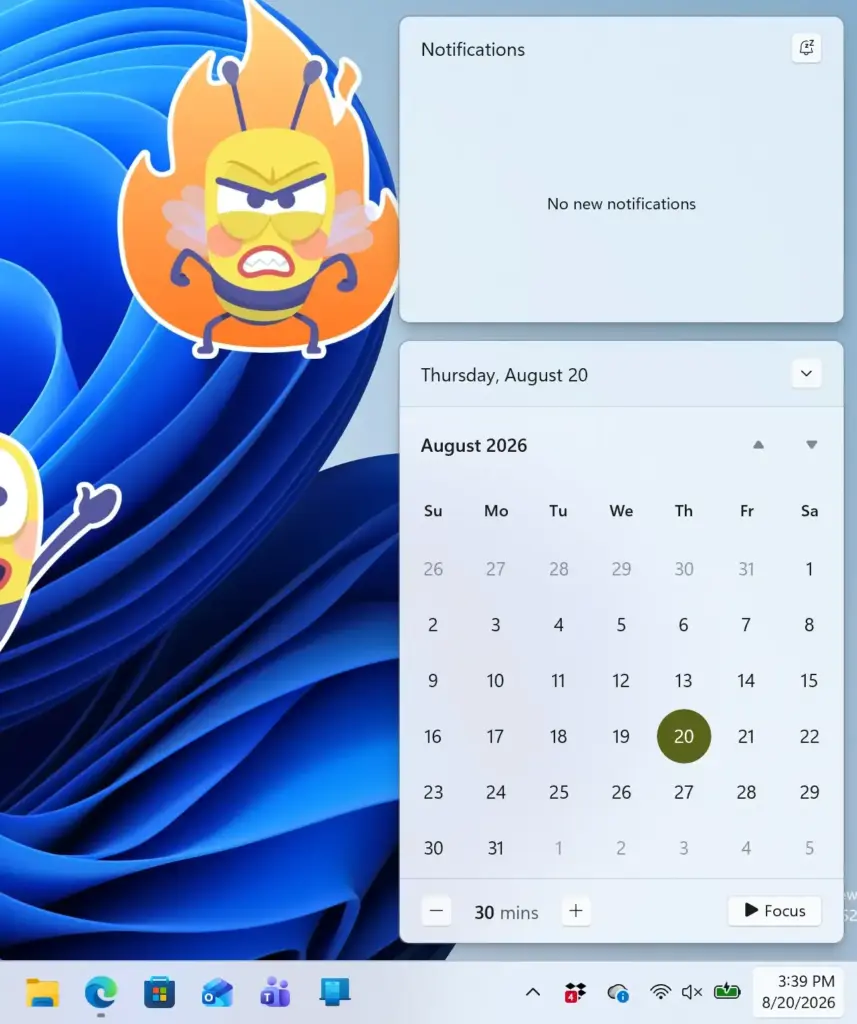
The Quick Settings panel is the fastest way to change devices. It lets you pick a different speaker, headset, or pair of headphones without going into deeper menus.
- Look at the bottom-right corner of the taskbar.
- Click the group of icons that includes the Volume, Wi-Fi, and Battery symbols. You can also press Windows Key + A. The Quick Settings panel opens.
- Next to the volume slider, click the small icon that looks like a speaker with an arrow or a wave. This is the Manage audio devices button. If you do not see it, the panel may be showing an older layout, so check that Windows is fully updated.
- A list of your connected speakers, headphones, and displays appears. Click the device you want to use right now.
Audio moves to that device at once. Treat this as a manual override. If you later plug in or connect something else, Windows may switch again, and this method does not change your permanent defaults.
Method 2Set the Default Sound Device via 🪟 Windows 11 Audio Settings
Use the Settings app when you want Windows to prefer a particular device whenever it is plugged in and turned on. It is the same in Windows 11 Home and Pro.
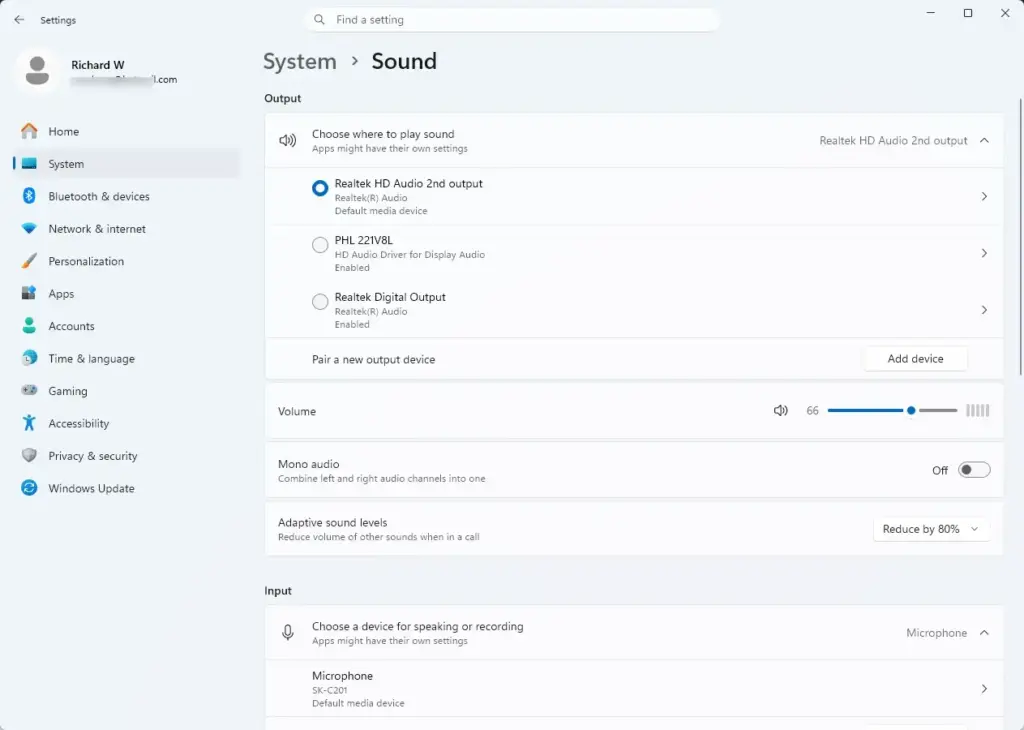
- Click the Start button on your taskbar and select Settings (the gear icon). Alternatively, press Windows Key + I.

- In the left-hand menu, click System.
- In the main window, click Sound.
- Scroll down to the Output section. You will see a list of your speakers and headphones. A device that is turned off or unplugged may not appear here. Connect it first.
- Click the arrow next to the device you want as your main speaker or headset. Its properties page opens.
- Look for Set as default sound device, or the options Use as default for audio and Use as default for communications. Choose the one that fits. The exact wording varies slightly between Windows 11 versions. On older builds, selecting the device's radio button in the list makes it the default.
To undo the change, repeat these steps and select your previous device.
Method 3Configure Using the Legacy Sound Control Panel
It shows every audio device on the machine, including disabled and disconnected ones, plus advanced speaker properties the modern app does not show. It is also the easiest place to set different devices for audio and for communications.
- Click the Start button, type Control Panel into the search bar, and open it.

- Change the View by option in the top right corner to Large icons or Small icons.
- Click Sound. The Sound window opens.
- Make sure you are on the Playback tab.
- If a device is missing, right-click an empty area of the list and tick Show Disabled Devices and Show Disconnected Devices.
- Right-click the speaker, headphone set, or audio device you want to use.
- Select Set as Default Device to handle regular sounds and media.
- Right-click the same device again and select Set as Default Communication Device if you want voice calls to use it too. Or choose a different device for calls. A green checkmark appears next to the default device, and a green phone icon marks the communication device.
- Click Apply, then OK, to save your changes.
No restart is needed. Some apps that were already playing audio may need to be closed and reopened before they pick up the new device.
Method 4Leverage Automation Scripts to Automatically Set the Default Output Device
Windows has no built-in toggle for smart auto-switching. If you want true automation, you have two routes: a custom PowerShell script or an open-source audio-switching utility. Both can swap outputs with a keyboard shortcut or in response to a system event, such as a headset connecting.
Download audio-switching helper utilities only from reputable open-source platforms, and check what a script does before you run it, to keep malware off your computer.
Advanced Considerations When Setting a Default Sound Output Device in 🪟 Windows 11
Managing audio goes beyond picking one pair of speakers. These advanced options help you fine-tune your setup:
Per-App Audio Output
Windows 11 can send sound from different programs to different devices. Here is how to set it up.
- Open Settings System Sound
- Scroll down and click Volume mixer.
- Find the app in the list and expand it. Choose the device you want from its output device drop-down.
For example, you can play music through desktop speakers while a game's audio goes to your gaming headset. An app only appears in the mixer once it is open and producing sound. Windows remembers the choice for that app.
Communication vs. Playback Devices
Separating playback from communication devices lets you keep media apart from voice calls. You can send game audio through large room speakers while work calls stay on a headset. To set this up, assign different devices as Set as Default Device and Set as Default Communication Device on the Playback tab of the legacy sound control panel, as described above. Some call apps have their own speaker setting, so check inside the app if it ignores the Windows default.
Disconnected Devices
Old entries for hardware you no longer use clutter your device lists. To hide them, open the classic sound control panel and go to the Playback tab. Right-click the device you no longer use and choose Disable. Windows stops offering it, so your computer stops trying to send sound to a headset that is turned off. To bring it back, right-click an empty area, tick Show Disabled Devices, then right-click the device and choose Enable.
Expert Tips for Seamless Audio Management (What Competitors Miss)
Most basic guides stop at clicking through the control panel. Everyday users also run into hardware quirks. Here are two fixes that popular tutorials often skip:
Managing Bluetooth Power States and Audio Prioritization
If Bluetooth headphones are slow to reconnect or start playing, the cause is often power management on the Bluetooth adapter. Here is the fix.
- Right-click the Start button and select Device Manager.
- Expand Bluetooth and double-click your Bluetooth adapter.
- Open the Power Management tab.
- Uncheck Allow the computer to turn off this device to save power, then click OK.
This stops the adapter from dropping into low-power sleep, so your headphones are ready when you start playing sound again. Not every adapter shows the Power Management tab. On a laptop, this setting may slightly shorten battery life. To undo it, tick the box again.
Handling HDMI and DisplayPort Audio Conflicts
When you connect a PC to a TV or monitor over HDMI, Windows often switches sound to that display's speakers. To stop it, open the legacy sound control panel, go to the Playback tab, right-click the monitor or TV speakers you do not use, and choose Disable. Windows can then no longer route audio there, and sound stays on your main speakers. If you later want audio over HDMI, show disabled devices and enable it again.
Best Practices for Managing Default Sound Devices in 🪟 Windows 11
A few habits keep audio predictable and your device lists clean. They also reduce sudden dropouts.
- Keep your audio drivers updated through Windows Update or your computer manufacturer's support application.

- Disable unused audio outputs, such as virtual software drivers or disconnected monitors, to reduce confusion in your system menus.
- Name your custom audio devices clearly in your settings so you can easily tell them apart in the Quick Settings panel. In the classic Sound window, right-click a device, choose Properties, and edit the name on the General tab.
Summary
You can manage default sound output in Windows 11 through the Quick Settings panel, the Settings app, the legacy Control Panel, and a few targeted fixes for Bluetooth and HDMI conflicts. Set your defaults, disable the devices you never use, and add a script or utility if you want switching to happen on its own. Windows will then stop hijacking your audio and send it to your preferred speakers every time you start your computer.
Frequently asked questions
How to change default sound output device in 🪟 Windows 11?
Open Settings, then go to System Sound. Scroll down to Advanced and select Volume device graph. Click the dropdown under Playback and choose your preferred device. Windows will use it as the default until you change it again.
Still have a question?
Answered by AI from this guide. Good questions may be added to this page — please don't include personal details.
Did this guide fix your problem?

About the Author
Richard
Tech Writer, IT Professional
Richard is a writer at Geek Rewind who turns complex IT tasks into clear, step-by-step guides. He draws on years of hands-on experience in system administration and enterprise IT operations, focusing on Windows, Linux and WordPress: the problems people actually run into, and the fixes that work. His server and WordPress guides come from systems he runs himself. Richard builds and maintains the platform behind Geek Rewind, from its Ubuntu servers and Nginx configuration to its custom WordPress plugins. Many new tutorials start with readers' questions, and he's always glad to answer them in the comments.
No comments yet — be the first to share your thoughts!