How to Change Audio Format of Sound Device in Windows 11

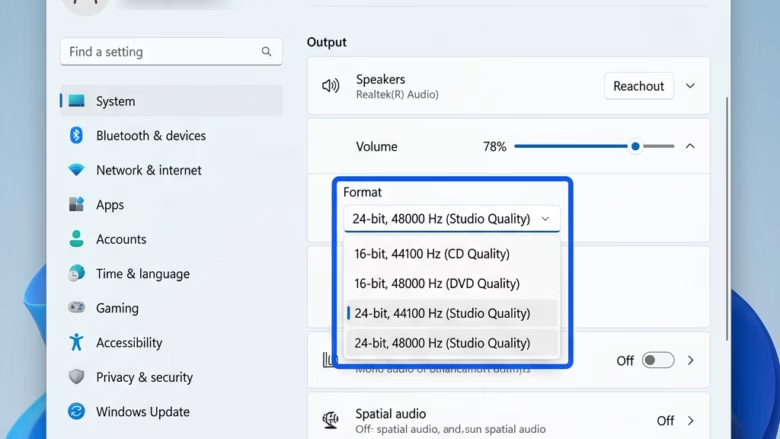
The audio format in Windows 11 sets the sample rate and bit depth your speakers or headphones use to play sound. Higher settings such as 24-bit, 48000 Hz capture more detail than standard CD quality, which is 16-bit, 44100 Hz.
You change this in the classic Sound control panel , and it takes only a few clicks. The steps below work on Home and Pro alike, and you don’t need a restart.
- Open Settings System Sound
- Scroll down to the Advanced section and click More sound settings. The classic Sound window opens.
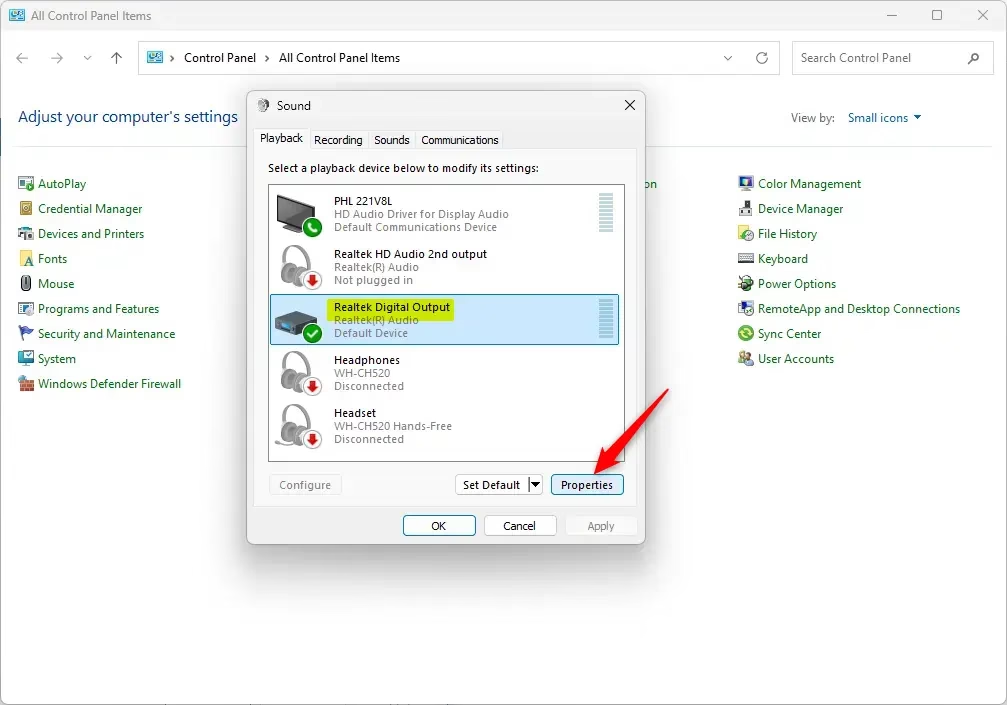
- On the Playback tab, click the speakers or headphones you want to change. Use the one marked as the default device if you aren’t sure.
- Click Properties, then open the Advanced tab.
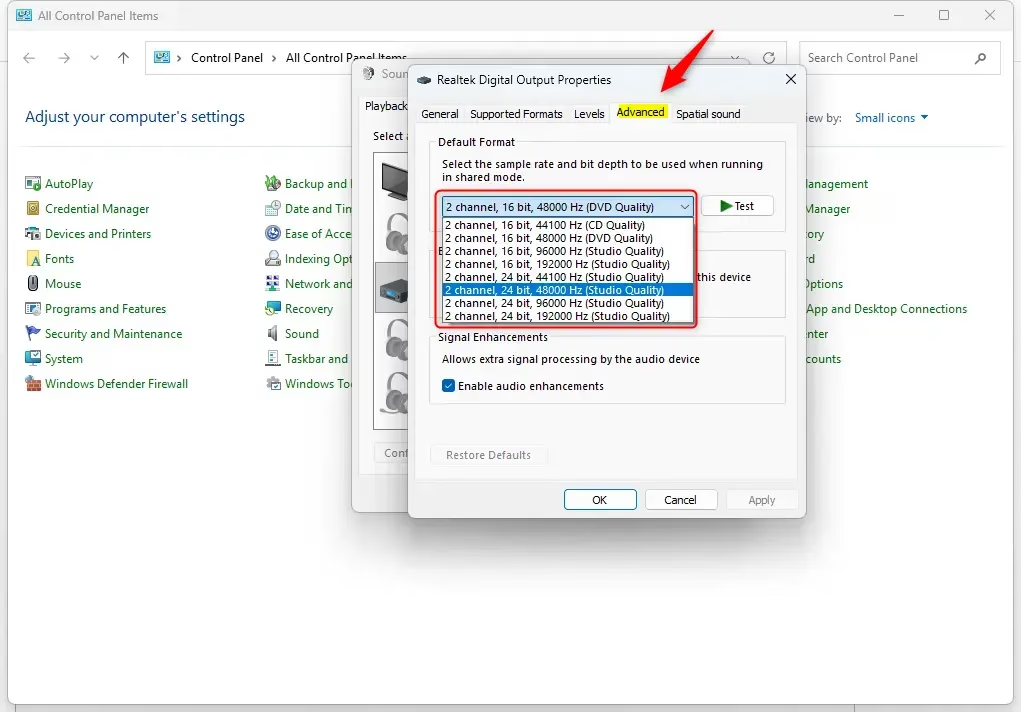
- Under Default Format, open the drop-down list and pick a sample rate and bit depth, for example 24 bit, 48000 Hz (Studio Quality).
- Click Test. You should hear a test tone through the device. If you hear nothing, or it crackles, choose a different format.
- Click Apply, then OK.
If the Advanced tab is missing or the format list is short, the limit usually comes from the device or its driver. Some Bluetooth headsets, for example, only offer the formats their profile supports. Updating the audio driver sometimes adds more choices.
Open Settings , navigate to System, then Sound. Click All sound devices, select your audio device, and choose a new format from the drop-down menu under Output or Input settings. Test the sound to confirm.
Why change your audio format?
Adjusting the audio format can improve sound quality. It can also fix distortion, crackling, or volume that sounds wrong, which sometimes happens when the format doesn’t match what the device supports.
Higher settings capture more detail, but they use more processing power and can make no audible difference on basic speakers. If you only watch videos or take calls, 16-bit, 44100 Hz or 48000 Hz is plenty. Pick the higher options if you listen to high-resolution music or edit audio and your hardware supports them.
What happens when done?
The new format takes effect as soon as you apply it. If an app that was already playing sound still sounds wrong, close it and open it again so it picks up the new format.
To undo the change, go back to Properties Advanced for the same device and choose your previous format, or the 16 bit, 44100 Hz (CD Quality) entry. Then click Apply.
If you hear problems with a particular app, check the same Advanced tab for the Exclusive Mode options. Some apps take full control of the device and ask for their own format.
References:
Fix low or quiet sound in Windows - Microsoft Support
Fix distorted or crackling audio in Windows - Microsoft Support
Option One
Change Audio Format in Settings
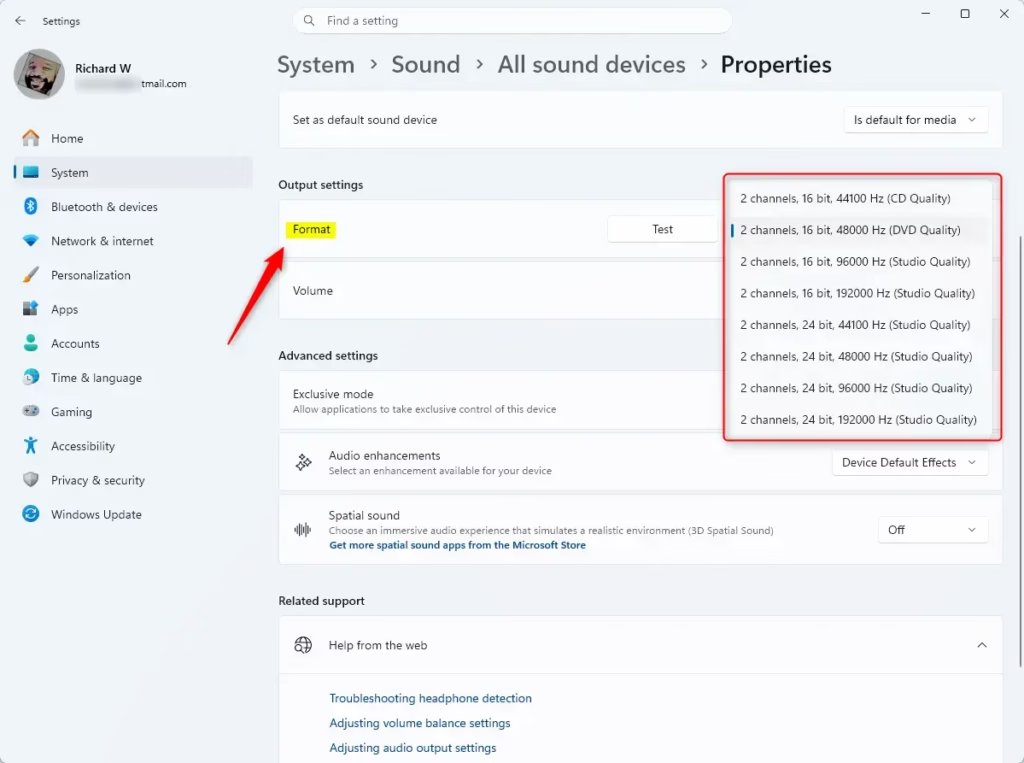
You can change audio format settings directly through the Windows 11 Settings app to fix sound issues or improve audio quality for your speakers and headphones. Open Settings, go to System, and select Sound. From there, click All sound devices, choose your specific hardware, and pick a new sample rate and bit depth from the output settings menu.- Open Settings by pressing Win+I.
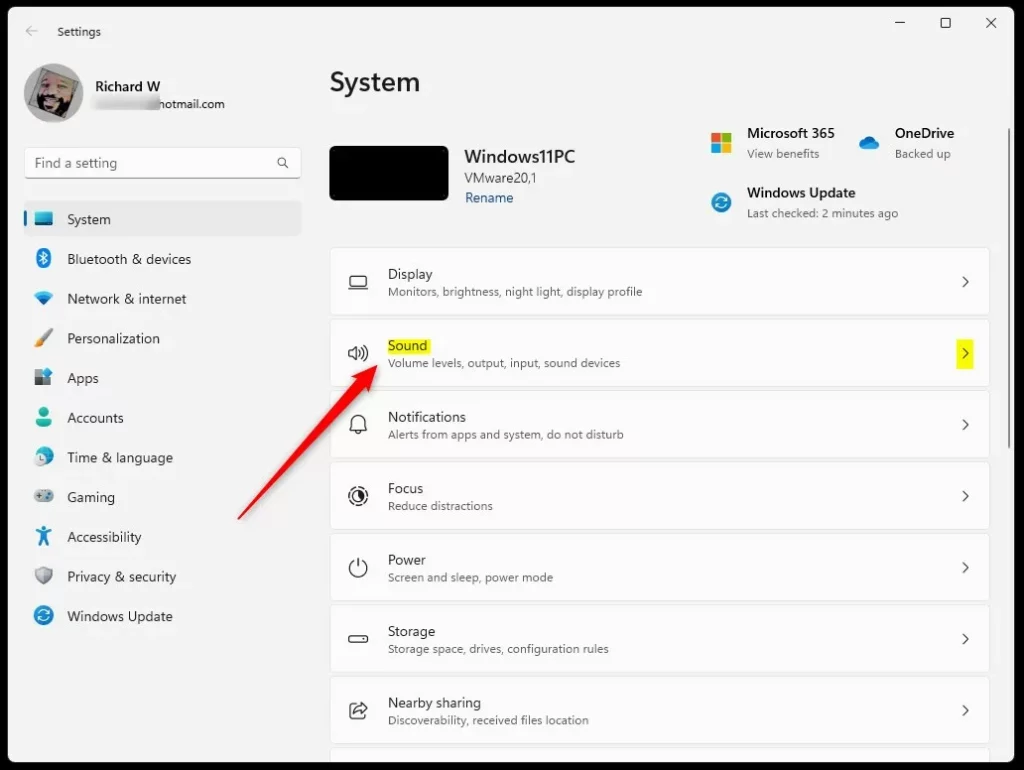
- Click System on the left, then click Sound on the right. Open Sound settings
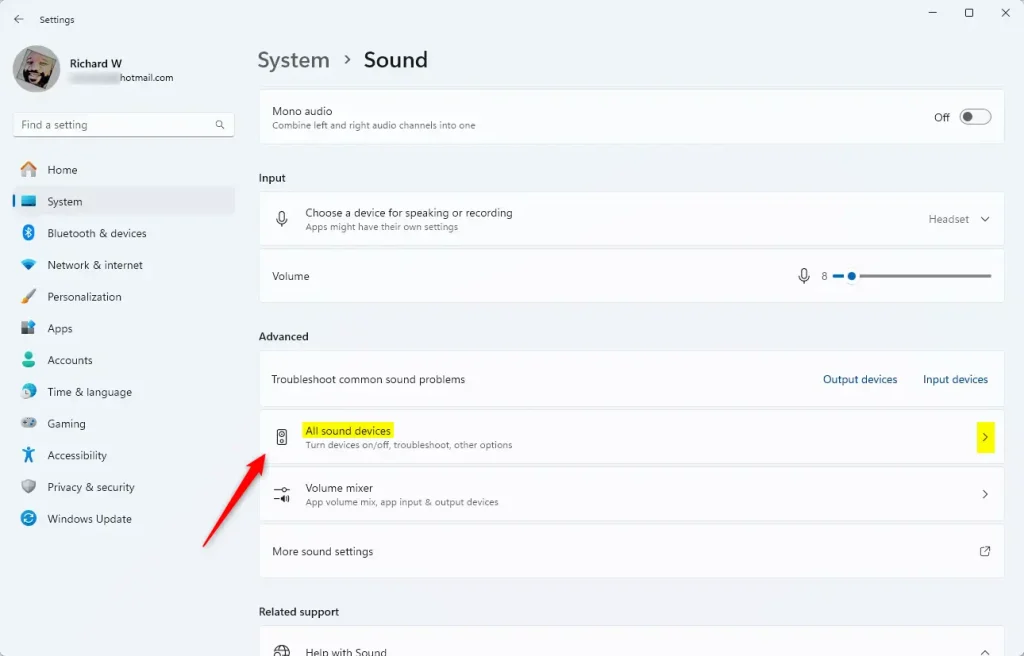
- Click All sound devices. Open All sound devices settings
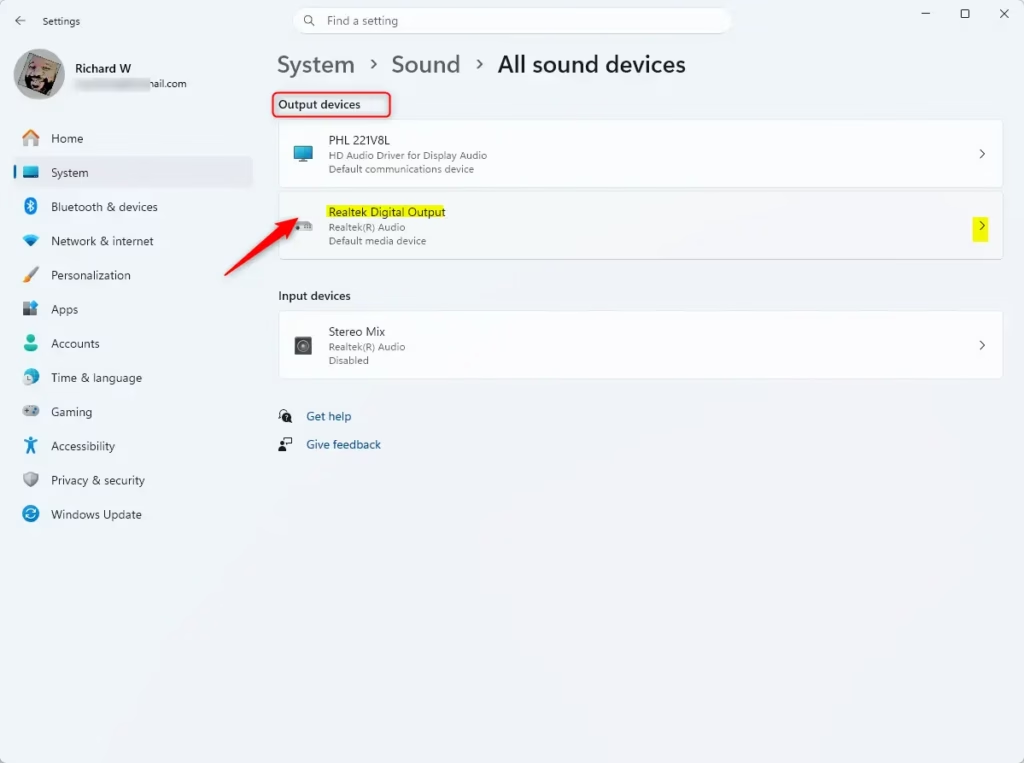
- Select the speaker or microphone device you want to update.
- Look for the Format drop-down menu under Output settings or Input settings. Choose the quality level you want.
- If you are changing speakers, click the Test button to hear how it sounds. If you change a microphone, you should test it afterward to ensure it is working correctly.
- Close the Settings window when you are finished.
Option Two
Change Audio Format in Control Panel
You can change audio format options using the classic Control Panel if you need advanced sample rate and bit depth controls that are missing from the modern settings menu. Open the Control Panel, click Sound, select your playback or recording device, and open its Properties window to find the advanced format settings.
- Open the Control Panel and click the Sound icon.
- Click the Playback tab for speakers or the Recording tab for microphones.
- Select your device from the list and click Properties.
- Click the Advanced tab.
- Select your preferred quality from the Default format drop-down menu.
- Click Test to check the sound quality if you are using speakers.
- Click OK to apply your changes.
- Click OK again to close the window.
Summary
Manually changing the sample rate and bit depth improves audio quality in Windows 11.
Have a question about this guide?
Answered by AI from this guide. Good questions may be added to this page — please don't include personal details.
Did this guide fix your problem?

About the Author
Richard
Tech Writer, IT Professional
Richard is a writer at Geek Rewind who turns complex IT tasks into clear, step-by-step guides. He draws on years of hands-on experience in system administration and enterprise IT operations, focusing on Windows, Linux and WordPress: the problems people actually run into, and the fixes that work. His server and WordPress guides come from systems he runs himself. Richard builds and maintains the platform behind Geek Rewind, from its Ubuntu servers and Nginx configuration to its custom WordPress plugins. Many new tutorials start with readers' questions, and he's always glad to answer them in the comments.
I think, for audiophile setups, *higher* sample rates and bit depth don’t always mean better sound. With an external DAC, Windows resampling or processing the stream would matter more. Like, a 44.1 kHz lossless source may sound better by a bit-perfect/exclusive playback rather than 96 or 192 kHz. Great post regardless, cheers!