How to Change Desktop Background Color in Windows 11 Personalization Settings

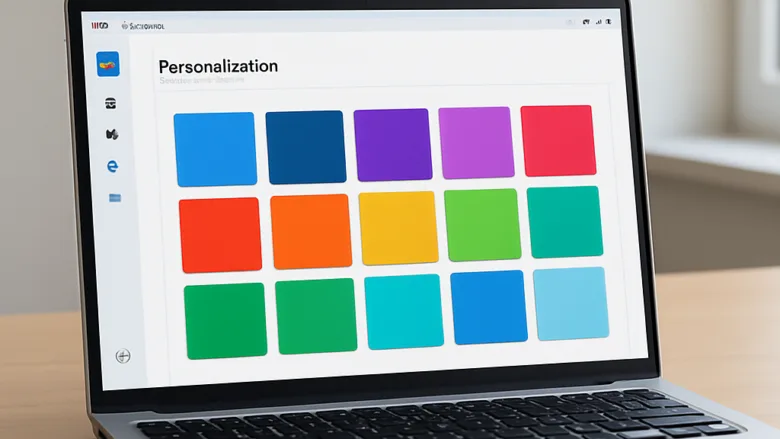
The desktop background color in Windows 11 is the solid backdrop behind your app windows and icons when you are not using a picture. You pick it in Personalization settings, either from a row of preset swatches or by building a custom shade.
Press Win+I to open Settings , choose Personalization, then click Background. That page controls the solid color on your screen. No restart is needed for any change in this guide, and you can undo any of them by going back to the same setting.
Open Settings by pressing Win+I, select Personalization, click Background, then choose Solid color from the Personalize your background dropdown and click any color swatch. The desktop changes immediately.
Change your background
The Background page lets you switch between a solid color, a picture, a slideshow or Windows spotlight. The change applies the moment you pick it, and you don’t need extra software. Come back to this page whenever you want a different flat shade or a new picture.
- Press the Win+I together to open Settings .
- Select Personalization in the left-hand menu. The personalization options appear on the right.
- Click Background. You should see a preview of your current desktop and a few settings below it.
- Find the dropdown labeled Personalize your background.
- Choose Picture, Solid color, Slideshow or Windows spotlight, depending on what you want on screen. Windows spotlight is not listed on every build. If it is missing, your version of Windows 11 doesn’t offer it.
- If you chose Solid color, click any swatch in the grid. The desktop changes to that color right away.
- If none of the swatches suit you, click View colors to pick a custom shade. Then confirm it with Done.
Policies set by an administrator can override this page. Home and Pro behave the same here.
Choose a fit for the desktop images
If a desktop picture looks stretched, cropped or tiled, the fit setting is the cause. It controls how Windows sizes the image to your monitor, and you can change it at any time.
- Open Settings .
- Select Personalization, then click Background.
- Make sure Personalize your background is set to Picture. The fit option only appears for pictures, not for a solid color.
- Find the dropdown titled Choose a fit for your desktop image.
- Select Fill to scale the image to cover the whole screen while keeping its proportions. Parts of the edges may be cropped.
- Select Fit to show the entire image without cropping. This can leave empty bars on the sides or top.
- Select Stretch to force the image to the screen size. This changes the aspect ratio, so the picture can look distorted.
- Select Tile to repeat a smaller image in a grid across the display.
- Select Center to place the image in the middle of the screen at its original resolution.
- Select Span to stretch one panoramic image across several connected monitors.
The desktop updates as soon as you pick an option. For most photos, Fill is the safest choice. If the picture is much smaller than your screen resolution, it will look soft or blurry with any option except Center.
Desktop background and multiple displays
With more than one monitor connected, you can give each screen its own picture. This only works with pictures, not with a solid color. A solid color applies to every display.
- Open Settings.
- Select Personalization, then click Background.
- Set Personalize your background to Picture.
- Right-click a thumbnail in the recent images section. A context menu appears.
- Select Set for monitor 1 or Set for monitor 2 to assign that picture to a single display.
- Repeat with a different thumbnail for each other screen.
The monitor options only appear when Windows detects more than one display. If you don't see them, open System, then Display, and confirm that both screens are detected and not just mirrored. If you use a slideshow instead, adjust its options on the same Background page, such as how often the picture changes.
Desktop background and multiple desktops
Virtual desktops are separate workspaces you can use to organize tasks, such as one for work and one for personal use. Whether each one can have its own background depends on your Windows 11 build.
- Press the Task view button on your taskbar, or press the Windows key + Tab together. Thumbnails of your open desktops appear along the bottom or top of the screen.
- Click New desktop to open an additional workspace.
- Click a desktop thumbnail to switch to it and arrange your app windows there.
- Right-click a desktop thumbnail and look for Choose background. If it is there, you can pick a separate background for that workspace.
Older builds of Windows 11 don't have Choose background in that menu. There, the background you set in Settings applies to every virtual desktop, and only third-party customization utilities can change that. Updating Windows through Windows Update is the first thing to try if the option is missing.
Color mode
Windows 11 can display its system interface in a light or dark theme. This sets the look of menus, Settings and many built-in apps, and it is separate from your desktop background.
- Open Settings.
- Select Personalization, then click Colors.
- Find the dropdown labeled Choose your mode.
- Select Light for bright white and light gray windows, menus and system apps.
- Select Dark for deep charcoal and black tones. Windows and most apps switch right away.
- Select Custom to set your default Windows mode and your default app mode independently. Two extra dropdowns appear, Choose your default Windows mode and Choose your default app mode.
Some older apps ignore the setting and keep their own look. To undo the change, return to the same dropdown and pick the previous mode.
Accent Color
The accent color is the highlight color Windows uses on active buttons, toggles, borders and taskbar indicators. You can choose it yourself or let Windows pick one for you.
- Open Settings.
- Select Personalization, then click Colors.
- Find the Accent color setting.
- Choose Manual to pick a specific color from the palette. Click View colors if you want a custom shade.
- Or choose Automatic to let Windows extract a matching color from your current desktop background image.
With a solid color background, Automatic has less to work with. If the result looks off, switch to Manual and pick the color yourself.
Show accent color on Start and taskbar
By default the accent color is only a subtle highlight. This toggle makes it fill the taskbar and Start menu background instead.
- Open Settings.
- Select Personalization, then click Colors.
- Scroll down to Show accent color on Start and taskbar.
- Click the toggle to set it to On. The taskbar and Start menu change to your accent color.
If the toggle is greyed out, your mode is set to Light. This option only works in dark mode. Under Choose your mode, select Dark, or select Custom and set the default Windows mode to Dark. Then come back and try the toggle again.
Show accent color on title bars and window borders
This setting puts your accent color on the title bars and outer borders of app windows. It makes active windows easier to tell apart from inactive ones.
- Open Settings.
- Select Personalization, then click Colors.
- Scroll down to Show accent color on title bars and window borders.
- Click the toggle to set it to On. Title bars on desktop apps that support it take on your accent color.
Some apps, including many Store apps, draw their own title bars. They may not change. Set the toggle back to Off to undo it.
Transparency effects
Transparency effects make windows, the Start menu and the taskbar look slightly see-through. They look nice, but some people turn them off for a cleaner look or to reduce graphics load on older hardware.
- Open Settings.
- Select Personalization, then click Colors.
- Find the toggle labeled Transparency effects.
- Click it to turn transparency On or Off, depending on your performance needs or taste. Menus and panels change right away.
Color filters and contrast themes
Windows 11 has accessibility tools for visual impairments and light sensitivity. Contrast themes change the whole color scheme to make text and interface elements easier to read. Color filters adjust how colors are displayed.
- Open Settings.
- Select Accessibility from the left-hand navigation pane.
- Click Contrast themes. Pick a theme from the dropdown and click Apply. The screen may go blank for a moment while the theme loads.
- Go back to Accessibility and click Color filters.
- Turn on the filter switch, then choose a filter such as grayscale, inverted, or a color-blindness correction filter.
To go back, return to Contrast themes and set the dropdown to None, then click Apply.
Fixing accidental high contrast triggers
A washed-out or black-and-white screen is often caused by an accidental keyboard shortcut that turns on a high contrast theme. The same shortcut turns it off again.
- Press the left Alt key, the left Shift key and the Print Screen key together on your keyboard.
- Click Yes on the prompt that asks whether you want to turn high contrast on or off. The screen may flicker for a moment.
- Check that your normal colors and your desktop background are back.
- To stop it happening again, open Settings, select Accessibility, and click Contrast themes. Turn off the option for the keyboard shortcut, which appears as a checkbox or a toggle depending on your build.
If the shortcut does nothing, a contrast theme may have been applied through Settings instead. In that case, set Contrast themes back to None as described in the previous section.
Managing background sync across devices
If you sign in to several Windows 11 PCs with the same Microsoft account, your personalization settings can follow you from one to the next. That includes your background and color choices. Turn this off if you want each PC to keep its own look.
- Open Settings.
- Select Accounts from the left-hand menu.
- Click Windows backup.
- Expand the section labeled Remember my preferences.
- Uncheck the box next to Personalization. Your background and color choices stop syncing across your cloud-connected devices.
Syncing only applies to Microsoft accounts. If you use a local account, there is nothing to turn off. Repeat these steps on each PC where you want syncing disabled. To undo this, check the box again.
What to do next
You can now set your desktop background, color mode and accent colors the way you want them. Next, look at taskbar alignment and system tray icons to finish setting up your workspace.
Frequently asked questions
How to change 🪟 Windows 11 desktop background color?
To change the solid color, press Windows key + I to open Settings, then select Personalization and click Background. Set Personalize your background to Solid color. Pick a swatch from the row of colors, or click View colors to build a custom shade. The change takes effect immediately.
Why can't I change the desktop background in 🪟 Windows 11?
Your desktop background is locked when your organization manages the PC, when Windows is not activated, or when a Group Policy setting blocks changes. Check whether the Background page shows a message about your organization. Activate Windows, or ask your IT administrator to change the policy.
Why is Microsoft changing my desktop background?
Microsoft is not picking your background on its own. The Windows spotlight option is turned on, and it rotates images that Microsoft downloads to your PC. To stop it, open Settings, select Personalization, click Background, and set Personalize your background to Picture or Solid color.
Why isn't the desktop Spotlight changing in 🪟 Windows 11?
Windows spotlight stops changing when the setting is switched to Picture or Solid color, or when your PC cannot reach the internet to download new images. Open Settings, select Personalization, click Background, and confirm that Personalize your background is set to Windows spotlight. Connect to the internet, then wait for the next rotation or restart your PC.
Still have a question?
Answered by AI from this guide. Good questions may be added to this page — please don't include personal details.
Did this guide fix your problem?

About the Author
Richard
Tech Writer, IT Professional
Richard is a writer at Geek Rewind who turns complex IT tasks into clear, step-by-step guides. He draws on years of hands-on experience in system administration and enterprise IT operations, focusing on Windows, Linux and WordPress: the problems people actually run into, and the fixes that work. His server and WordPress guides come from systems he runs himself. Richard builds and maintains the platform behind Geek Rewind, from its Ubuntu servers and Nginx configuration to its custom WordPress plugins. Many new tutorials start with readers' questions, and he's always glad to answer them in the comments.
No comments yet — be the first to share your thoughts!