How to Disable ‘Let’s Finish Setting Up Your Device’ in Windows 11

The ‘Let’s Finish Setting Up Your Device’ screen in Windows 11 triggers unwanted prompts for Microsoft services.
This screen appears after major Windows updates, like the Windows 11 23H2 version, pushing you to set up or sign in to things like Microsoft 365 and OneDrive.
Stopping these setup notifications means Windows 11 won’t interrupt your work with suggestions you don’t need.
This keeps your computer focused on what you want to do and stops repeated setup reminders.
Go to Settings > System > Notifications > Additional settings and uncheck “Suggest ways to get the most out of Windows and finish setting up this device.” Alternatively, use the Registry Editor or Group Policy Editor for advanced users.
Method 1Using the Settings App
You can disable the ‘Let’s finish setting up your device’ window in Windows 11 using the Settings app. This method is straightforward and safe for most users. Simply open Settings, go to System, then Notifications, and expand Additional settings to find the option to turn off these setup prompts.
- Open the Windows Settings app by pressing Windows key + I.

windows 11 new settings button - Click on System on the left sidebar.
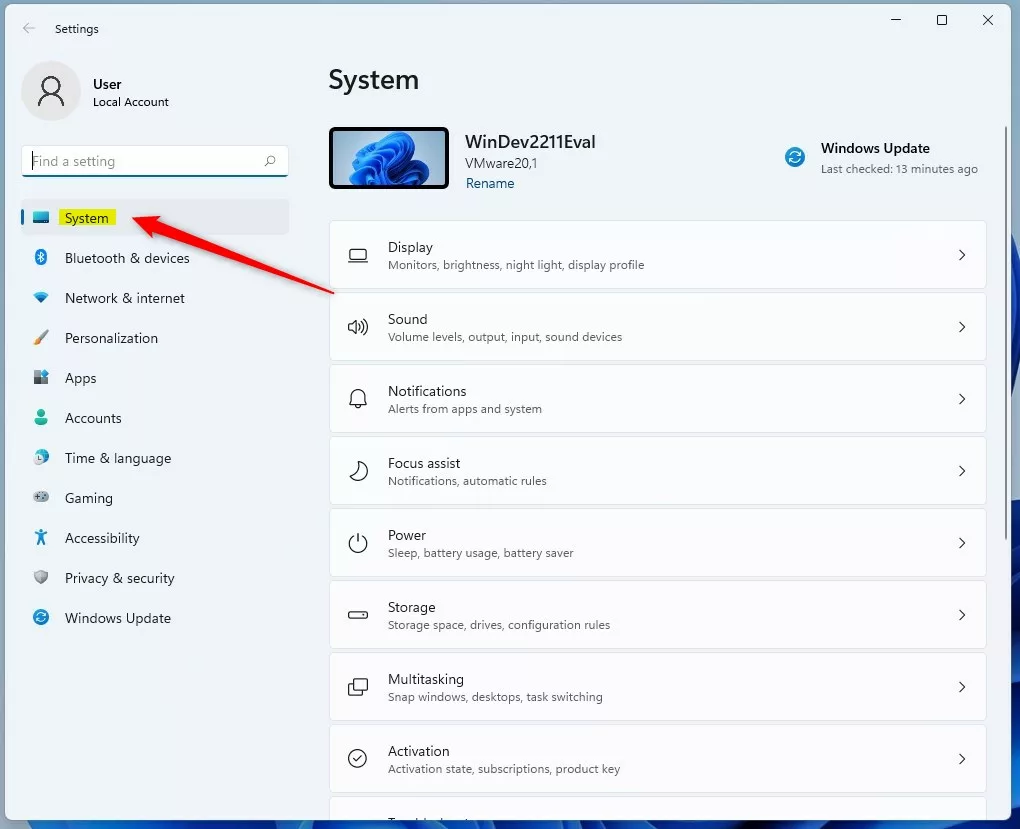
system button in windows settings app - Select Notifications.
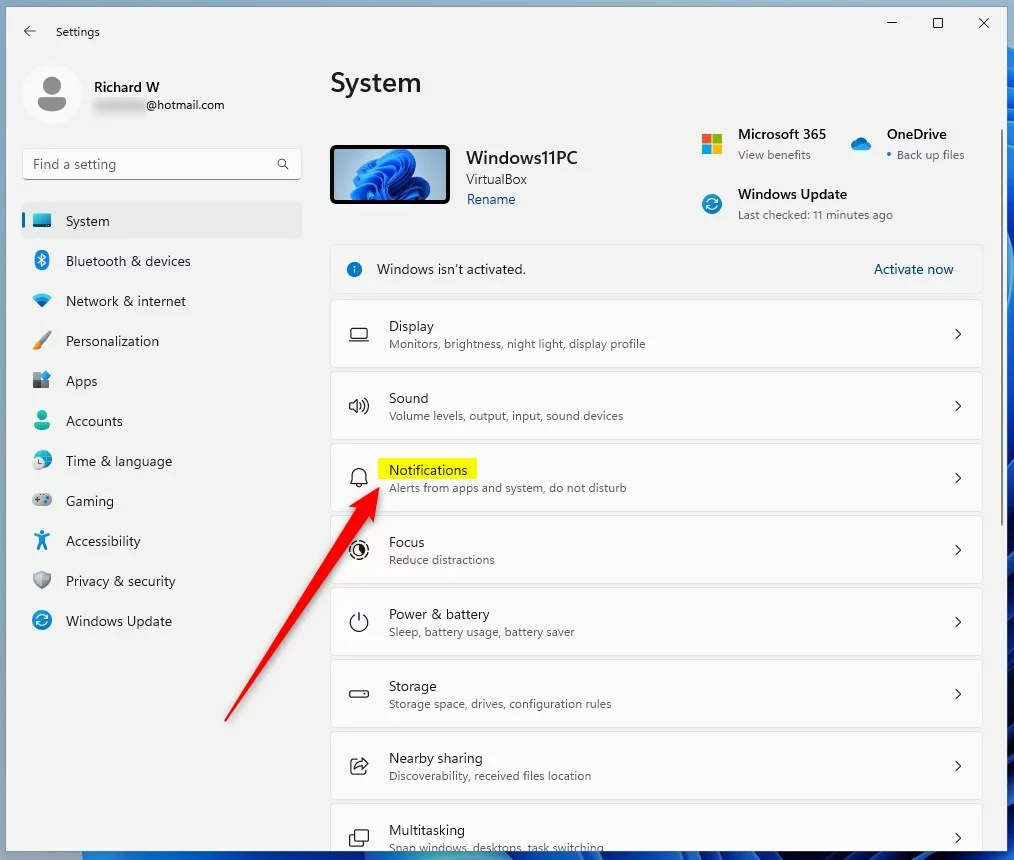
windows 11 system notifications tile - Scroll down and click Additional settings to expand the menu.
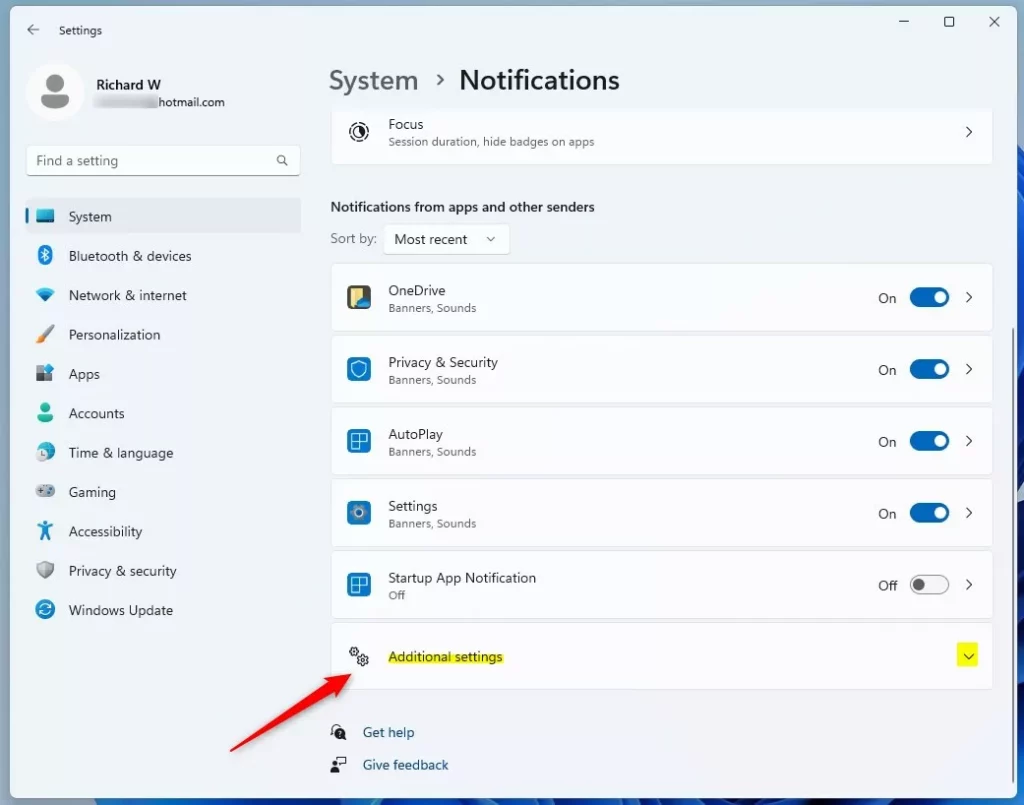
windows notifications advanced settings - Uncheck the box labeled: “Suggest ways to get the most out of Windows and finish setting up this device.”
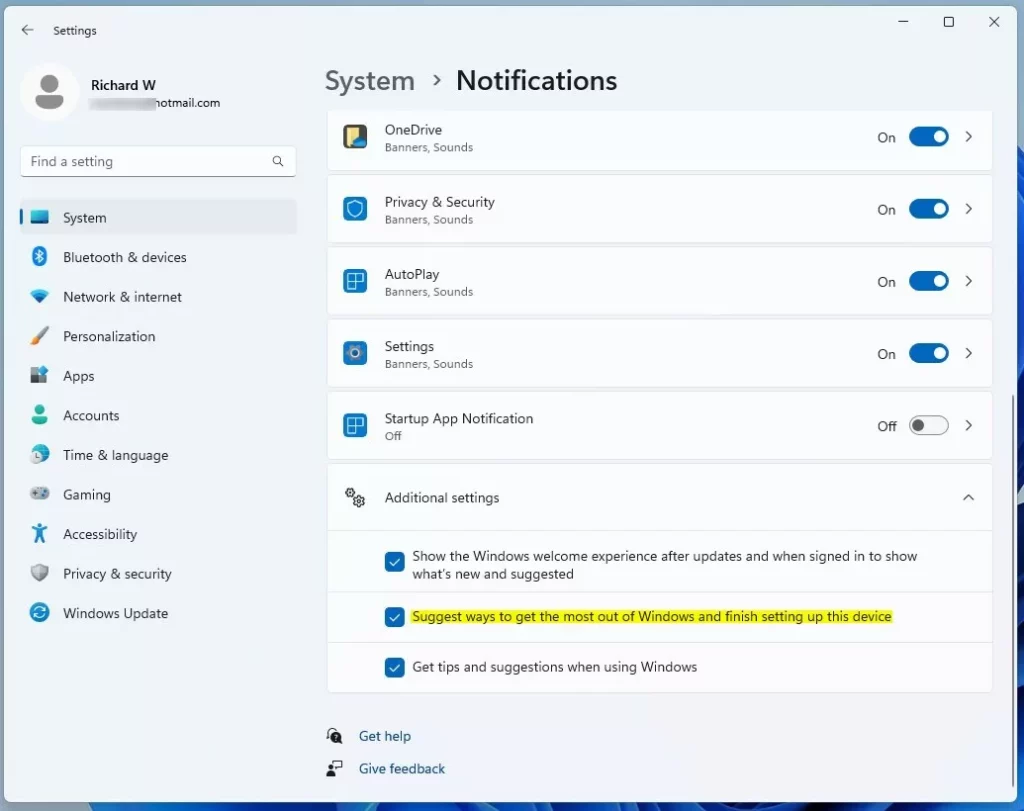
windows suggest ways to get the most out of windows
Method 2Using the Registry (Advanced)
Advanced users can disable the ‘Let’s finish setting up your device’ prompts in Windows 11 by editing the Registry Editor. Before making changes, it’s crucial to back up your registry. Open the Registry Editor, navigate to 🗝️HKEY_CURRENT_USER\Software\Microsoft\Windows\CurrentVersion\UserProfileEngagement, and modify the relevant value to stop these setup messages.
- Press Windows key + R, type
regedit, and hit Enter. - Navigate to:
HKEY_CURRENT_USER\Software\Microsoft\Windows\CurrentVersion\UserProfileEngagement 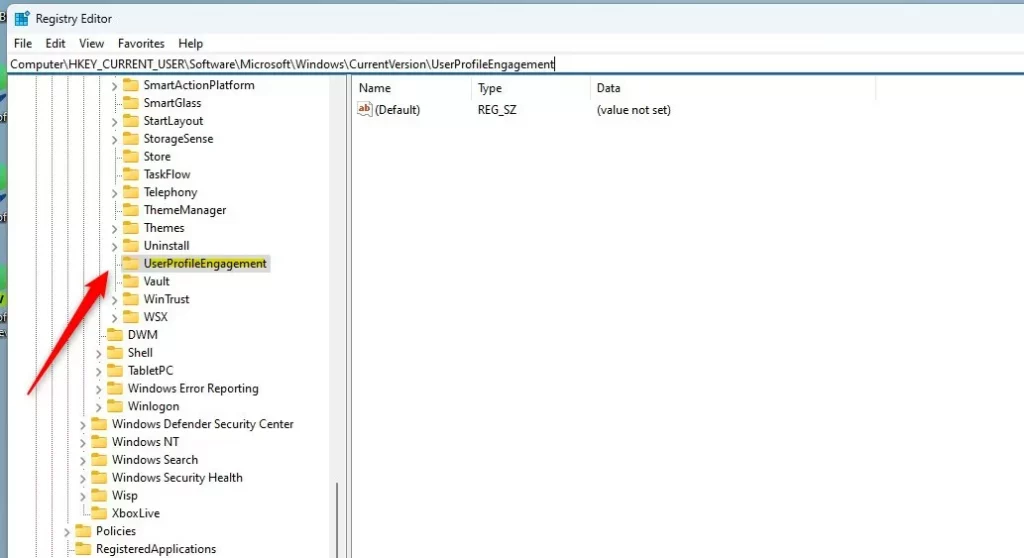
windows let finish setting up your device registry - If the folder does not exist, right-click CurrentVersion, select New > Key, and name it
UserProfileEngagement. - Right-click in the right pane, select New > DWORD (32-bit) Value, and name it
ScoobeSystemSettingEnabled. - Double-click it and set the Value data to
0. 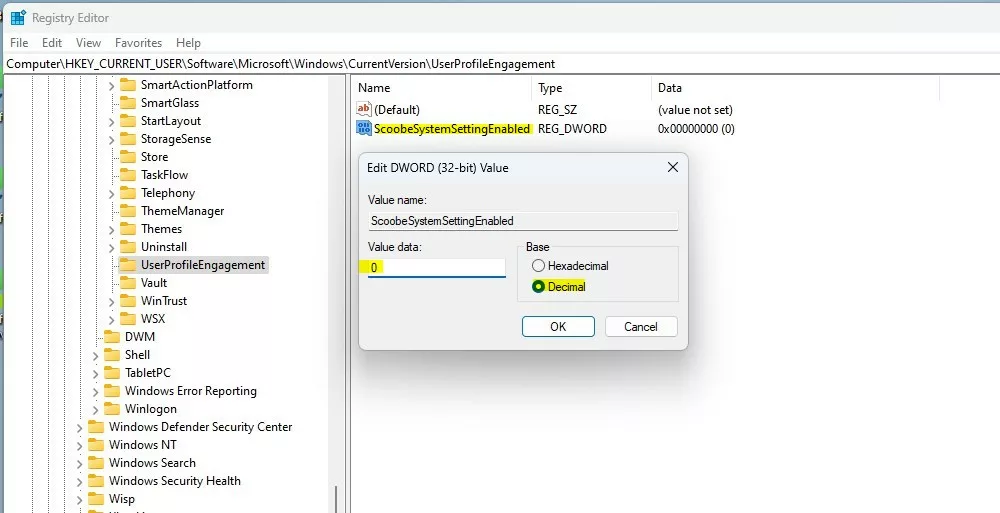
windows let finish setting up your device registry value data
Method 3Using the Group Policy Editor (🪟 Windows 11 Pro Only)
For Windows 11 Pro users, the Group Policy Editor offers a way to disable the ‘Let’s finish setting up your device’ messages for everyone on the PC. Open the Group Policy Editor by typing gpedit.msc and pressing Enter. Navigate to Computer Configuration\Administrative Templates\Windows Components\Windows Welcome Experience and double-click the ‘Don’t show the Windows Welcome Expe’ setting.
- Press Windows key + R, type
gpedit.msc, and hit Enter. - Go to:
Computer Configuration\Administrative Templates\Windows Components\Windows Welcome Experience - Double-click Don’t show the Windows Welcome Experience after updates.
- Select Enabled and click OK.
Troubleshooting: What if the Prompt Persists?
Summary
You can stop the ‘Let’s finish setting up your device’ screen in Windows 11 through the Settings app, Registry Editor, or Group Policy Editor, depending on your Windows version and comfort level with technical changes.
Is it safe to disable the setup window?
Yes, it is completely safe. Disabling this window only stops promotional notifications for Microsoft services like OneDrive or Microsoft 365. It does not disable essential system functions, security features, or your ability to receive future Windows updates. Your computer will continue to operate exactly as it did before.
Why does 🪟 Windows 11 keep asking me to finish setup after updates?
Windows 11 triggers this prompt after major updates to ensure you are aware of new features or services Microsoft has added. It is a recurring notification designed to encourage users to sign into a Microsoft account or enable cloud-based features that may have been reset or updated during the process.
Was this guide helpful?

About the Author
Richard
Tech Writer, IT Professional
Richard, a writer for Geek Rewind, is a tech enthusiast who loves breaking down complex IT topics into simple, easy-to-understand ideas. With years of hands-on experience in system administration and enterprise IT operations, he’s developed a knack for offering practical tips and solutions. Richard aims to make technology more accessible and actionable. He's deeply committed to the Geek Rewind community, always ready to answer questions and engage in discussions.

No comments yet — be the first to share your thoughts!