How to Add a New Widget to the Widgets Board in Windows 11

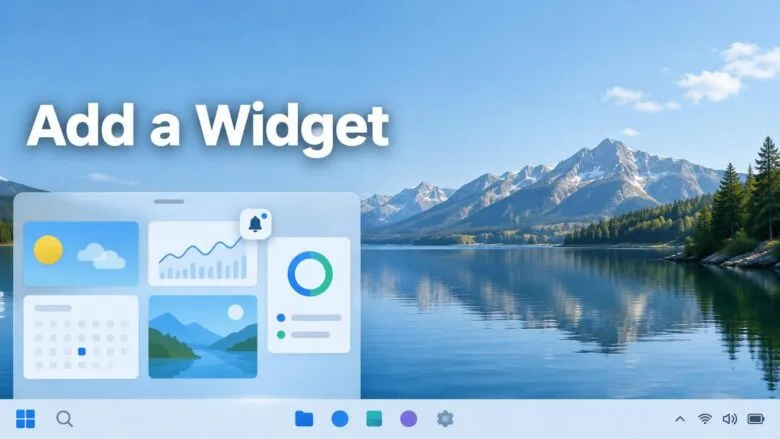
Windows 11 can now tell you about a new widget before you go looking for one. After you install an app, Windows can tell you that a widget for it is available, and selecting the notification opens the board with that widget highlighted.
The Widgets Board is the panel you open from the taskbar. It holds small cards, called widgets, that show things like weather or app content. The new notification is only in Windows Insider preview builds (test versions from Microsoft’s early-access program), including Experimental Build 26340.9616 from October 7, 2026. It is not in the stable releases yet and may change before it ships.
Windows 11 Insider preview builds can notify you when an app’s widget is ready, and selecting that notification opens the Widgets Board with the new widget highlighted. Add it from there. Stable releases such as 25H2 and 26H2 don’t include this yet, so on those, open the Widgets Board with Win+W and add widgets manually.
What the new widget notification does
Until now, a new widget only appeared on the board if you went looking for it. The new behavior reverses that. When you install an app that offers a widget, Windows can show a notification, and that notification takes you straight to the widget.
Microsoft lists the change in its Windows Insider release notes as “Widget availability notification”. It appears in the notes for update KB5132057, dated November 13, 2026, and in Experimental Build 26340.9616.
Here is what Microsoft has confirmed so far:
- Windows can notify you when a new widget becomes available after you install an app.
- Selecting the notification opens the Widgets Board with the new widget highlighted.
- From there, you add the widget.
Microsoft has not published more detail than that. The exact wording of the notification, the label on the button that adds the widget, and which apps trigger the notification are not confirmed. This article does not guess at them.
Before you start
If you are on a stable release, you will not see the notification. Use the manual route described later in this article, or read how to add or remove widgets on the Windows 11 taskbar.
Two other points are worth knowing before you test it:
- Edition and restartMicrosoft’s notes do not say whether the notification differs between Home and Pro, and they do not mention a restart. Microsoft has not confirmed either point yet.
- Taskbar settingsThe Widgets icon must be available on your taskbar for you to open the board yourself. If you turned it off earlier, the linked taskbar guide shows how to bring it back.
How to add a new widget to the Widgets Board in 🪟 Windows 11
- Confirm your PC runs a Windows Insider preview build. Open Settings Windows Update Windows Insider Program to see whether the PC is enrolled. To check the build number, press the Win+R, type winver, and press Enter. The About Windows window shows the version and build, for example 26340.9616.
- Install the app you want a widget for. Use the Microsoft Store or the app’s own installer. Not every app provides a widget, so the notification may not appear for every install.
- Watch for the notification after the install finishes. Windows can notify you that a new widget is available. The notification uses the normal Windows notification area at the bottom right of the screen.
- Select the notification. The Widgets Board opens with the new widget highlighted. The highlight shows you which widget belongs to the app you just installed.
- Add the highlighted widget to the board. Use the add option shown on or next to the highlighted widget. Microsoft has not confirmed the exact label, so follow what appears on screen in your build.
- Check that the widget now appears on the board. Open the Widgets Board from the taskbar, or press the Win+W, and look for the new widget among your existing ones.
If the widget is on the board, the task is complete. Widgets you add stay on the board alongside the ones you already had. If you want to see how the board fits into the taskbar overall, this overview of the Widgets feature covers it.
If you miss the notification or it never appears
A notification that disappears before you select it can slip past you. Windows can also hold notifications back while Do not disturb (a mode that silences alerts) is on. Open the Notification Center from the right end of the taskbar and look for it there.
If no notification shows up at all, work through these possibilities in order:
- Check your build. Run winver as described above. If you are on a stable 25H2 or 26H2 release, the notification is not available to you yet.
- Check that the app offers a widget. The notification appears when a new widget becomes available after an install. An app with no widget has nothing to announce.
- Check your notification settings. Open Settings System Notifications and confirm that notifications are on. Check that Do not disturb is off.
- Open the Widgets Board yourself. Select the Widgets icon on the taskbar and look through the board for the new widget. Whether the highlight stays after you miss the notification is not confirmed.
Notifications for the Widgets icon on the taskbar are a separate setting. For that setting, read Configuring Widgets notifications on the taskbar. Whether it also affects the new widget notification is not confirmed.
Add a widget when no notification appears
You do not need the notification to add a widget. The Widgets Board has its own controls for choosing which widgets it shows, and that is the route for anyone on a stable release. Those controls have changed between Windows 11 versions, so follow the labels you see on screen in your build.
Some widgets come from developer tools rather than from app installs. Dev Home (a Microsoft app for developers) can add widgets too. Adding Windows 11 resource widgets with Dev Home shows one example of an app that supplies widgets to the board.
If your feed is crowding the board, you can also change what appears there without removing widgets. Showing or hiding your feed in Widgets walks through that.
Undo or remove a widget you added
Adding a widget does not change system files, so you can take it off the board at any time. Find the remove option on the widget itself. Its exact label depends on your build. The guide to adding or removing widgets on the Windows 11 taskbar covers the current options.
Uninstalling the app does not necessarily remove its widget from the board. Microsoft has not said what happens in that case, so check the board after you uninstall.
If you decide the Widgets Board is more clutter than help, read whether you should turn off Widgets in Windows 11 first. What breaks when you disable Windows 11 widgets lists the side effects.
What to expect as this rolls out
Preview features change. The notification wording, the way the widget is highlighted, and the number of apps that trigger it can all shift between Insider builds. Microsoft has also not said when it will reach stable 25H2 or 26H2 PCs.
Until then, treat the steps above as a description of how the feature works in preview, not as a fixed procedure. If your build behaves differently, trust what Windows shows on screen over this article.
What to do next
On a stable build, press the Win (the key with the Windows logo on it) and W together to open the Widgets Board, then add widgets with the board’s own controls. When the notification reaches your PC, the first thing you should see after installing a supported app is a prompt that opens the board with the new widget highlighted. If the board then opens every time you point at the Widgets icon and that annoys you, read stop Widgets opening on hover.
Frequently asked questions
How to add multiple monitors to your 🪟 Windows 11 PC site:Microsoft.com?
Connect the second monitor with an HDMI, DisplayPort, or USB-C cable, then turn it on. Press Win+P and choose Extend to use the screen as extra workspace. To change the layout, open Settings, go to System Display, and drag the numbered boxes to match how your screens sit on your desk.
How to add multiple monitors to your 🪟 Windows 11 PC?
Plug the second monitor into a video port on your desktop's graphics card or motherboard, then turn it on. Press Win+P and select Extend. For more control, open Settings, select System, then Display, and choose Extend these displays under Multiple displays.
How to add multiple monitors to your 🪟 Windows 11 laptop?
Connect the external monitor with an HDMI, USB-C, or DisplayPort cable, then turn the monitor on. Press Win+P and choose Extend. Your laptop screen stays on, and the monitor adds extra space. To rearrange the screens, open Settings, go to System Display, and drag the boxes into position.
Still have a question?
Answered by AI from this guide. Good questions may be added to this page — please don't include personal details.
Did this guide fix your problem?

About the Author
Richard
Tech Writer, IT Professional
Richard is a writer at Geek Rewind who turns complex IT tasks into clear, step-by-step guides. He draws on years of hands-on experience in system administration and enterprise IT operations, focusing on Windows, Linux and WordPress: the problems people actually run into, and the fixes that work. His server and WordPress guides come from systems he runs himself. Richard builds and maintains the platform behind Geek Rewind, from its Ubuntu servers and Nginx configuration to its custom WordPress plugins. Many new tutorials start with readers' questions, and he's always glad to answer them in the comments.
No comments yet — be the first to share your thoughts!