How to Create a Samba Public Share on Ubuntu 24.04
You create a Samba public share on Ubuntu 24.04 to allow easy, unrestricted file access for anyone on your local network.
Samba is a free, open-source software suite that provides seamless file and print services between Linux and Windows machines, using the SMB/CIFS protocol.
This setup lets you share a specific folder, like one in your home directory, enabling users to read and write files without needing to log in. We’ll configure Samba on your Ubuntu 24.04 system to achieve this.
Install Samba using `sudo apt install samba`, create a share folder with `sudo mkdir /home/share` and `sudo chmod 777 /home/share`, then configure `/etc/samba/smb.conf` with guest access enabled and restart Samba with `sudo systemctl restart smbd`.
Install Samba
To use Samba on Ubuntu, you must install its packages. It is not available on Ubuntu by default.
Run the command below to install Samba.
sudo apt update
sudo apt install samba
Create a share folder
After installing Samba, create the folder you wish to share with everyone. If you have an existing folder, then skip this section.
The folder (share) below will be a fully public share with everyone having access without requiring authentication.
sudo mkdir /home/share
sudo chmod 777 /home/share
Configure Samba
Configuring Samba on Ubuntu 24.04 involves editing its main settings file, located at /etc/samba/smb.conf, to define how your shares work.
Samba default configuration file is at [/etc/samba/smb.conf].
First, create a backup before editing it.
sudo cp /etc/samba/smb.conf /etc/samba/smb.conf.bak
Then edit the file and adjust the highlighted settings below.
sudo nano /etc/samba/smb.conf
Adjust the settings below.
#======================= Global Settings =======================

[global]

# Change this to the workgroup/NT-domain name your Samba server will part of
   workgroup = WORKGROUP

# server string is the equivalent of the NT Description field
   server string = %h server (Samba, Ubuntu)

#### Networking ####

# Uncomment and add your interface name

  interfaces = 127.0.0.0/8 ens33

# Uncomment this to bind to the named interfaces and/or networks

  bind interfaces only = yes


####### Authentication #######
#
# This option controls how unsuccessful authentication attempts are mapped
# to anonymous connections

  map to guest = bad user

#======================= Share Definitions =======================
#
# Under share definitions, create your share with the folder above.

[Share]
   # specify shared directory
   path = /home/share
   # allow all to write
   writable = yes
   # allow guest user (nobody)
   guest ok = yes
   # consider all as guest
   guest only = yes
   # set all new files to public
   force create mode = 777
   # set all new folers to public
   force directory mode = 777
Save and exit the file.
Restart Samba.
sudo systemctl restart smbd
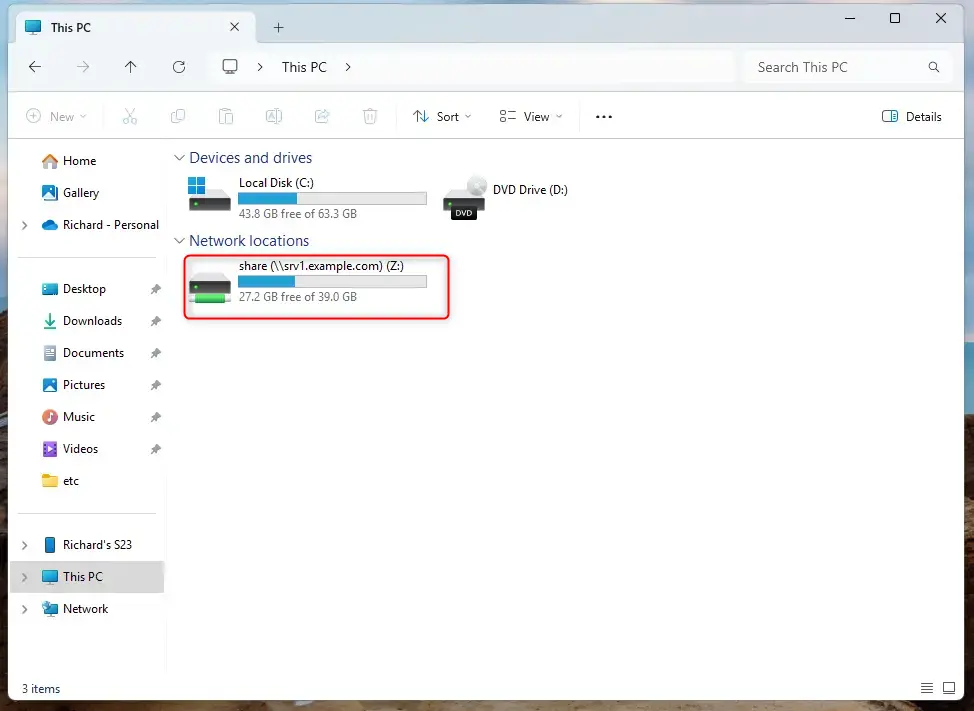
Samba share is created. Users on the same network should be able to browse and locate the shared folder.
Map Samba shares on Windows
Mapping your Samba shares on Windows lets you access your Ubuntu files easily through File Explorer, just like any other network drive.
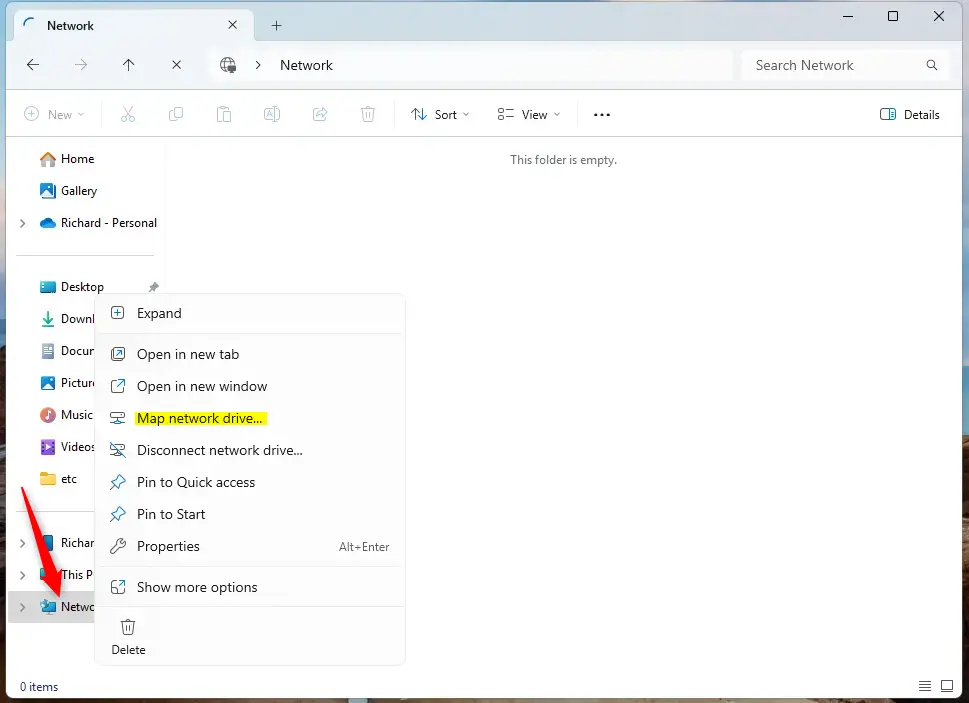
Right-click the Network folder in File Explorer and select “Map network drives.”
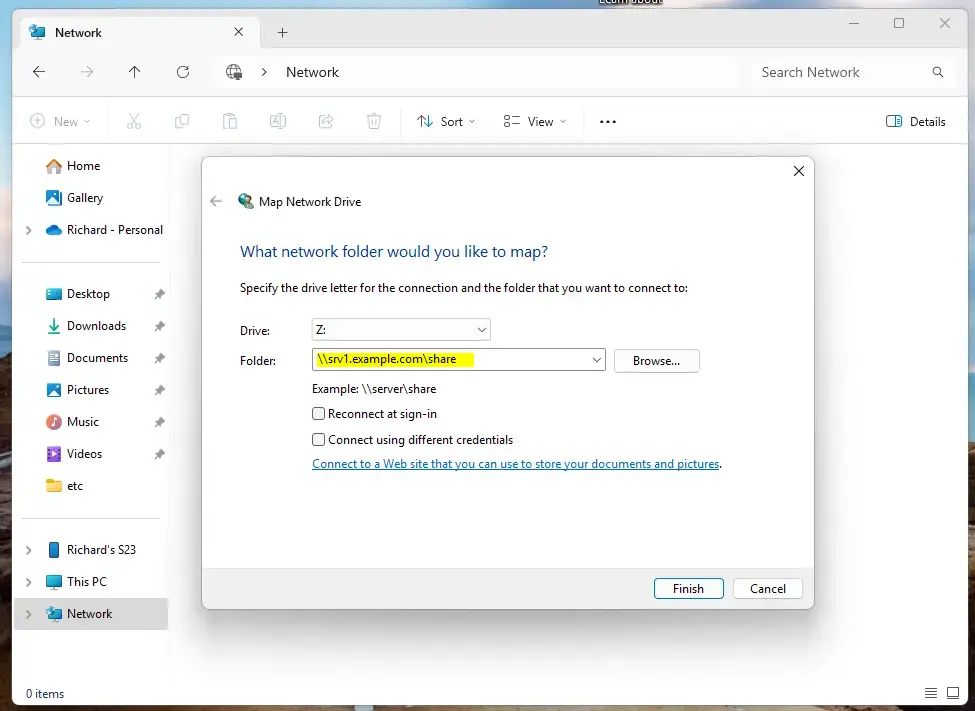
Enter the server name followed by the share name.
\srv1.example.comshare
When prompted, enter your account that lives on the Ubuntu server.
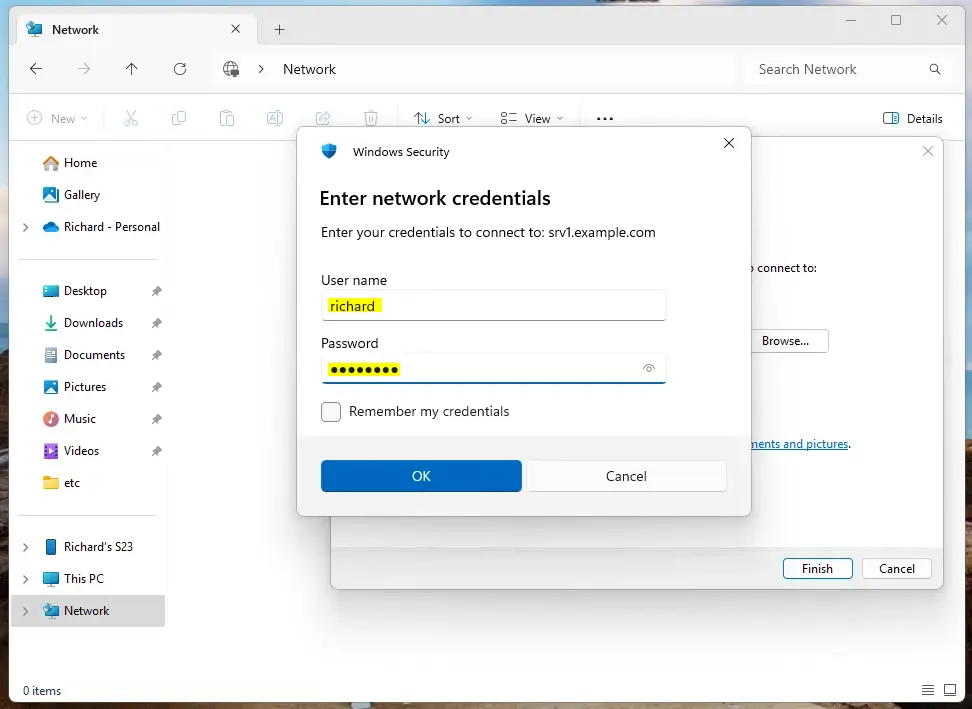
After that, the share should be mapped to your Windows machine.
The latest version of Windows 11 will block unauthenticated guest access by default. A workaround is below to allow authenticated guest access.
- Select Start, type gpedit.msc, and select Edit group policy.
- In the left pane under Local Computer Policy, navigate to Computer ConfigurationAdministrative TemplatesNetworkLanman Workstation.
- Open Enable insecure guest logons, select Enabled, then select OK.
Disable SMB signing as well.
Open the Local Group Policy editor.
Expand Windows Settings > Security Settings > Local Policies and select Security Options.
Then, select “Microsoft network client: Digitally sign communication (always)” and disable it.

That should do it!
Conclusion:
Setting up a Samba public share on Ubuntu 24.04 allows for seamless file and print sharing across your network. Here are the key points to remember:
- Samba Installation: Ensure Samba is installed to enable sharing capabilities.
- Folder Creation: Create and set permissions for a public share directory.
- Configuration: Modify the Samba configuration file to establish guest access and appropriate permissions.
- Restart Service: Always restart the Samba service after making configuration changes.
- Windows Mapping: Windows users can easily map the shares but may need to enable guest access settings due to security features.
- Security Considerations: Be aware of potential security implications when allowing unauthenticated guest access.
With these steps, your Samba share will be ready for use, offering a convenient solution for file sharing within your network.
section by specifying the path, setting 'writable = yes', and allowing guest access with 'guest ok = yes'. Make sure to set the file and directory modes to 777 for public access.”]Was this guide helpful?

About the Author
Richard
Tech Writer, IT Professional
Richard, a writer for Geek Rewind, is a tech enthusiast who loves breaking down complex IT topics into simple, easy-to-understand ideas. With years of hands-on experience in system administration and enterprise IT operations, he’s developed a knack for offering practical tips and solutions. Richard aims to make technology more accessible and actionable. He's deeply committed to the Geek Rewind community, always ready to answer questions and engage in discussions.

[…] can create public shares with Samba, but it’s not recommended in a secure […]