How to Enable File Sharing Between Ubuntu and Windows 11
File sharing between Ubuntu and Windows 11 works by setting up Samba on your Ubuntu computer.
Samba is a free program that speaks the same language as Windows for sharing files and printers. This lets you easily move files and access things on both your Ubuntu and Windows 11 PCs.
This connection means you can see your Windows 11 shared folders right in Ubuntu’s file manager. Likewise, you can get to your Ubuntu shares from your Windows 11 computer without needing USB drives.
Enable file sharing by configuring Samba on Ubuntu and ensuring Network Discovery and File Sharing are active in Windows. Access Windows shares from Ubuntu via the File Manager using smb://servername/Share_name, and access Ubuntu shares from Windows by setting up Samba on Ubuntu.
Enable Network Discovery in 🪟 Windows 11
Windows needs to “announce” that it has files to share. If this is turned off, other computers cannot find it. First, turn on Network Discovery in Windows 11. Read more about this here: How to enable Network Discovery on Windows 11.
Turn on File Sharing in 🪟 Windows 11
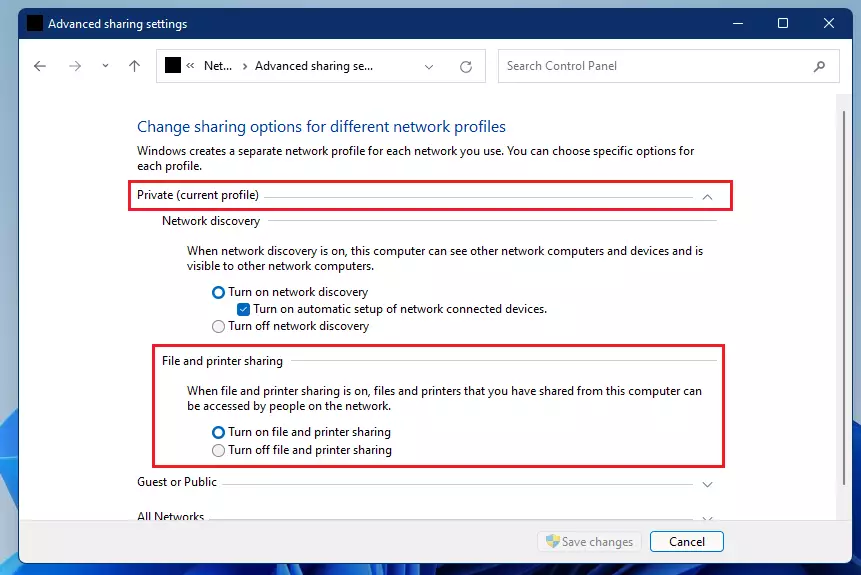
To share files between Ubuntu and Windows 11, you first need to turn on file sharing in Windows. This setting is found in the Control Panel, under the Network and Sharing Center, and then in the advanced sharing settings. Making sure this is active is the first step for successful Ubuntu Windows 11 file sharing.
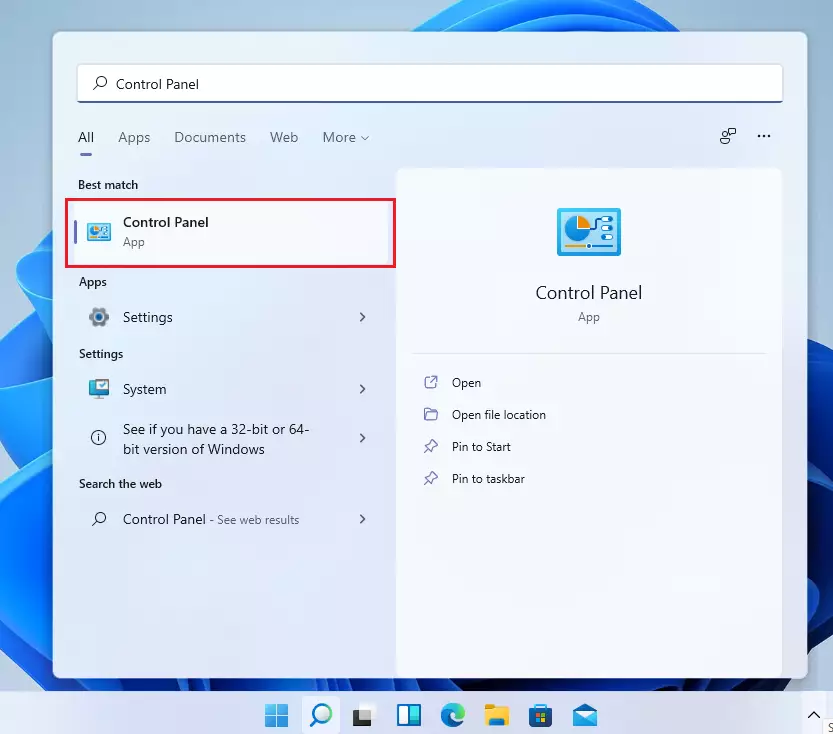
- Click Start and type Control Panel.
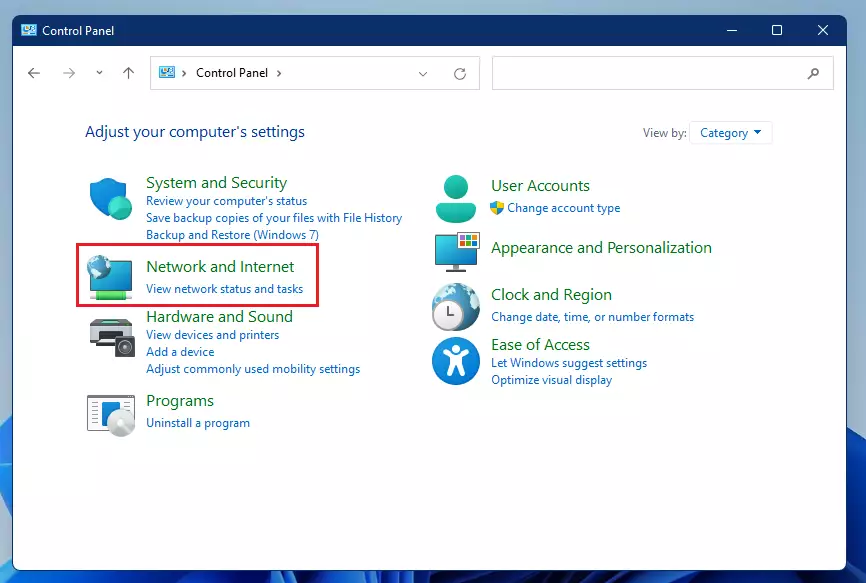
windows 11 control panel - Click Network and Internet.
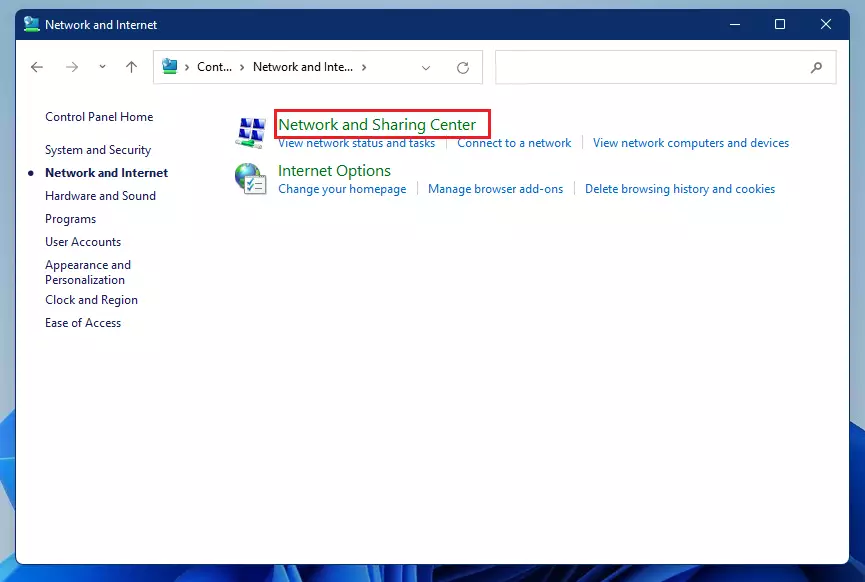
windows 11 control panel network and internet - Select Network and Sharing Center.
windows 11 network and sharing center - Click Change advanced sharing settings.

windows 11 change advanced sharing settings - Scroll down to All networks and ensure these settings are active so you can access your folders.

windows turn off password protected sharing
You can quickly enable file sharing settings for Windows 11 by running specific commands as an administrator in the Command Prompt. This method is particularly useful for users who prefer command-line operations over graphical interfaces.
netsh advfirewall firewall set rule group="File and Printer Sharing" new enable=Yes
netsh advfirewall firewall set rule group="Network Discovery" new enable=Yes
Access Windows Shares from Ubuntu
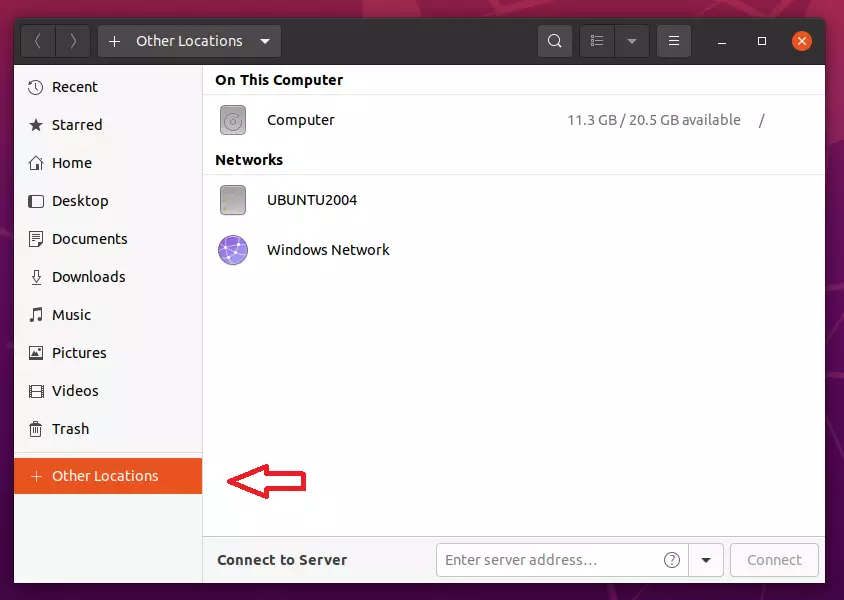
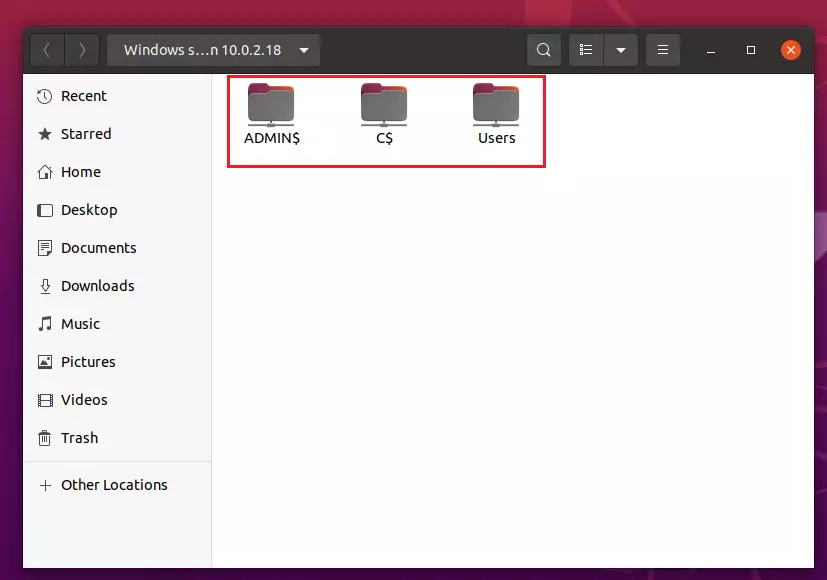
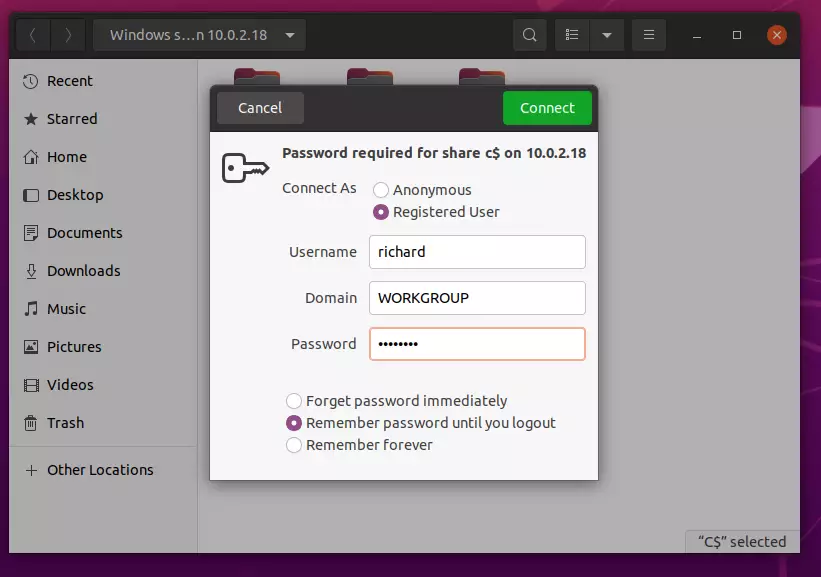
Once you’ve set up file sharing on your Windows 11 computer, you can easily access those shared folders directly from your Ubuntu machine using its File Manager. Simply open the File Manager, click ‘Other Locations’ in the sidebar, and then type in your Windows computer’s network address to connect and browse your files.
- Open your File Manager.
- Click Other Locations in the left sidebar.
ubuntu and windows 11 file sharing - If you do not see your Windows computer, you may need to install the sharing tool by opening your terminal and running:
sudo apt update
sudo apt install samba
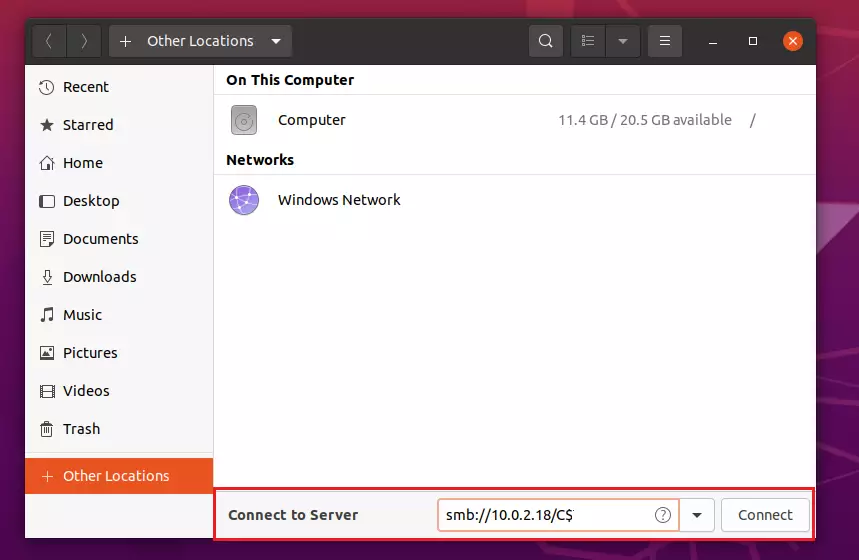
In the Connect to Server box at the bottom, type the address of your Windows computer like this:
smb://servername/Share_name
Or if you have a specific folder to open:
smb://10.0.2.18/users/Richard/Documents
How to access Ubuntu files from Windows
Accessing your Ubuntu files from Windows is possible by setting up a shared folder using a tool called Samba. This involves creating a specific folder on your Ubuntu system and then adjusting its permissions so that your Windows computer can see and access it. This process ensures smooth Ubuntu Windows 11 file sharing in both directions.
- Open the terminal and create a folder:
sudo mkdir /samba
- Set the permissions so others can use it:
sudo chgrp sambashare /samba
sudo chmod 2770 /samba
- Add your user account to the sharing list (replace yourusername with your actual Ubuntu name):
sudo smbpasswd -a yourusername
- Set a password for your Samba share:
sudo smbpasswd -a yourusername
sudo smbpasswd -e yourusername
- Add your account to the share group:
sudo usermod -a -G sambashare yourusername
- Open the configuration file:
sudo nano /etc/samba/smb.conf
- Add these lines to the bottom of the file and save it:
    path = /samba
    browseable = yes
    read only = no
    force create mode = 0660
    force directory mode = 2770
    valid users = @sambashare
- Restart the service to apply changes:
sudo systemctl restart smbd
sudo systemctl restart nmbd
Summary
Connecting Ubuntu and Windows 11 for file sharing relies on the SMB protocol, requiring network discovery to be visible and Samba for access.Was this guide helpful?

About the Author
Richard
Tech Writer, IT Professional
Richard, a writer for Geek Rewind, is a tech enthusiast who loves breaking down complex IT topics into simple, easy-to-understand ideas. With years of hands-on experience in system administration and enterprise IT operations, he’s developed a knack for offering practical tips and solutions. Richard aims to make technology more accessible and actionable. He's deeply committed to the Geek Rewind community, always ready to answer questions and engage in discussions.


Thank you very much.
I have tried many tutorials to connect to Windows network share and by far this was the easiest.
Command prompt as administrator. Get this.
C:\Windows\System32>netsh advfirewall firewall set rule group=”File and Printer Sharing” new enable=Yesnetsh advfirewall firewall set rule group=”Network Discovery” new enable=Yes
‘group’ is not a valid argument for this command.