How to Enable or Disable Network Discovery in Windows 11
You enable or disable Network Discovery in Windows 11 to control if your PC can find and be found by other devices on your local network for file and printer sharing.
Network Discovery lets your computer see other devices like printers and shared folders, and allows them to see your PC. It’s a crucial setting for seamless home or office network interaction.
By default, Windows 11 often keeps Network Discovery disabled for enhanced security. However, enabling it is essential for easily sharing resources. For instance, if you’re using Windows 11 Home, you need Network Discovery active to easily locate shared media libraries.
This tutorial shows you the exact steps to toggle Network Discovery on or off through the Network and Internet settings. You’ll learn how to make your PC visible when you need it and hidden when you don’t.
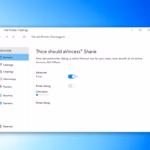
Open Settings, navigate to Network & Internet, then Advanced network settings, and finally Advanced sharing settings. Expand the relevant network profile (usually Private) and turn on the switches for Network discovery and File and printer sharing.
What is Network Discovery?
Network Discovery lets your Windows 11 PC find and connect to other devices on your home network, like printers or shared folders. Windows usually turns it on for private networks, like your home Wi-Fi, but keeps it off for public networks to protect your computer. It helps your PC see and be seen by other computers and devices nearby.
How to Enable Network Discovery in 🪟 Windows 11 (Using Settings)
You can enable network discovery in Windows 11 using the Settings app if your PC can’t find other devices on your network. To do this, open Settings by clicking the Start menu and choosing Settings, or by pressing Windows key + I. Then, go to Network & Internet, scroll down to Advanced network settings, and find the option to turn it on.
- Open Settings: Click the Start menu (Windows icon) and select Settings. Or press Windows key + I on your keyboard.
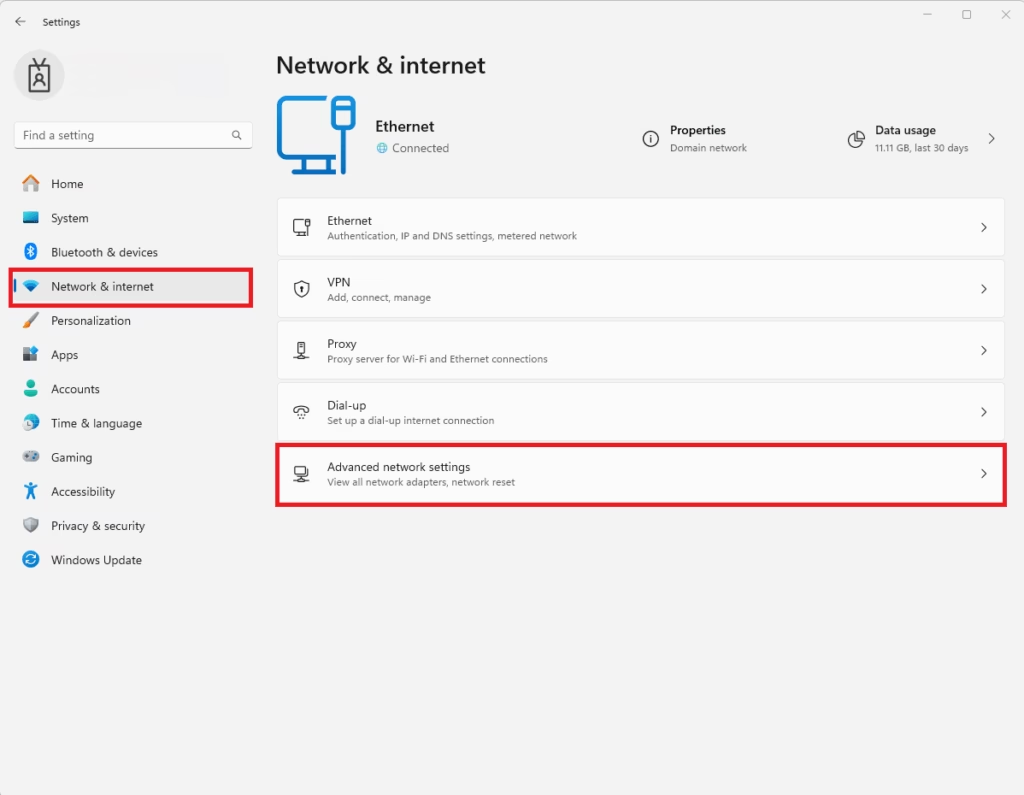
- In Settings, click Network & Internet on the left side.
- Scroll down and click on Advanced network settings.
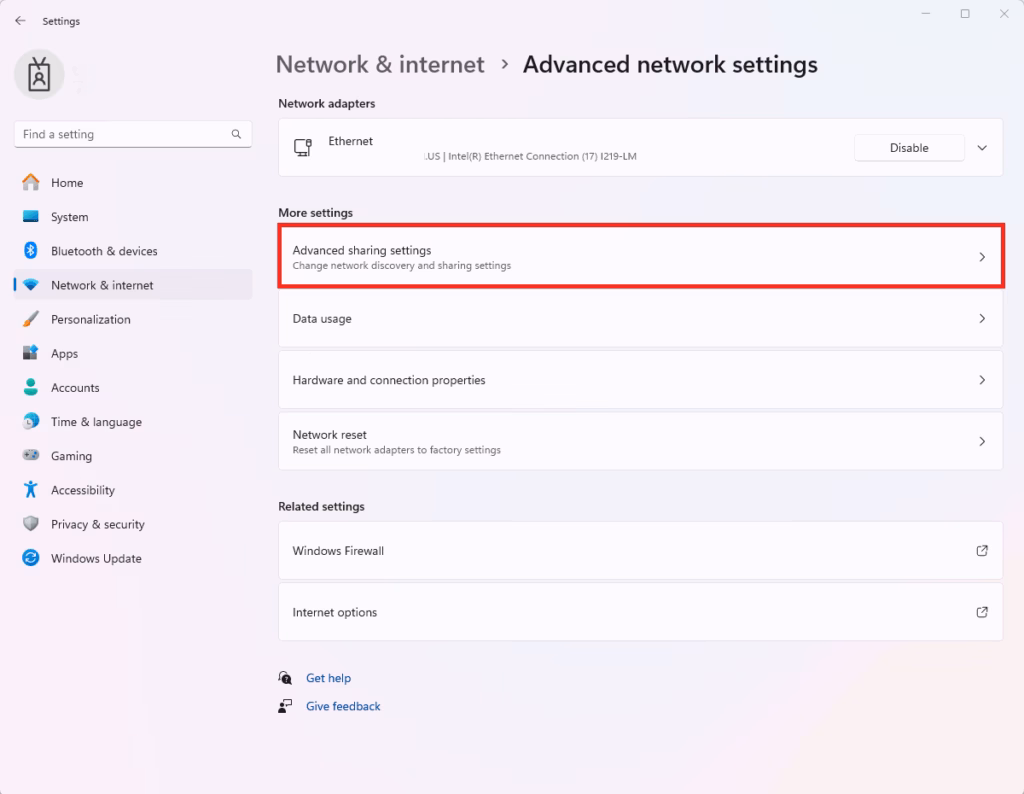
- Find and click Advanced sharing settings.
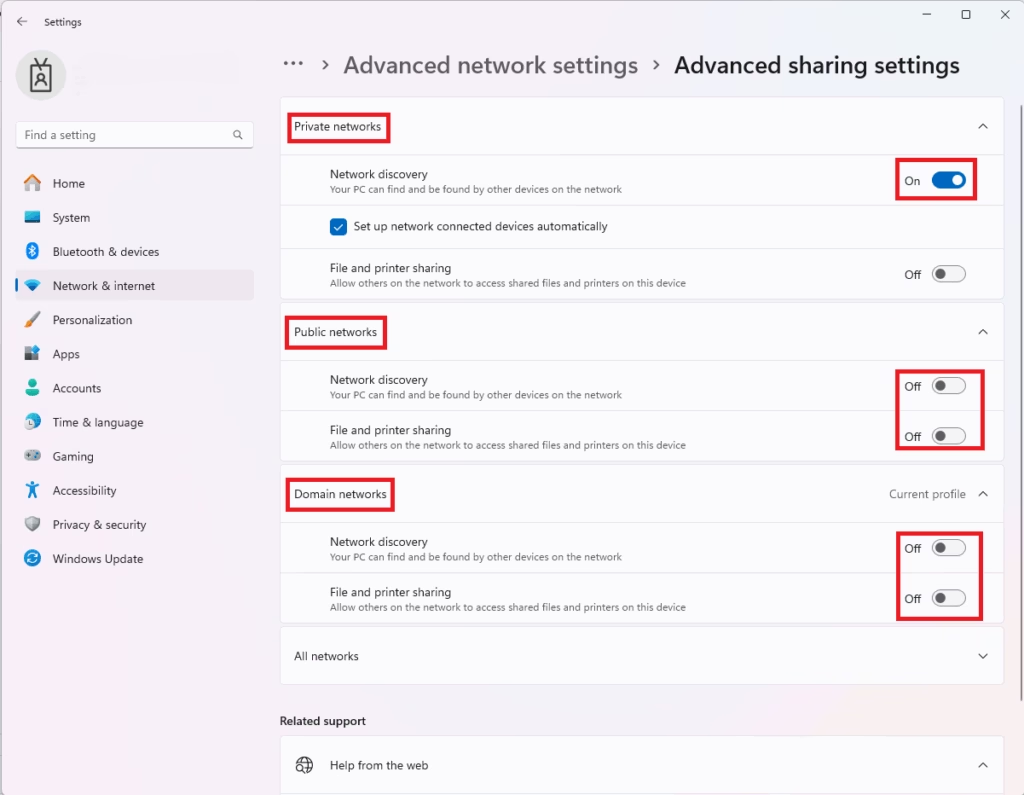
- Here, look at your network profiles (Private and Public). For the one you use (usually Private), click to expand it.
- Turn on the switches for:
- Network discovery
- File and printer sharing
- Close Settings when done.
Enable Network Discovery Using the Control Panel
You can also enable network discovery in Windows 11 using the Control Panel, which some people find easier. Open Control Panel by searching for it in the Start menu. Then, click on Network and Internet, followed by Network and Sharing Center. From there, select Change advanced sharing settings on the left side and expand the network profiles to turn it on.
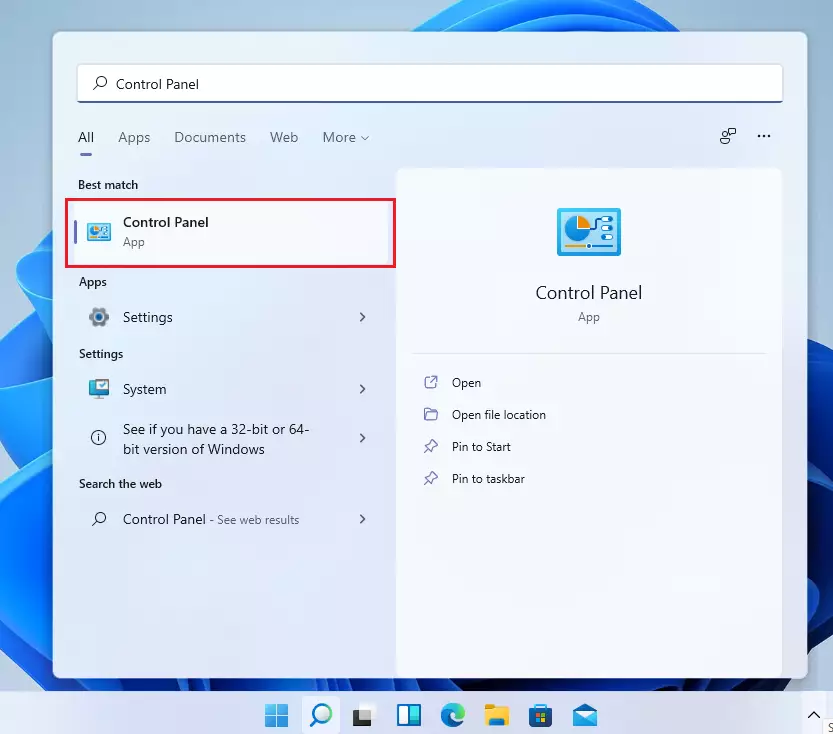
- Click Start and type Control Panel, then open it.
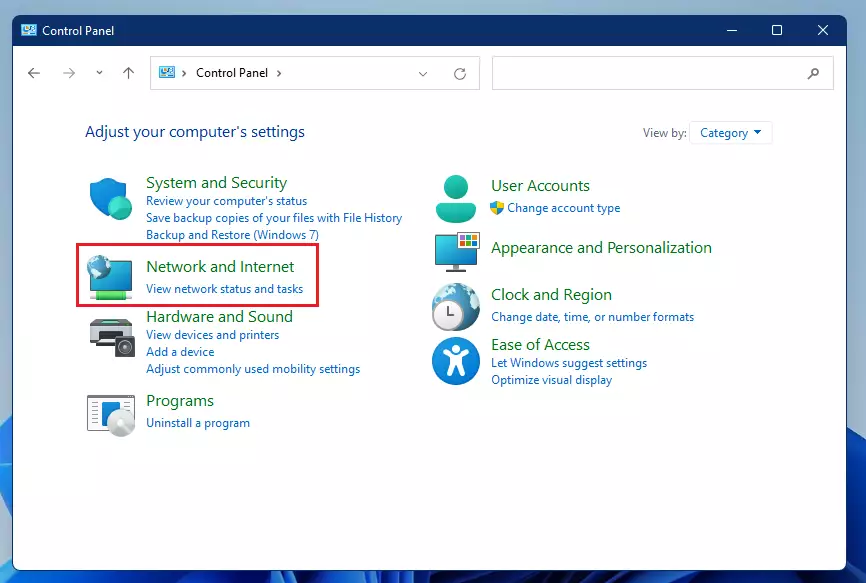
- Click on Network and Internet.
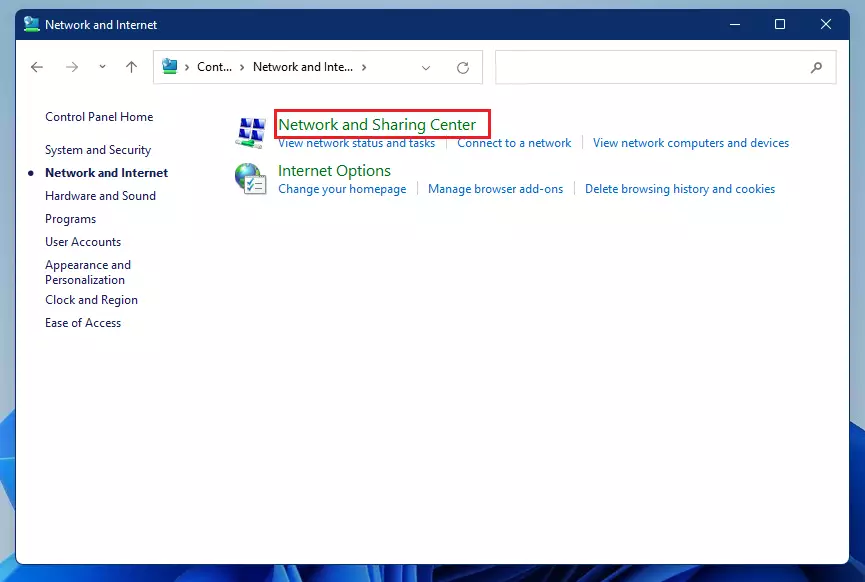
- Next, select Network and Sharing Center.
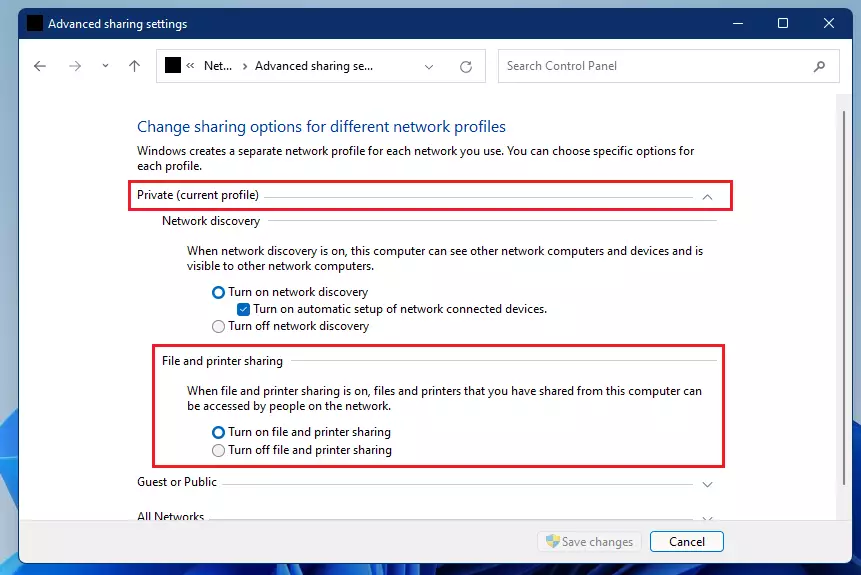
- On the left side, click Change advanced sharing settings.
- Expand the Private and Guest or Public network profiles.
- Turn on Network discovery and File and printer sharing for each profile you want.
- Click Save changes at the bottom.

Turn on Network Discovery and File Sharing Using Command Prompt
netsh advfirewall firewall set rule group="File and Printer Sharing" new enable=Yes
netsh advfirewall firewall set rule group="Network Discovery" new enable=Yes
How to open Command Prompt as admin:
- [ADMIN REQUIRED] Click the Start menu, type cmd or Command Prompt.
- [ADMIN REQUIRED] Right-click on Command Prompt and choose Run as administrator.
- Copy and paste the commands above and press Enter after each.
Extra Tip: Enable SMB 1.0 / CIFS File Sharing (If Needed)
If you need to share files with older devices or programs in Windows 11, you might have to enable SMB 1.0 / CIFS File Sharing. To do this, open Control Panel and go to Programs and Features. On the left, click Turn Windows features on or off. Find and check the box for SMB 1.0/CIFS File Sharing Support, then click OK.
To enable it:
- Open Control Panel.
- Go to Programs and Features.
- Click Turn Windows features on or off on the left.
- Find and check SMB 1.0/CIFS File Sharing Support.
- [ADMIN REQUIRED] Click OK and restart your computer if asked.
Learn more about turning Windows features on or off here.
Summary
Network Discovery helps your Windows 11 PC find and connect to other devices on your network, and you can turn it on using Settings or Control Panel.Should I enable network discovery?
As a general rule, you should keep network discovery disabled on networks you don't trust or administer. Use it on private networks only where you need local sharing or management features and have other controls in place.
How do I enable network discovery?
Navigate to All Control Panel Items > Networking and Sharing Center > Advanced sharing settings. In the Network discovery section, select Turn on network discovery.
How to check if network discovery is enabled?
Click the [Start] icon on the taskbar①, then select [Settings] ②. Select [Network & Internet]③, then select [Advanced network settings]④. On More settings, select [Advanced sharing settings]⑤. You can create a separate network profile for each network type you use, to turn on or off the Network Discovery feature⑥.
Was this guide helpful?

About the Author
Richard
Tech Writer, IT Professional
Richard, a writer for Geek Rewind, is a tech enthusiast who loves breaking down complex IT topics into simple, easy-to-understand ideas. With years of hands-on experience in system administration and enterprise IT operations, he’s developed a knack for offering practical tips and solutions. Richard aims to make technology more accessible and actionable. He's deeply committed to the Geek Rewind community, always ready to answer questions and engage in discussions.


No comments yet — be the first to share your thoughts!