How to Map Network Shares as Drives in Windows 11

Mapping a network share as a drive in Windows 11 gives you quick access to files on another computer or server on your network.
This process assigns a drive letter, like D: or E:, to a shared folder, making it appear as if it’s a local drive on your PC. You can then open this mapped drive directly from File Explorer, just like any other drive.
For example, instead of typing out a long network path like \\SERVERNAME\SHAREDFOLDER every time, you’ll just click a single drive letter.
This feature is especially useful for frequently accessed shared files in an office environment or for personal media libraries stored on a home server.
Open File Explorer, click the three-dot menu, and select “Map network drive.” Choose a drive letter, enter the network folder path, and click Finish. Your network folder will then appear as a new drive in “This PC.
Map a network location in 🪟 Windows 11
If you frequently access a network location, consider mapping it to your local computer for quicker and easier access.
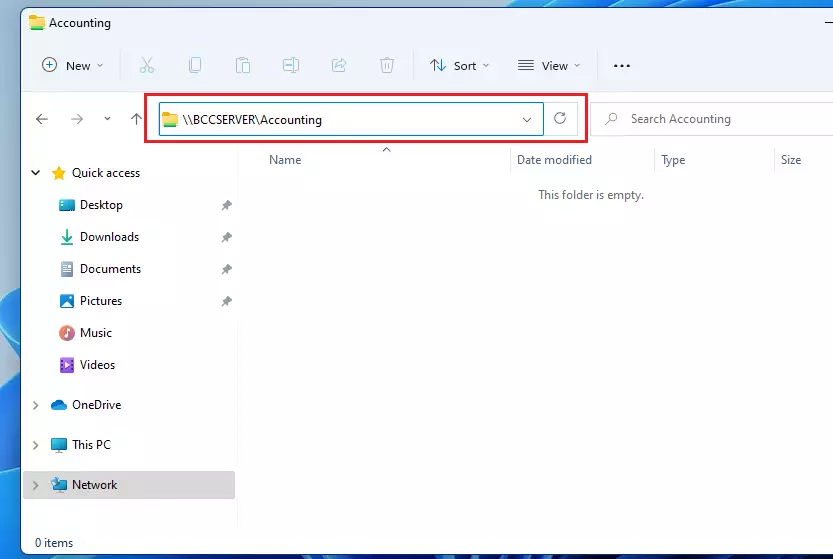
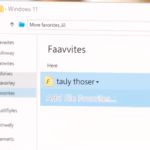
In Windows, network resources are typically accessed via File Explorer. You open File Explorer and type the resource network path in the browser box, similar to the image below:
\\SERVERNAME\SharedResourceName
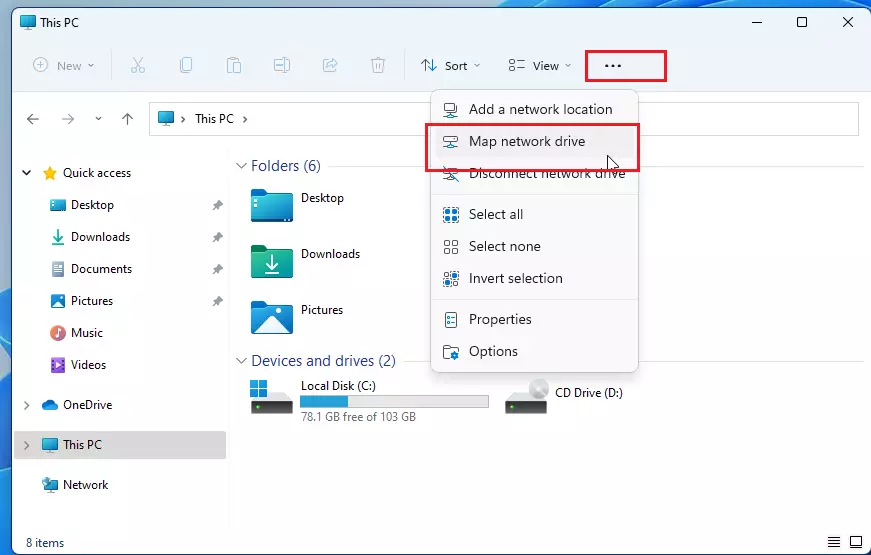
Some users will create shortcuts by copying and pasting the network folder on their desktops. While some people create desktop shortcuts, creating a network drive is often a better approach for shared resources.
To do that, open File Explorer, then click on the ellipsis (three-dot) in the toolbar menu and click Map network drive as highlighted below:
When the pop-up window appears, select a drive letter from the list of available options. By default, the letter Z will be assigned if it is not already in use.
If you want to avoid the letter Z, consider using a higher drive letter to ensure that the mapped network drive does not interfere with any removable storage you connect to your PC.
In the Folder field, enter the path to the network resource. You can also use the browse button to locate and select the network location.
If you need a separate password to access the network location, select the box to connect using different credentials. Only select this box if your username and password do not allow you to access the network location.
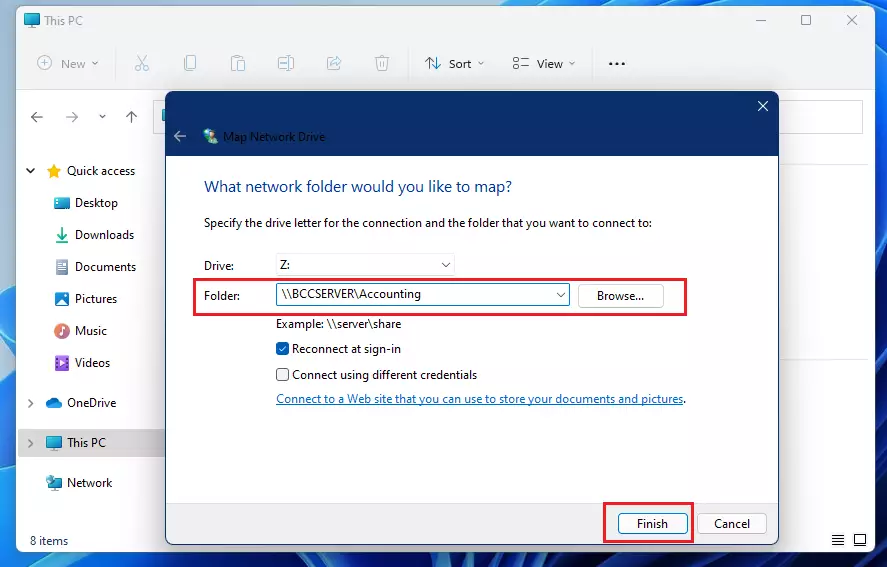
Once you’ve entered all the details, click Finish.
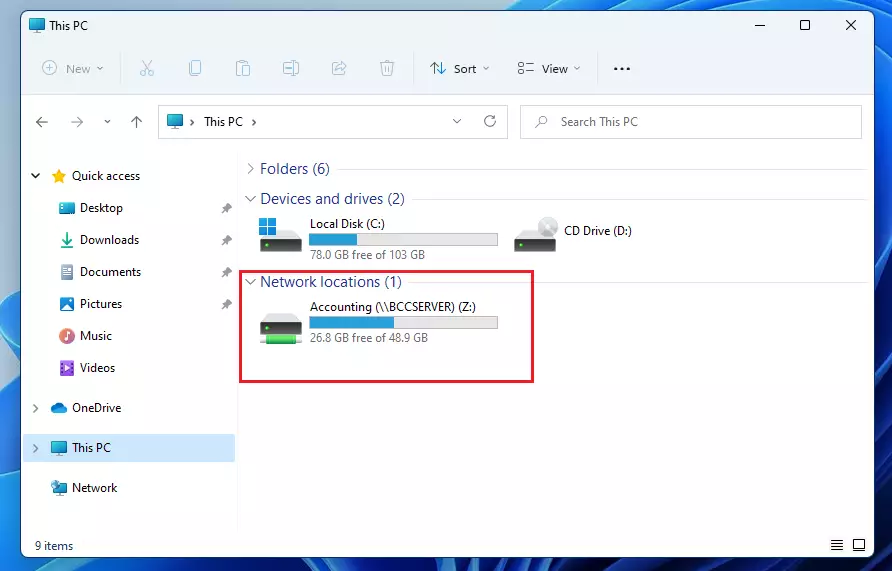
A new network drive will then appear on your computer. Next time you want to access the Accounting folder, go to your local computer and click on the Z drive.
That should do it.
If you run into issues where you can’t access a shared folder, you might want to read the post below to enable Network Discovery and sharing in Windows 11.
Enable Network Discovery and Sharing in Windows 11 – Website for Students
Conclusion:
- Mapping network drives in Windows 11 is a straightforward process that enhances user efficiency.
- It allows for quick access to frequently used shared resources by assigning a drive letter.
- Using the mapped drive method is preferable to creating shortcuts on your desktop.
- Ensuring you select an appropriate drive letter helps prevent conflicts with removable storage.
- If issues arise, enabling Network Discovery and sharing is a useful troubleshooting step.
- Following these steps can streamline your workflow in a networked environment.
Was this guide helpful?

About the Author
Richard
Tech Writer, IT Professional
Richard, a writer for Geek Rewind, is a tech enthusiast who loves breaking down complex IT topics into simple, easy-to-understand ideas. With years of hands-on experience in system administration and enterprise IT operations, he’s developed a knack for offering practical tips and solutions. Richard aims to make technology more accessible and actionable. He's deeply committed to the Geek Rewind community, always ready to answer questions and engage in discussions.


[…] You can map network drives: How to map network drivers […]
[…] or map a network drive or folder in Windows Subsystem for Linux (WSL). In Windows 11, users can map network drives and folders with ease. If you know the path to a shared folder and have access to the location, you should be able to map […]
[…] How to map a network drive in Windows 11 […]
[…] allows users to map network folders as a drive. With some tricks, users can mount or map a local folder as a drive in Windows […]
[…] users can map the shares using the ‘Map network drives‘ […]
[…] local Network, Network Discovery, and File sharing must be turned on. The Network icon also shows mapped network locations in File Explorer if there are […]
[…] How to Map a Network Drive in Windows 11 – Website for Students […]
[…] How to map a network drive in Windows 11 […]
[…] How to map a network drive in Windows 11 […]
[…] are multiple ways you can map or unmap network drives in Windows. You can use File Explorer, the Command Prompt, or PowerShell […]