Map Network Drives with PowerShell in Windows 11
Mapping network drives connects you to shared folders on other computers, and PowerShell in Windows 11 offers a fast way to do this.
PowerShell is a powerful tool built into Windows that lets you automate tasks by typing commands. It’s like a supercharged command prompt.
You can map network drives using File Explorer, but PowerShell gives you more control and speed, especially for repeated tasks. For example, you can map a drive using the `New-PSDrive` command.
This command uses specific details like a drive letter (such as Z:) and the network path (like `\\Server\Share`) to make the connection.
Use the New-SmbMapping cmdlet in PowerShell to map network drives persistently. Open PowerShell, then run New-SmbMapping -LocalPath “Z:” -RemotePath “\ServerNameShare” -Persistent $true, replacing “Z:” and the server path with your desired drive letter and network share.
Map or unmap network drive in PowerShell
As mentioned earlier, there are multiple ways to map or unmap (disconnect) network drives in Windows.
Usually, users will use File Explorer to map or disconnect a network drive. However, the PowerShell app can also map or unmap (disconnect) network drives.
Here's how to do that.
First, open the PowerShell app by clicking on the Start Menu and searching for 'PowerShell.'
Under Best match, select and open the PowerShell app. The Windows Terminal app will open with a PowerShell prompt.
On the terminal window, type the command format as shown below:
New-PSDrive -Name "DriveLetter" -PSProvider "FileSystem" -Root "\\ServerName-or-IPAddress\SharedFolder" -Persist
Replace `DriveLetter` with the drive letter you want. Then, change `ServerName` and `SharedFolder` to the actual name of the server computer and the name of the shared folder.
Example:
New-PSDrive -Name "Z" -PSProvider "FileSystem" -Root "\\HomePC\Documents" -Persist
If prompted for a username and password, type them correctly and press Enter to map the network share.
When you try to connect to a protected share, you will always get prompted to provide a username and password. To avoid typing your password, store it in a variable and pass it with the command.
If you want to include your username and password with the command, use the steps below.
First, run the command below to store your credentials in a variable.
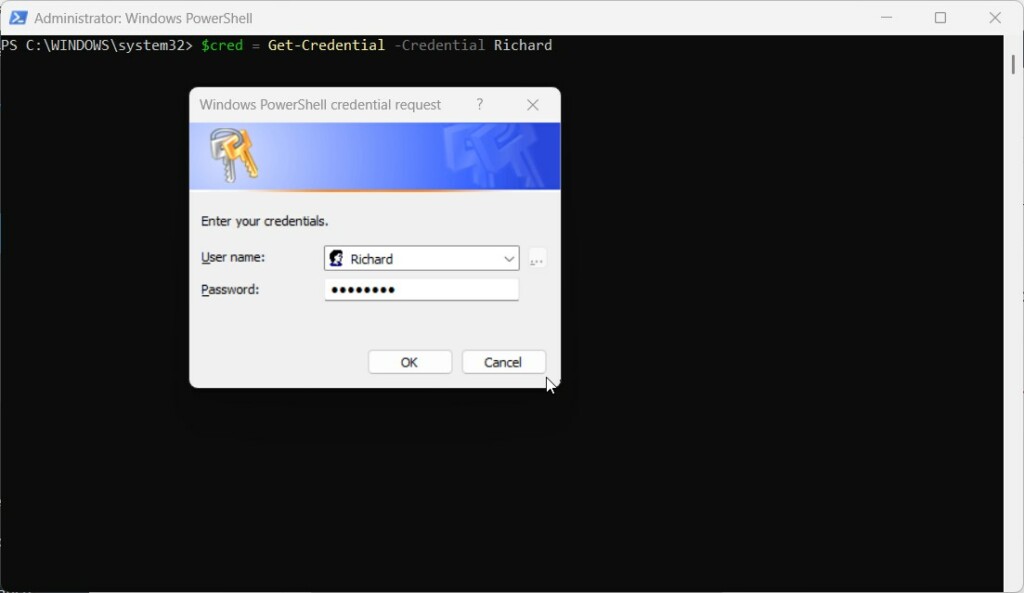
$cred = Get-Credential -Credential USERNAME
Replace USERNAME with your account or username.
You should see a prompt window similar to the one below. Type in your password and click Ok to store your credentials.
With your credentials stored, run the command below to may the network drive and pass your credentials simultaneously.
New-PSDrive -Name "E" -Root "\\HomePC\Documents" -Persist -PSProvider "FileSystem" -Credential $cred
Another option is to save your login details in Windows Credential Manager. To do this, run the following commands: cmdkey /generic:USERNAME /add:SERVERNAME. You'll need to replace `USERNAME` with your account name and `SERVERNAME` with the name of the computer hosting the shared folders.
cmdkey /add:HomePC /user:WORKGROUND\username /pass:password
After storing your credentials in the Credential Manager, you can run the PowerShell command without specifying your credential or getting a prompt for your username and password.
New-PSDrive -Name "P" -Root "\\HomePC\Documents" -Persist -PSProvider "FileSystem"
Unmap or disconnect shared network drives using PowerShell
Once a shared drive is mapped, users can use PowerShell to unmap or disconnect it. Before you disconnect a shared network drive, you may want to list all shared network drives mapped to your computer.
Run the command below to do that.
Get-PSDrive -PSProvider "FileSystem"
Once you know the letter used to map the drive, run the command below to unmap or disconnect it.
Remove-PSDrive -Name DriveLetter
Just replace `DriveLetter` with the letter of the drive you want to disconnect. For example:
Remove-PSDrive -Name Z
Disconnect multiple drives.
Get-PSDrive X, W | Remove-PSDrive
That should do it!
Conclusion:
- Mapping or unmapping shared network drives using PowerShell in Windows 11 provides a convenient and efficient way to manage access to network resources.
- Following the steps, users can easily map network drives and access shared folders, streamlining their workflow and enhancing productivity.
- Including credentials with the PowerShell command or storing them in the Credential Manager offers flexibility and security when mapping network drives.
- Additionally, PowerShell enables users to efficiently list and disconnect mapped network drives, providing a comprehensive solution for managing network resources on Windows 11.
Was this guide helpful?

About the Author
Richard
Tech Writer, IT Professional
Richard, a writer for Geek Rewind, is a tech enthusiast who loves breaking down complex IT topics into simple, easy-to-understand ideas. With years of hands-on experience in system administration and enterprise IT operations, he’s developed a knack for offering practical tips and solutions. Richard aims to make technology more accessible and actionable. He's deeply committed to the Geek Rewind community, always ready to answer questions and engage in discussions.

No comments yet — be the first to share your thoughts!