How Can SMB Compression Speed Up Windows 11 File Transfers?
SMB compression speeds up Windows 11 file transfers by shrinking files before they move across your network, sending less data overall.
This Windows feature finds data that can be made smaller, shrinks it during the transfer, and then makes it full-size again on the other computer.
You will see the biggest speed boosts when moving large files, especially on slower internet connections like VPNs or when working remotely. Some tests show it can make transfers up to 65% faster on the right equipment.
SMB compression speeds up Windows 11 file transfers by shrinking files before they travel over the network. You can ensure it’s active by running the PowerShell command Set-SmbClientConfiguration -CompressForce $true. This feature is most beneficial for large files on slower connections.
Important Disclaimer: 🪟 Windows 11 24H2 Performance
If you’ve updated to Windows 11 24H2, you might notice file transfers are slower than usual. This is a known issue, so before you change any settings, make sure your network drivers are up-to-date, as this can often fix performance dips.
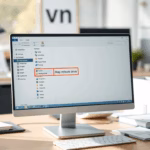
How to Enable SMB Compression
Turning on SMB compression in Windows 11 is achievable with a PowerShell command. This feature helps speed up file transfers between computers by making files smaller before they are sent over the network.
- Press Windows key + R to open the Run dialog.
- Type
powershelland press Ctrl+Shift+Enter to run as Administrator. FLAG: Admin privileges required. - Run the following command to force compression:
Set-SmbClientConfiguration -CompressForce $true. - Visit the official Microsoft Learn article for more technical details.
Troubleshooting Slow SMB Transfers
Advanced Network Optimization
For even faster file transfers, explore a few advanced options. Check if SMB Multichannel is active, a setting that lets you use multiple network paths simultaneously. You can also compare SMB Over QUIC, which is for internet transfers, against standard TCP, which is for local ones.
Map and Manage Network Shares
Mapping drives or creating shares can be done with commands. FLAG: Admin privileges required for share creation.
- Map a drive:
net use * \\192.168.1.50\SharedFolder /requestcompression:yes - Create a share:
New-SmbShare -Name "Data" -Path "C:\Data" -CompressData $true - Update a share:
Set-SmbShare -Name "Data" -CompressData $true
Summary
SMB compression speeds up file transfers by shrinking data, which is helpful even with known Windows 11 24H2 issues. Updating drivers and using PowerShell commands can fix performance problems, while keeping SMB signing active ensures security.
Why is my SMB transfer speed slower on 🪟 Windows 11 24H2?
The 24H2 update introduced network stack changes that can cause performance regressions. This often stems from driver conflicts with specific hardware like the I226-V NIC. Updating your network adapter drivers and checking for Windows updates are the first steps to restoring your expected SMB throughput.
Should I disable SMB signing to improve file transfer speeds?
SMB signing adds a security layer to your data. Disabling it might slightly increase speed, but it makes your network vulnerable to man-in-the-middle attacks. It is highly recommended to keep SMB signing enabled for security, focusing instead on NIC driver optimization and SMB Multichannel settings.
Does disabling Large Send Offload fix slow network speeds?
Large Send Offload (LSO) and Receive Side Scaling (RSS) are designed to offload work from your CPU to the network card. If your drivers are buggy, disabling these in your Network Adapter properties can sometimes stabilize speeds, though it may increase CPU usage during heavy file transfers.
Was this guide helpful?

About the Author
Richard
Tech Writer, IT Professional
Richard, a writer for Geek Rewind, is a tech enthusiast who loves breaking down complex IT topics into simple, easy-to-understand ideas. With years of hands-on experience in system administration and enterprise IT operations, he’s developed a knack for offering practical tips and solutions. Richard aims to make technology more accessible and actionable. He's deeply committed to the Geek Rewind community, always ready to answer questions and engage in discussions.


No comments yet — be the first to share your thoughts!